Module shopify.trigger

ballerinax/shopify.trigger Ballerina library
Overview
The Ballerina listener for Shopify allows you to listen to store events, grouped by the resource they relate to.
- Orders (
OrdersService):onOrdersCreate,onOrdersUpdated,onOrdersCancelled,onOrdersFulfilled,onOrdersPartiallyFulfilled,onOrdersPaid - Customers (
CustomersService):onCustomersCreate,onCustomersUpdate,onCustomersEnable,onCustomersDisable,onCustomersMarketingConsentUpdate - Products (
ProductsService):onProductsCreate,onProductsUpdate - Fulfillments (
FulfillmentsService):onFulfillmentsCreate,onFulfillmentsUpdate
This module receives Shopify's webhook notifications directly - it does not call Shopify's Admin API
on your behalf. Each notification carries the full resource representation (the whole order, customer,
product, or fulfillment), not just a change reference, so no follow-up API call is needed to see what
changed. A subscription that sets include_fields gets only the fields it lists; fetch anything else
with the Admin API.
Key features
- Receives 15 Shopify events for orders, customers, products and fulfillments
- Verifies every delivery with the app's client secret (HMAC-SHA256,
X-Shopify-Hmac-Sha256) - Typed payload records carrying the full order, customer, product or fulfillment (or the fields a
subscription picks with
include_fields) - Acknowledges each delivery before running your handler, so a slow or failing handler doesn't cause retries
- Services can be attached on their own path, so several triggers and HTTP services can share one port
- Trigger services are listed by
bal build --export-endpoints(Ballerina 2201.13.6 or later)
Setup guide
Before using this connector in your Ballerina application, you need a Shopify partner account and a development store to generate real events against, and a Ballerina service that Shopify can reach over the internet to deliver webhook payloads to. The two sections below cover both a quick local test setup and a production deployment.
Try it out locally
Use this flow to test your webhook handling logic on your own machine before deploying anywhere, using ngrok to expose your local listener to the internet.
Step 1: Create a Shopify Partner account and a development store
-
Sign up for a Shopify Partner account if you don't already have one.
-
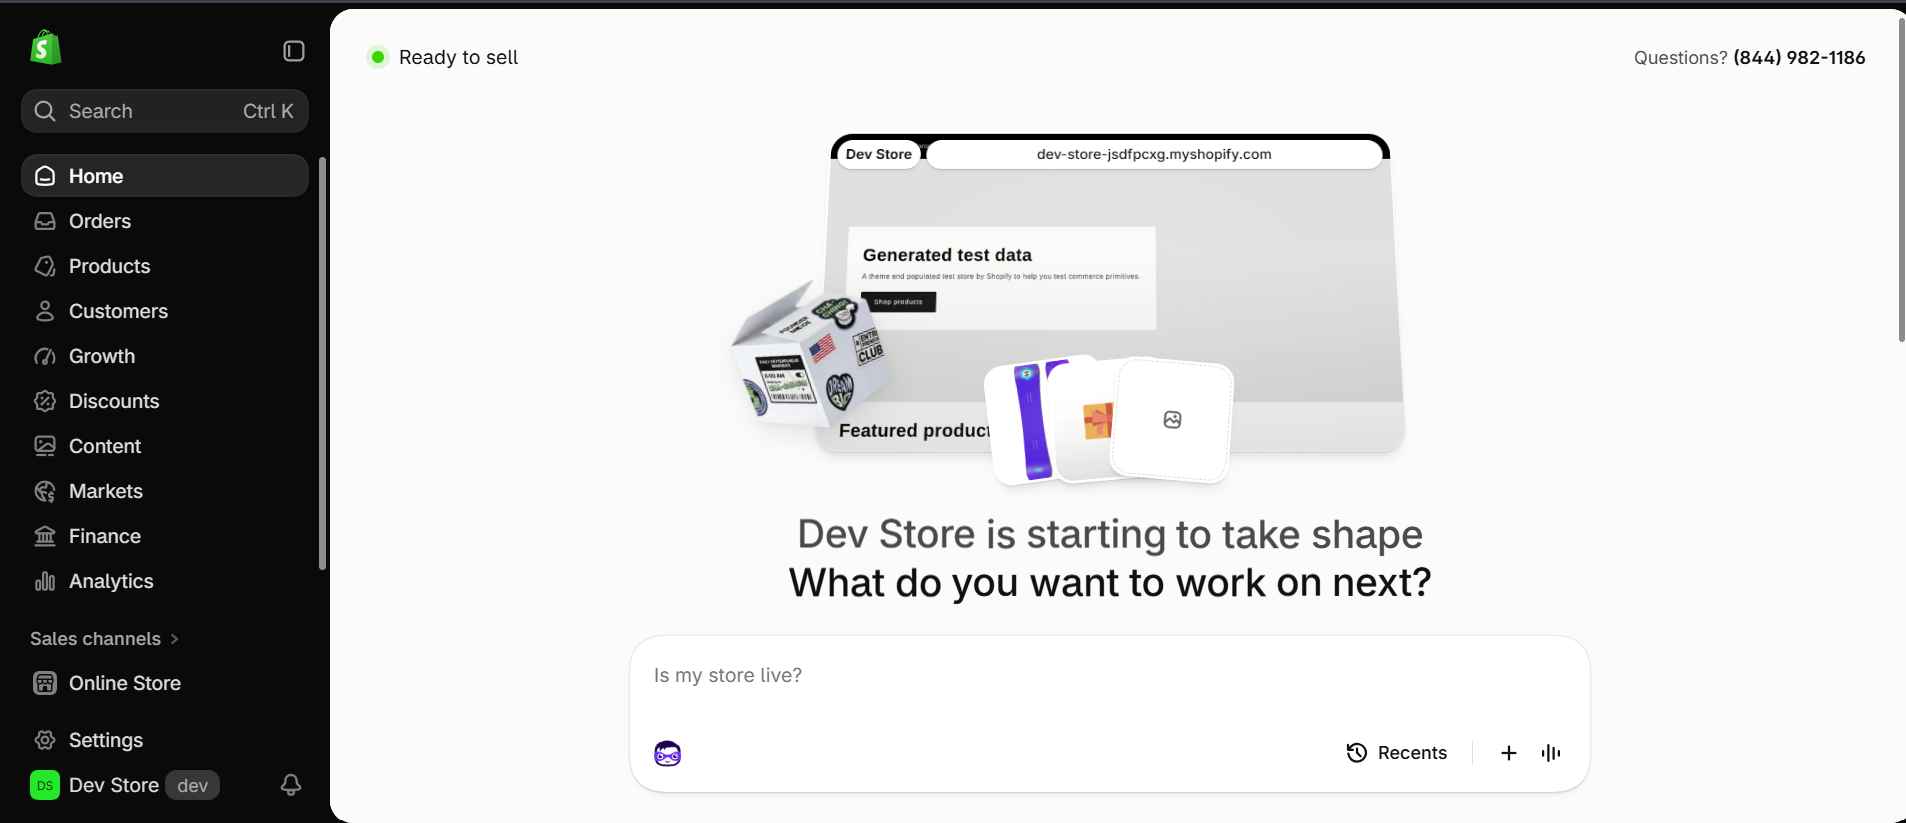
From the Partner Dashboard, go to Stores > Create store > Dev and create a development store - this is where you'll trigger real test events (creating orders, customers, products, etc.). Turn on Generate test data for store so you have sample products and a bogus payment gateway ready to go.
Step 2: Create a custom app
Shopify's older "legacy custom apps" flow (configured directly under a store's Settings) has been retired. Apps are now created and managed through the Dev Dashboard, and webhook subscriptions are declared as config rather than filled into a form.
-
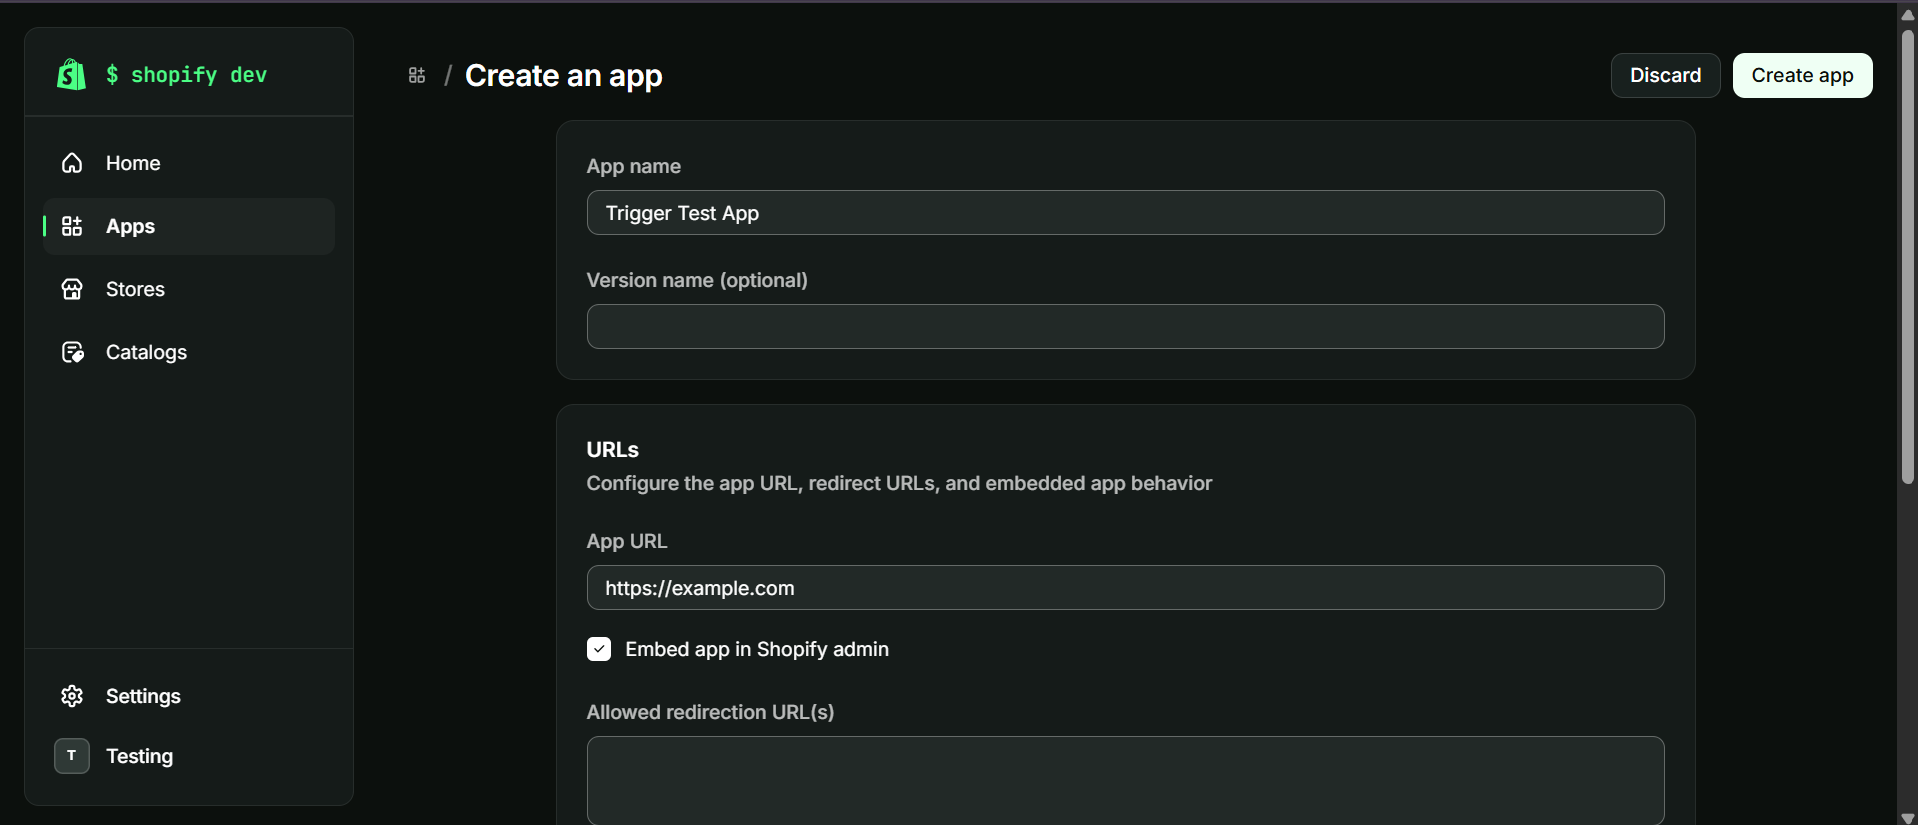
From the Partner Dashboard, go to Apps > Create app, give it a name, and leave the app URL as a placeholder (e.g.
https://example.com) - it's only relevant for an app with a real embedded UI, which this test app doesn't need.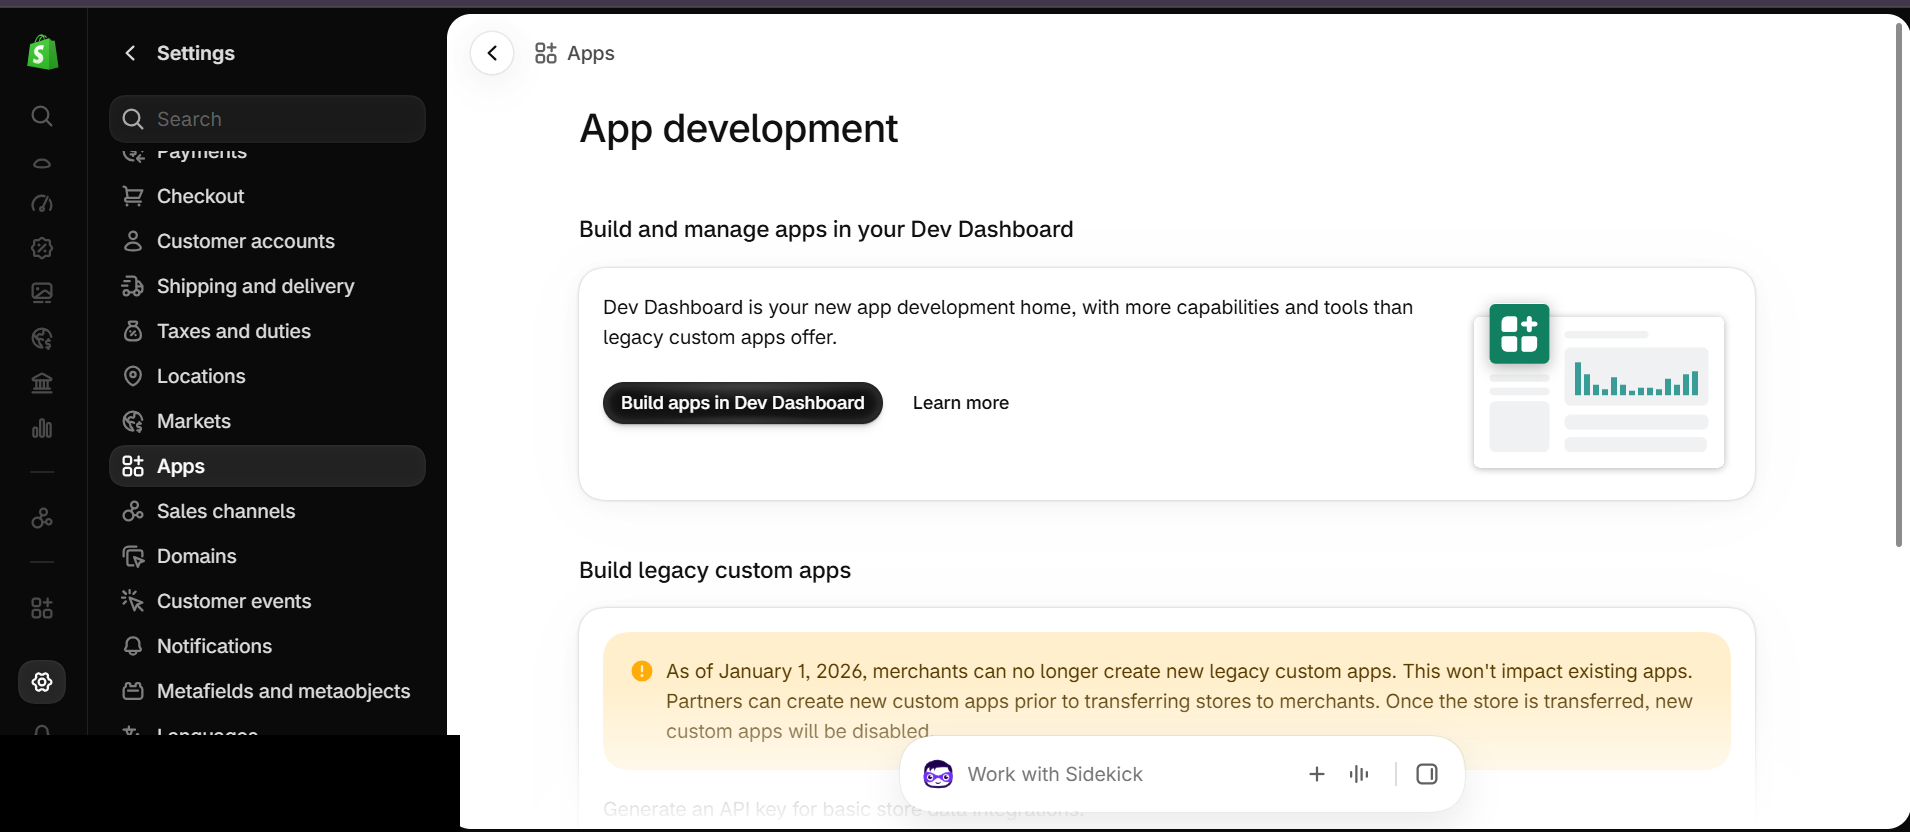
-
Install the Shopify CLI (
npx shopifyworks without a global install) and link a local project to the app you just created:npx shopify app config linkThis logs you into the Shopify CLI (opens a browser) and prompts you to select your organization and the app to link to, generating a
shopify.app.tomlfile in the current directory.
Step 3: Set up ngrok
The Ballerina listener runs locally and needs a publicly accessible URL so Shopify can deliver webhook events to it. ngrok creates a secure tunnel from a public URL to your local service.
Install ngrok and start a tunnel on port 8090 (the default port for the Ballerina listener):
ngrok http 8090
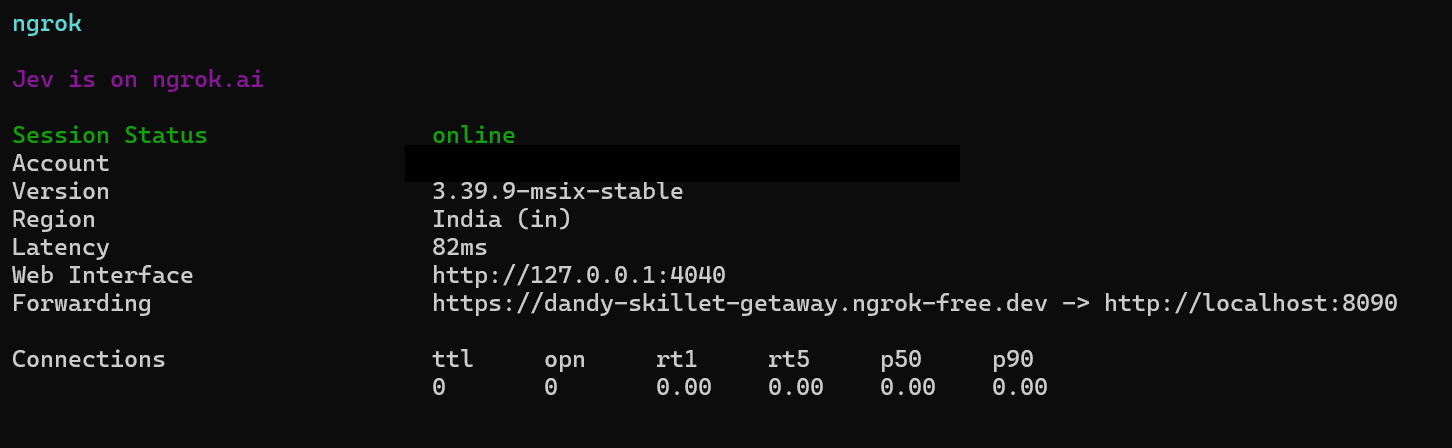
Copy the HTTPS forwarding URL from the ngrok terminal output. It looks like:
https://xxxx-xxx-xxx-xxx.ngrok-free.app
Save this value - you will need the ngrok URL in the next step.
Step 4: Subscribe to webhook topics
Add the topics you want to receive to shopify.app.toml, pointing at your ngrok URL from Step 3,
and declare the access scope each topic needs (e.g. products/create needs read_products). Keep
the [webhooks] table and its api_version that app config link wrote; Shopify requires it:
[access_scopes] scopes = "read_products" [webhooks] api_version = "<the version app config link wrote>" [[webhooks.subscriptions]] topics = ["products/create"] uri = "<your ngrok URL, e.g. https://abc123.ngrok-free.app>"
Some topics (e.g. anything under
orders/*orcustomers/*) touch protected customer data and require Shopify's separate data-access approval before you can subscribe to them - see Protected customer data if you hit that error. Fulfillment topics can also count as protected customer data, since they carry the customer's email and shipping destination.products/*has no such restriction and is the simplest topic to test locally.
Deploy the config:
npx shopify app deploy
Deploying doesn't install the app. Install it on your development store from the app's page in the Dev Dashboard (Install app, then pick the development store).
Confirm the subscription is live from the app's Versions page in the Dev Dashboard:
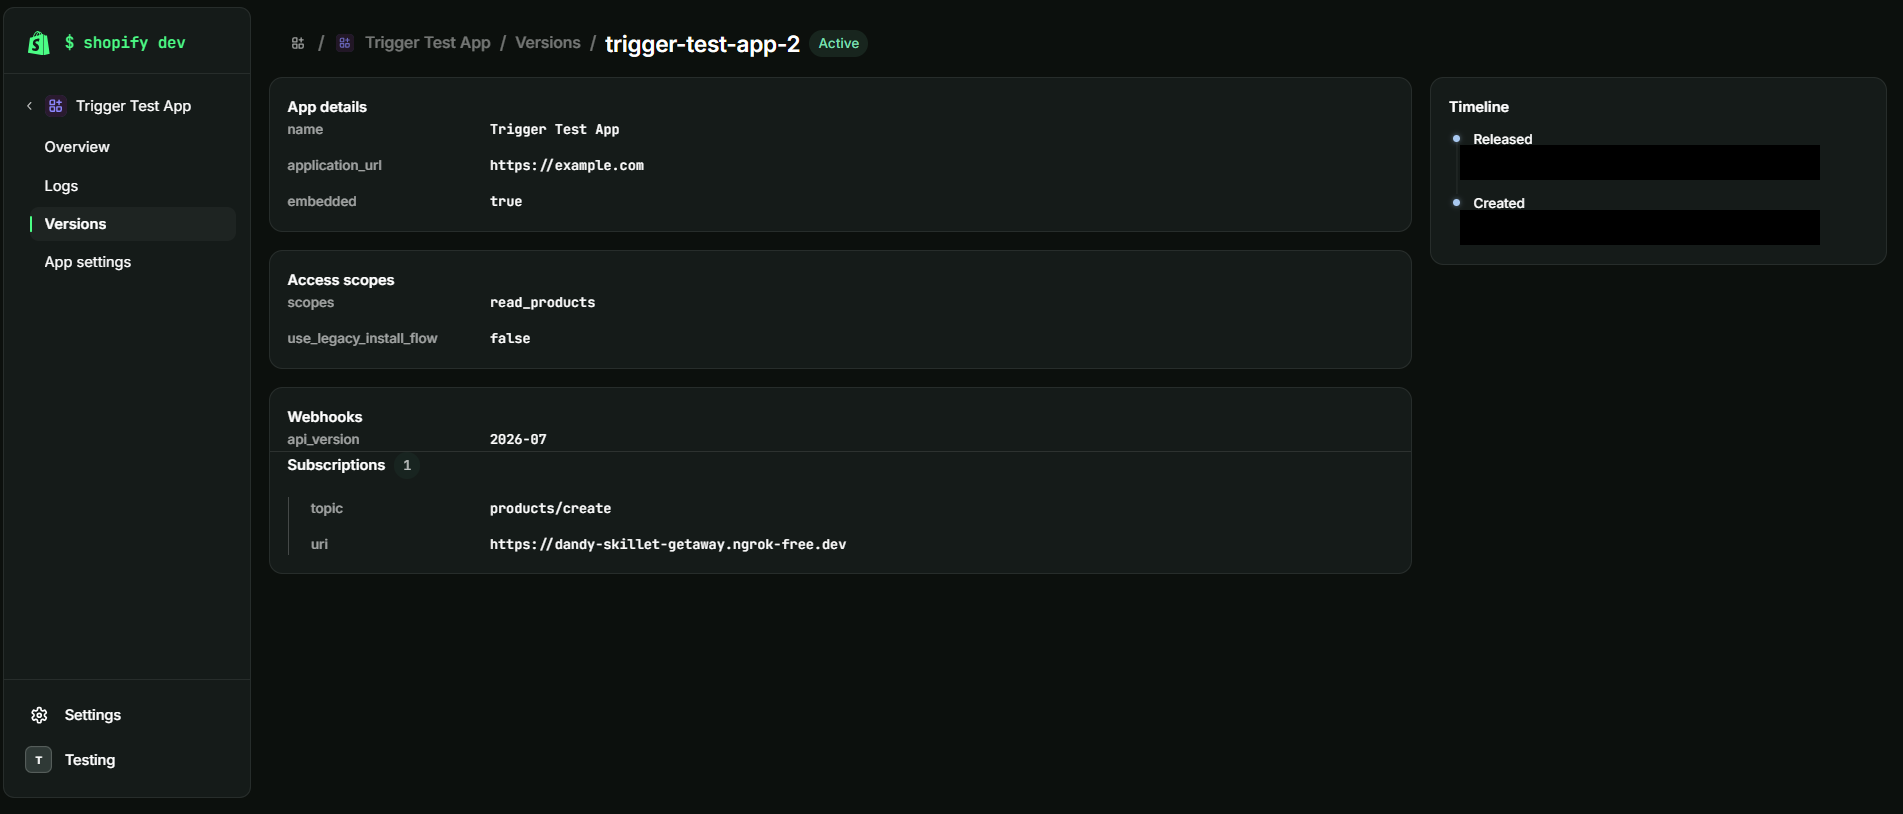
Repeat with more [[webhooks.subscriptions]] blocks for every additional topic your service needs.
Step 5: Retrieve the signing secret
Shopify signs every webhook delivery with your app's Client Secret, using HMAC-SHA256 over the raw request body. This is a single shared secret - unlike QuickBooks' separate verifier token, it's the same credential used to sign every subscription on the app.
-
Go to the app's App settings page in the Dev Dashboard and reveal the Client secret.
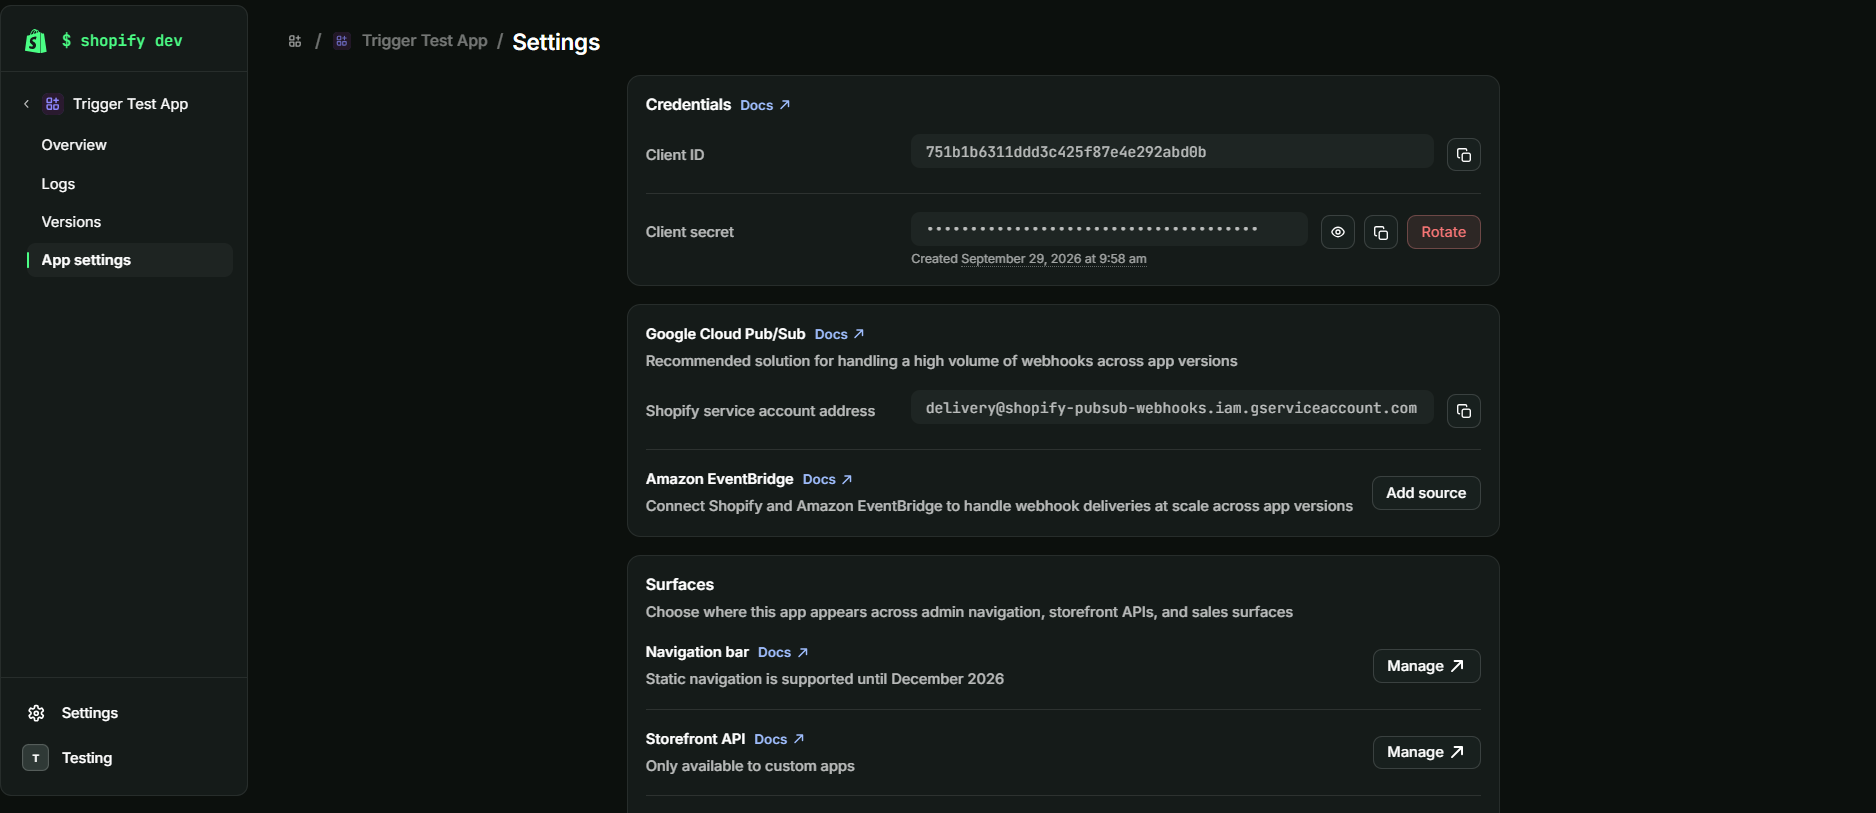
Save this value - you will need it in the Quickstart section when initialising the Ballerina listener. This is the value the listener calls
webhookSecret.
Production / business integration
The steps above use ngrok's temporary URL, which is fine for local testing but not for a real deployment. For production use:
-
Deploy your Ballerina service somewhere with a stable, internet-reachable HTTPS URL. Ballerina doesn't require any specific hosting platform - containers, a VM, a managed PaaS, or anything else that gives you a stable HTTPS endpoint all work equally well.
-
Update the
uriin each[[webhooks.subscriptions]]block inshopify.app.toml(Step 4) to your production URL instead of the ngrok URL, and runshopify app deployagain to push the change live. -
Rather than hardcoding
webhookSecretas shown in the Quickstart, inject it viaConfig.toml(or your platform's equivalent configuration/secret mechanism), since it's aconfigurablevalue. -
If you need topics under
orders/*orcustomers/*, request Shopify's protected customer data approval before going live - see Protected customer data.
Compatibility
| Version | |
|---|---|
| Ballerina Language | Ballerina Swan Lake 2201.13.0 |
Quickstart
To use the Shopify listener in your Ballerina application, update the .bal file as follows.
Before running the quickstart, ensure you have:
- The Client Secret from Step 5 of the Setup guide
- ngrok running ()
ngrok http 8090
Step 1: Import listener
To import the ballerinax/shopify.trigger module into the Ballerina project, add the following statement:
import ballerinax/shopify.trigger as shopify; import ballerina/io;
Step 2: Create a new listener instance
Add the following to your Config.toml file, replacing the placeholder with the value saved during
the Setup guide:
webhookSecret = "<YOUR_CLIENT_SECRET>"
Then initialise the listener in your .bal file:
configurable string webhookSecret = ?; listener shopify:Listener shopifyWebhook = new ( {webhookSecret}, 8090 );
webhookSecret should always match the Client Secret configured on the Shopify app - this is what
the listener uses to verify incoming payloads actually came from Shopify.
Step 3: Invoke listener triggers
Now let's use the triggers available within the listener.
A service attached to one of the listener's service types must implement all of that type's
remote functions. For example, OrdersService exposes six, covering every order event:
service shopify:OrdersService on shopifyWebhook { remote function onOrdersCreate(shopify:OrderEvent payload) returns error? { io:println(payload); } remote function onOrdersUpdated(shopify:OrderEvent payload) returns error? { io:println(payload); } remote function onOrdersCancelled(shopify:OrderEvent payload) returns error? { io:println(payload); } remote function onOrdersFulfilled(shopify:OrderEvent payload) returns error? { io:println(payload); } remote function onOrdersPartiallyFulfilled(shopify:OrderEvent payload) returns error? { io:println(payload); } remote function onOrdersPaid(shopify:OrderEvent payload) returns error? { io:println(payload); } }
Note: Unlike QuickBooks' notification-only webhooks, Shopify sends the full resource
representation in every event - payload above is the complete order, not just its ID, so no
follow-up API call is needed to see what changed.
To compile and run the Ballerina program, issue the following command:
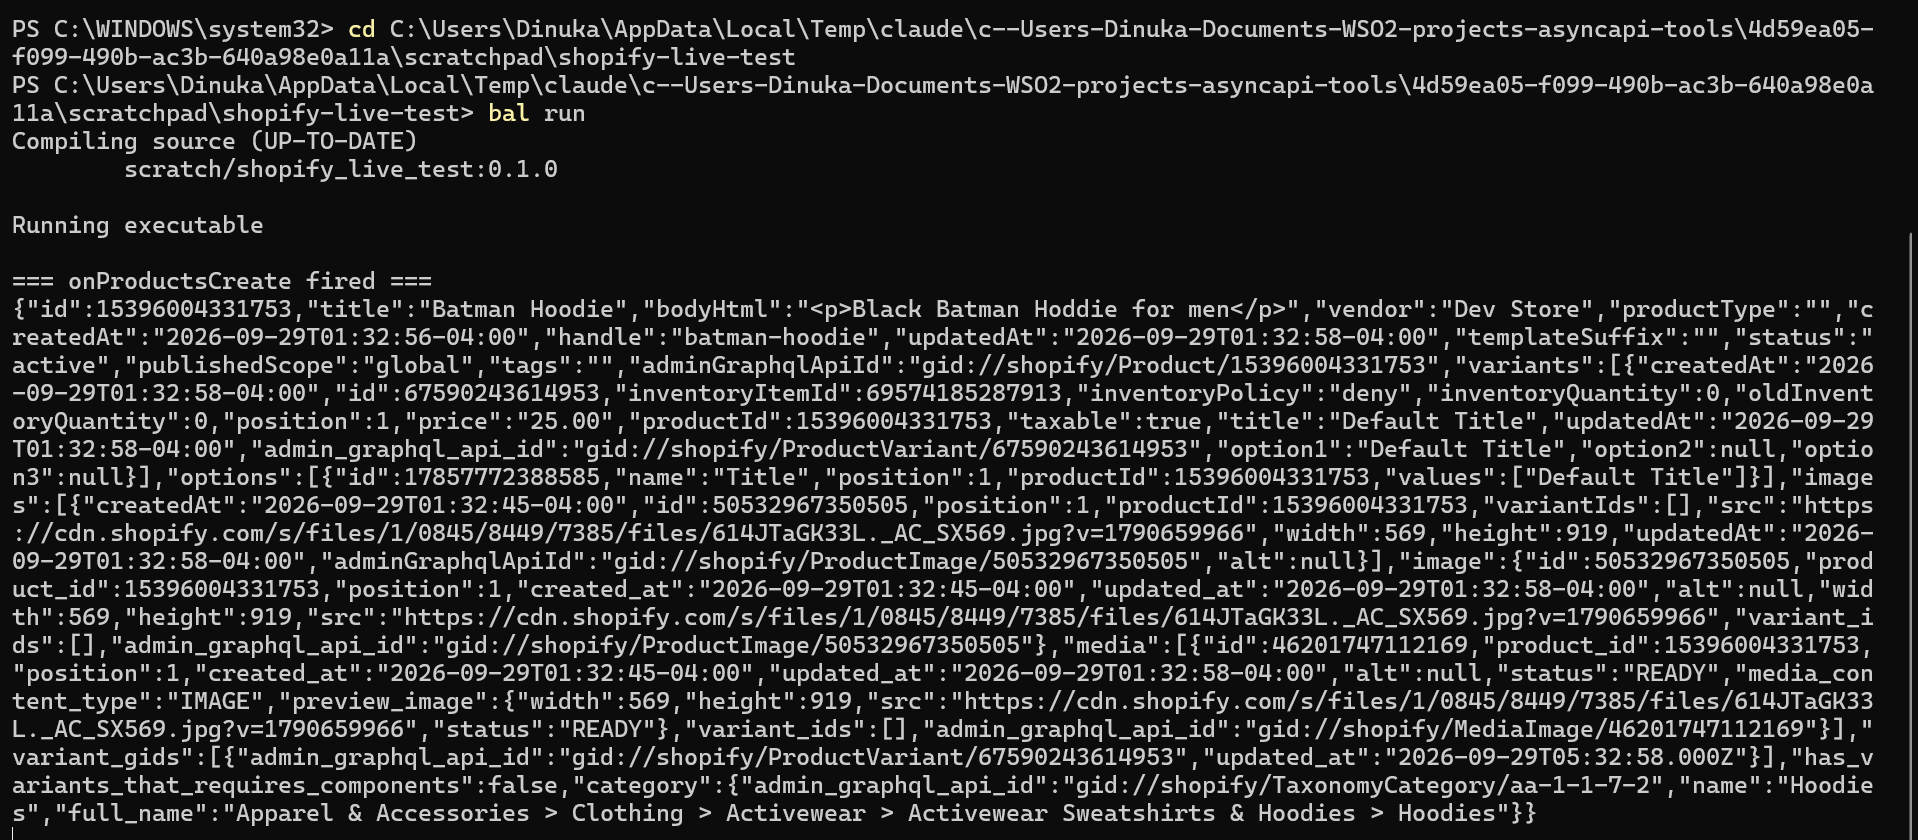
bal run
To verify it is working, go to your Shopify development store and create an order (or whichever resource matches the topic you subscribed to). You should see the event printed in the Ballerina console output.
Examples
The shopify.trigger module provides practical examples illustrating usage in various scenarios.
Explore these examples,
covering common webhook event handling use cases.
Report issues
To report bugs, request new features, start new discussions, etc., go to the Ballerina Library repository
Useful links
- For more information go to the
shopify.triggerpackage. - See the migration notes for context on this package's move from the asyncapi-triggers monorepo.
- For example demonstrations of the usage, go to Ballerina By Examples.
- Chat live with us via our Discord server.
- Post all technical questions on Stack Overflow with the #ballerina tag.
Service types
shopify.trigger: OrdersService
Attachable service type exposing the OrdersService family of webhook events.
onOrdersCreate
function onOrdersCreate(OrderEvent payload) returns error?Triggered on Orders create.
Parameters
- payload OrderEvent - the OrderEvent webhook payload
Return Type
- error? - an error if handling the event fails
onOrdersCancelled
function onOrdersCancelled(OrderEvent payload) returns error?Triggered on Orders cancelled.
Parameters
- payload OrderEvent - the OrderEvent webhook payload
Return Type
- error? - an error if handling the event fails
onOrdersFulfilled
function onOrdersFulfilled(OrderEvent payload) returns error?Triggered on Orders fulfilled.
Parameters
- payload OrderEvent - the OrderEvent webhook payload
Return Type
- error? - an error if handling the event fails
onOrdersPaid
function onOrdersPaid(OrderEvent payload) returns error?Triggered on Orders paid.
Parameters
- payload OrderEvent - the OrderEvent webhook payload
Return Type
- error? - an error if handling the event fails
onOrdersPartiallyFulfilled
function onOrdersPartiallyFulfilled(OrderEvent payload) returns error?Triggered on Orders partially fulfilled.
Parameters
- payload OrderEvent - the OrderEvent webhook payload
Return Type
- error? - an error if handling the event fails
onOrdersUpdated
function onOrdersUpdated(OrderEvent payload) returns error?Triggered on Orders updated.
Parameters
- payload OrderEvent - the OrderEvent webhook payload
Return Type
- error? - an error if handling the event fails
shopify.trigger: CustomersService
Attachable service type exposing the CustomersService family of webhook events.
onCustomersCreate
function onCustomersCreate(CustomerEvent payload) returns error?Triggered on Customers create.
Parameters
- payload CustomerEvent - the CustomerEvent webhook payload
Return Type
- error? - an error if handling the event fails
onCustomersDisable
function onCustomersDisable(CustomerEvent payload) returns error?Triggered on Customers disable.
Parameters
- payload CustomerEvent - the CustomerEvent webhook payload
Return Type
- error? - an error if handling the event fails
onCustomersEnable
function onCustomersEnable(CustomerEvent payload) returns error?Triggered on Customers enable.
Parameters
- payload CustomerEvent - the CustomerEvent webhook payload
Return Type
- error? - an error if handling the event fails
onCustomersUpdate
function onCustomersUpdate(CustomerEvent payload) returns error?Triggered on Customers update.
Parameters
- payload CustomerEvent - the CustomerEvent webhook payload
Return Type
- error? - an error if handling the event fails
onCustomersMarketingConsentUpdate
function onCustomersMarketingConsentUpdate(CustomerEvent payload) returns error?Triggered on Customers marketing consent update.
Parameters
- payload CustomerEvent - the CustomerEvent webhook payload
Return Type
- error? - an error if handling the event fails
shopify.trigger: ProductsService
Attachable service type exposing the ProductsService family of webhook events.
onProductsCreate
function onProductsCreate(ProductEvent payload) returns error?Triggered on Products create.
Parameters
- payload ProductEvent - the ProductEvent webhook payload
Return Type
- error? - an error if handling the event fails
onProductsUpdate
function onProductsUpdate(ProductEvent payload) returns error?Triggered on Products update.
Parameters
- payload ProductEvent - the ProductEvent webhook payload
Return Type
- error? - an error if handling the event fails
shopify.trigger: FulfillmentsService
Attachable service type exposing the FulfillmentsService family of webhook events.
onFulfillmentsCreate
function onFulfillmentsCreate(FulfillmentEvent payload) returns error?Triggered on Fulfillments create.
Parameters
- payload FulfillmentEvent - the FulfillmentEvent webhook payload
Return Type
- error? - an error if handling the event fails
onFulfillmentsUpdate
function onFulfillmentsUpdate(FulfillmentEvent payload) returns error?Triggered on Fulfillments update.
Parameters
- payload FulfillmentEvent - the FulfillmentEvent webhook payload
Return Type
- error? - an error if handling the event fails
Listeners
shopify.trigger: Listener
attach
function attach(GenericServiceType serviceRef, string[]|string? attachPoint) returns error?detach
function detach(GenericServiceType serviceRef) returns error?Parameters
- serviceRef GenericServiceType -
'start
function 'start() returns error?gracefulStop
function gracefulStop() returns error?immediateStop
function immediateStop() returns error?Records
shopify.trigger: Address
Address
Fields
- 'address1? string - The customer's mailing address.
- 'address2? string - An additional field for the customer's mailing address.
- city? string - The customer's city, town, or village.
- company? string - The customer's company.
- country? string - The customer's country.
- countryCode? string - The two-letter country code corresponding to the customer's country.
- countryName? string - The customer's normalized country name.
- customerId? int - A unique identifier for the customer.
- 'default? boolean - Returns true for each default address.
- firstName? string - The customer's first name.
- id? int - A unique identifier for the address.
- lastName? string - The customer's last name.
- name? string - The customer's first and last names.
- phone? string - The customer's phone number at this address.
- province? string - The customer's region name. Typically a province, a state, or a prefecture.
- provinceCode? string - The two-letter code for the customer's region.
- zip? string - The customer's postal code, also known as zip, postcode, Eircode, etc.
shopify.trigger: AmountSet
The discount amount allocated to the line item in shop and presentment currencies.
Fields
- shopMoney? Price - The price object
- presentmentMoney? Price - The price object
shopify.trigger: CurrentTotalDutiesSet
The current total duties charged on the order in shop and presentment currencies. The amount values associated with this field reflect order edits, returns, and refunds.
Fields
- currentTotalDutiesSet? CurrentTotalDutiesSetObject - The current total duties charged on the order in shop and presentment currencies. The amount values associated with this field reflect order edits, returns, and refunds.
shopify.trigger: CurrentTotalDutiesSetObject
The current total duties charged on the order in shop and presentment currencies. The amount values associated with this field reflect order edits, returns, and refunds.
Fields
- shopMoney? Price - The price object
- presentmentMoney? Price - The price object
shopify.trigger: Customer
The Customer resource stores information about a shop's customers, such as their contact details, their order history, and whether they've agreed to receive email marketing.
Fields
- acceptsMarketing? boolean - Whether the customer has consented to receive marketing material via email.
- acceptsMarketingUpdatedAt? string - The date and time (ISO 8601 format) when the customer consented or objected to receiving marketing material by email. Set this value whenever the customer consents or objects to marketing materials.
- addresses? Address[] - A list of the ten most recently updated addresses for the customer.
- currency? string - The three-letter code (ISO 4217 format) for the currency that the customer used when they paid for their last order. Defaults to the shop currency. Returns the shop currency for test orders.
- createdAt? string - The date and time (ISO 8601 format) when the customer was created.
- firstName? string - The customer's first name.
- email? string - The unique email address of the customer. Attempting to assign the same email address to multiple customers returns an error.
- defaultAddress? Address - Address
- id? int - A unique identifier for the customer.
- lastName? string - The customer's last name.
- lastOrderId? int - The ID of the customer's last order.
- lastOrderName? string - The name of the customer's last order. This is directly related to the name field on the Order resource.
- metafield? Metafield - Attaches additional metadata to a shop's resources
- marketingOptInLevel? string - The marketing subscription opt-in level (as described by the M3AAWG best practices guideline) that the customer gave when they consented to receive marketing material by email. If the customer does not accept email marketing, then this property will be set to null.
- multipassIdentifier? string - A unique identifier for the customer that's used with Multipass login.
- note? string - A note about the customer.
- ordersCount? int - The number of orders associated with this customer.
- phone? string - The unique phone number (E.164 format) for this customer. Attempting to assign the same phone number to multiple customers returns an error. The property can be set using different formats, but each format must represent a number that can be dialed from anywhere in the world.
- smsMarketingConsent? SmsMarketingConsent - The marketing consent information when the customer consented to receiving marketing material by SMS. The phone property is required to create a customer with SMS consent information and to perform an SMS update on a customer that doesn't have a phone number recorded. The customer must have a unique phone number associated to the record.
- state? string - The state of the customer's account with a shop. Default value is disabled.
- taxExempt? boolean - Whether the customer is exempt from paying taxes on their order. If true, then taxes won't be applied to an order at checkout. If false, then taxes will be applied at checkout.
- taxExemptions? string[] - Whether the customer is exempt from paying specific taxes on their order. Canadian taxes only.
- totalSpent? string - The total amount of money that the customer has spent across their order history.
- updatedAt? string - The date and time (ISO 8601 format) when the customer information was last updated.
- verifiedEmail? boolean - Whether the customer has verified their email address.
shopify.trigger: CustomerAddress
The mailing address associated with the payment method. This address is an optional field that won't be available on orders that do not require a payment method.
Fields
- 'address1? string - The street address of the billing address.
- 'address2? string - An optional additional field for the street address of the billing address.
- city? string - The city, town, or village of the billing address.
- company? string - The company of the person associated with the billing address.
- country? string - The name of the country of the billing address.
- countryCode? string - The two-letter code (ISO 3166-1 format) for the country of the billing address.
- firstName? string - The first name of the person associated with the payment method.
- lastName? string - The last name of the person associated with the payment method.
- latitude? Latitude - The latitude of the billing address. Shopify sends a number although its documentation shows a string.
- longitude? Longitude - The longitude of the billing address. Shopify sends a number although its documentation shows a string.
- name? string - The full name of the person associated with the payment method.
- phone? string - The phone number at the billing address.
- province? string - The name of the region (for example, province, state, or prefecture) of the billing address.
- provinceCode? string - The two-letter abbreviation of the region of the billing address.
- zip? string - The postal code (for example, zip, postcode, or Eircode) of the billing address.
shopify.trigger: CustomerEvent
Fields
- id? int - A unique identifier for the customer.
- email? string - The unique email address of the customer. Attempting to assign the same email address to multiple customers returns an error.
- acceptsMarketing? boolean - Whether the customer has consented to receive marketing material via email.
- createdAt? string - The date and time (ISO 8601 format) when the customer was created.
- updatedAt? string - The date and time (ISO 8601 format) when the customer information was last updated.
- firstName? string - The customer's first name.
- lastName? string - The customer's last name.
- ordersCount? int - The number of orders associated with this customer.
- state? string - The state of the customer's account with a shop. Default value is disabled.
- totalSpent? string - The total amount of money that the customer has spent across their order history.
- lastOrderId? int - The ID of the customer's last order.
- note? string - A note about the customer.
- verifiedEmail? boolean - Whether the customer has verified their email address.
- multipassIdentifier? string - A unique identifier for the customer that's used with Multipass login.
- taxExempt? boolean - Whether the customer is exempt from paying taxes on their order. If true, then taxes won't be applied to an order at checkout. If false, then taxes will be applied at checkout.
- phone? string - The unique phone number (E.164 format) for this customer. Attempting to assign the same phone number to multiple customers returns an error. The property can be set using different formats, but each format must represent a number that can be dialed from anywhere in the world.
- lastOrderName? string - The name of the customer's last order. This is directly related to the name field on the Order resource.
- currency? string - The three-letter code (ISO 4217 format) for the currency that the customer used when they paid for their last order. Defaults to the shop currency. Returns the shop currency for test orders.
- addresses? Address[] - A list of the ten most recently updated addresses for the customer.
- acceptsMarketingUpdatedAt? string - The date and time (ISO 8601 format) when the customer consented or objected to receiving marketing material by email. Set this value whenever the customer consents or objects to marketing materials.
- marketingOptInLevel? string - The marketing subscription opt-in level (as described by the M3AAWG best practices guideline) that the customer gave when they consented to receive marketing material by email. If the customer does not accept email marketing, then this property will be set to null.
- smsMarketingConsent? SmsMarketingConsent - The marketing consent information when the customer consented to receiving marketing material by SMS. The phone property is required to create a customer with SMS consent information and to perform an SMS update on a customer that doesn't have a phone number recorded. The customer must have a unique phone number associated to the record.
- adminGraphqlApiId? string - Admin GraphQL API ID
- json... - Rest field
shopify.trigger: DiscountAllocations
An ordered list of amounts allocated by discount applications. Each discount allocation is associated with a particular discount application.
Fields
- amount? string - The discount amount allocated to the line in the shop currency.
- discountApplicationIndex? int - The index of the associated discount application in the order's
- amountSet? AmountSet - The discount amount allocated to the line item in shop and presentment currencies.
shopify.trigger: DiscountApplication
Stacked discount application
Fields
- 'type? string - The discount application type.Valid values:manual The discount was manually applied by the merchant (for example, by using an app or creating a draft order).script: The discount was applied by a Shopify Script.discount_code: The discount was applied by a discount code. = ['discount_code', 'manual', 'script']
- value? string - The value of the discount application as a decimal. This represents the intention of the discount application
- valueType? string - The type of the value = ['percentage', 'fixed_amount']
- allocationMethod? string - The method by which the discount application value has been allocated to entitled lines. = ['across', 'each', 'one']
- targetSelection? string - The lines on the order, of the type defined by target_type, that the discount is allocated over = ['all', 'entitled', 'explicit']
- targetType? string - The type of line on the order that the discount is applicable on = ['line_item', 'shipping_line']
- description? string - The description of the discount application, as defined by the merchant or the Shopify Script. Available only for manual and script discount applications
- title? string - The title of the discount application, as defined by the merchant. Available only for manual discount applications
shopify.trigger: DiscountCode
Discounts applied to the order
Fields
- amount? string - The value of the discount deducted from the order total. The type field determines how this value is calculated
- code? string - The discount code
- 'type? string - The type of discount. Can be one of: percentage, shipping, fixed_amount (default) = ['fixed_amount', 'percentage', 'shipping']
shopify.trigger: DiscountedPriceSet
The price of the shipping method in both shop and presentment currencies after line-level discounts have been applied.
Fields
- shopMoney? Price - The price object
- presentmentMoney? Price - The price object
shopify.trigger: Fulfillment
You can use the Fulfillment resource to view, create, modify, or delete an order's or fulfillment order's fulfillments. A fulfillment order represents a group of one or more items in an order that are to be fulfilled from the same location. A fulfillment represents work that is completed as part of a fulfillment order and can include one or more items. You can use the Fulfillment resource to manage fulfillments for both orders and fulfillment orders.
Fields
- createdAt? string - The date and time when the fulfillment was created. The API returns this value in ISO 8601 format
- id? int - The ID for the fulfillment.
- lineItems? LineItem[] - A historical record of each item in the fulfillment.
- locationId? int - The unique identifier of the location that the fulfillment should be processed for. To find the ID of the location, use the Location resource.
- name? string - The uniquely identifying fulfillment name, consisting of two parts separated by a .. The first part represents the order name and the second part represents the fulfillment number. The fulfillment number automatically increments depending on how many fulfillments are in an order (e.g. #1001.1, #1001.2).
- notifyCustomer? string - Whether the customer should be notified. If set to true, then an email will be sent when the fulfillment is created or updated. For orders that were initially created using the API, the default value is false. For all other orders, the default value is true.
- orderId? int - The unique numeric identifier for the order.
- originAddress? Address - Address
- receipt? Receipt - A text field that provides information about the receipt
- 'service? string - The type of service used.
- shipmentStatus? string - The current shipment status of the fulfillment.
- status? string - The status of the fulfillment.
- trackingCompany? string - The name of the tracking company.
- trackingNumbers? string[] - A list of tracking numbers, provided by the shipping company.
- trackingUrls? string[] - The URLs of tracking pages for the fulfillment.
- updatedAt? string - The date and time (ISO 8601 format) when the fulfillment was last modified.
- variantInventoryManagement? string - The name of the inventory management service.
shopify.trigger: FulfillmentEvent
Fields
- id? int - The ID for the fulfillment.
- orderId? int - The unique numeric identifier for the order.
- status? string - The status of the fulfillment.
- createdAt? string - The date and time when the fulfillment was created. The API returns this value in ISO 8601 format
- 'service? string - The type of service used.
- updatedAt? string - The date and time (ISO 8601 format) when the fulfillment was last modified.
- trackingCompany? string - The name of the tracking company.
- shipmentStatus? string - The current shipment status of the fulfillment.
- locationId? int - The unique identifier of the location that the fulfillment should be processed for. To find the ID of the location, use the Location resource.
- originAddress? Address - Address
- email? string - Email.
- destination? Address - Address
- lineItems? LineItem[] - A historical record of each item in the fulfillment.
- trackingNumber? string - A tracking number, provided by the shipping company.
- trackingNumbers? string[] - A list of tracking numbers, provided by the shipping company.
- trackingUrl? string - The URL of tracking pages for the fulfillment.
- trackingUrls? string[] - The URLs of tracking pages for the fulfillment.
- receipt? Receipt - A text field that provides information about the receipt
- name? string - The uniquely identifying fulfillment name, consisting of two parts separated by a .. The first part represents the order name and the second part represents the fulfillment number. The fulfillment number automatically increments depending on how many fulfillments are in an order (e.g. #1001.1, #1001.2).
- adminGraphqlApiId? string - Admin GraphQL API ID.
- json... - Rest field
shopify.trigger: LineItem
A historical record of each item in the fulfillment.
Fields
- id? int - The ID of the line item within the fulfillment.
- variantId? int - The ID of the product variant being fulfilled.
- title? string - The title of the product.
- quantity? int - The number of items in the fulfillment.
- price? string - The price of the item.
- grams? int - The weight of the item in grams.
- sku? string - The unique identifier of the item in the fulfillment.
- variantTitle? string - The title of the product variant being fulfilled.
- vendor? string - The name of the supplier of the item.
- fulfillmentService? string - The service provider who is doing the fulfillment.
- productId? int - The unique numeric identifier for the product in the fulfillment.
- requiresShipping? boolean - Whether a customer needs to provide a shipping address when placing an order for this product variant.
- taxable? boolean - Whether the line item is taxable.
- giftCard? boolean - Whether the line item is a gift card
- name? string - The name of the product variant.
- variantInventoryManagement? string - The name of the inventory management system.
- properties? Property[] - Any additional properties associated with the line item.
- productExists? boolean - Whether the product exists.
- fulfillableQuantity? int - The amount available to fulfill. This is the quantity - max (refunded_quantity, fulfilled_quantity) - pending_fulfilled_quantity - open_fulfilled_quantity.
- totalDiscount? string - The total of any discounts applied to the line item.
- fulfillmentStatus? string - The status of an order in terms of the line items being fulfilled. Valid values are fulfilled, null, or partial
- fulfillmentLineItemId? int - A unique identifier for a quantity of items within a single fulfillment. An order can have multiple fulfillment line items.
- taxLines? TaxLine[] - A list of tax line objects, each of which details the title, price, and rate of any taxes applied to the line item.
shopify.trigger: ListenerConfig
Configuration for the webhook listener, including the secret used to verify incoming requests.
Fields
- webhookSecret? string - The secret used to verify incoming webhook signatures.
shopify.trigger: Metafield
Attaches additional metadata to a shop's resources
Fields
- 'key string - An identifier for the metafield (maximum of 30 characters).
- namespace string - A container for a set of metadata (maximum of 20 characters). Namespaces help distinguish between metadata that you created and metadata created by another individual with a similar namespace.
- value string - Information to be stored as metadata.
- valueType string - The value type. Valid values are string and integer.
- description? string - Additional information about the metafield.
shopify.trigger: NoteAttribute
Extra information that is added to the order. Appears in the Additional details section of an order details page. Each array entry must contain a hash with name and value keys.
Fields
- name? string - Name
- value? string - Value
shopify.trigger: Option
The custom properties that a shop owner uses to define product variants. You can define three options for a product variant are option1, option2, option3. Default value is Default Title. The title field is a concatenation of the option1, option2, and option3 fields. Updating the option fields updates the title field.
Fields
- 'option1? string - Option 1
- 'option2? string - Option 2
- 'option3? string - Option 3
shopify.trigger: OrderAdjustment
Order adjustment attached to the refund.
Fields
- id? int - The unique identifier for the order adjustment.
- orderId? int - The unique identifier for the order that the order adjustment is associated with.
- refundId? int - The unique identifier for the refund that the order adjustment is associated with.
- amount? string - The value of the discrepancy between the calculated refund and the actual refund. If the kind property's value is shipping_refund, then amount returns the value of shipping charges refunded to the customer.
- taxAmount? string - The taxes that are added to amount, such as applicable shipping taxes added to a shipping refund.
- kind? string - The order adjustment type. Valid values are shipping_refund and refund_discrepancy.
- reason? string - The reason for the order adjustment. To set this value, include discrepancy_reason when you create a refund.
shopify.trigger: OrderEvent
Fields
- id? int - The ID of the order, used for API purposes. This is different from the order_number property, which is the ID used by the shop owner and customer.
- email? string - The customer's email address.
- closedAt? string - The date and time (ISO 8601 format) when the order was closed. Returns null if the order isn't closed.
- createdAt? string - The autogenerated date and time (ISO 8601 format) when the order was created in Shopify. The value for this property cannot be changed.
- updatedAt? string - The date and time (ISO 8601 format) when the order was last modified. Filtering orders by updated_at is not an effective method for fetching orders because its value can change when no visible fields of an order have been updated. Use the Webhook and Event APIs to subscribe to order events instead.
- number? int - The order's position in the shop's count of orders. Numbers are sequential and start at 1.
- note? string - An optional note that a shop owner can attach to the order.
- token? string - A unique value when referencing the order.
- gateway? string - The payment gateway used.
- test? boolean - Whether this is a test order.
- totalPrice? string - The sum of all line item prices, discounts, shipping, taxes, and tips in the shop currency. Must be positive.
- subtotalPrice? string - The price of the order in the shop currency after discounts but before shipping, duties, taxes, and tips.
- totalWeight? decimal - The sum of all line item weights in grams. The sum is not adjusted as items are removed from the order.
- totalTax? string - The sum of all the taxes applied to the order in the shop currency. Must be positive.
- taxesIncluded? boolean - Whether taxes are included in the order subtotal.
- currency? string - The three-letter code (ISO 4217 format) for the shop currency.
- financialStatus? string - The status of payments associated with the order. Can only be set when the order is created.
- confirmed? boolean - Confirmation status
- totalDiscounts? string - The total discounts applied to the price of the order in the shop currency.
- totalLineItemsPrice? string - The sum of all line item prices in the shop currency.
- cartToken? string - A unique value when referencing the cart that's associated with the order.
- buyerAcceptsMarketing? boolean - Whether the customer consented to receive email updates from the shop.
- name? string - The order name, generated by combining the order_number property with the order prefix and suffix that are set in the merchant's general settings. This is different from the id property, which is the ID of the order used by the API. This field can also be set by the API to be any string value.
- referringSite? string - The website where the customer clicked a link to the shop.
- landingSite? string - The URL for the page where the buyer landed when they entered the shop.
- cancelledAt? string - The date and time when the order was canceled. Returns null if the order isn't canceled.
- cancelReason? string - The reason why the order was canceled.
- totalPriceUsd? string - The sum of all line item prices, discounts, shipping, taxes, and tips in the shop currency. Must be positive.
- checkoutToken? string - A unique value when referencing the checkout that's associated with the order.
- reference? string - The reference where the customer clicked a link to the shop.
- userId? int - The ID of the user logged into Shopify POS who processed the order, if applicable.
- locationId? int - The ID of the physical location where the order was processed. If you need to reference the location against an order, then use the FulfillmentOrder resource.
- sourceIdentifier? string - The source identifier
- sourceUrl? string - The source url
- processedAt? string - The date and time (ISO 8601 format) when an order was processed. This value is the date that appears on your orders and that's used in the analytic reports. If you're importing orders from an app or another platform, then you can set processed_at to a date and time in the past to match when the original order was created.
- deviceId? int - The device ID
- phone? string - The customer's phone number for receiving SMS notifications.
- customerLocale? string - The two or three-letter language code, optionally followed by a region modifier.
- appId? int - The ID of the app that created the order.
- browserIp? string - The IP address of the browser used by the customer when they placed the order. Both IPv4 and IPv6 are supported.
- landingSiteRef? string - The URL for the page where the buyer landed when they entered the shop.
- orderNumber? int - The order 's position in the shop's count of orders starting at 1001. Order numbers are sequential and start at 1001.
- discountApplications? DiscountApplication[] - An ordered list of stacked discount applications.
- discountCodes? DiscountCode[] - A list of discounts applied to the order.
- noteAttributes? NoteAttribute[] - Extra information that is added to the order. Appears in the Additional details section of an order details page. Each array entry must contain a hash with name and value keys.
- paymentGatewayNames? string[] - The list of payment gateways used for the order.
- processingMethod? string - How the payment was processed. It has the following valid values
- sourceName? string - Where the order originated. Can be set only during order creation, and is not writeable afterwards. Values for Shopify channels are protected and cannot be assigned by other API clients: web, pos, shopify_draft_order, iphone, and android. Orders created via the API can be assigned any other string of your choice. If unspecified, then new orders are assigned the value of your app's ID.
- fulfillmentStatus? string - The order's status in terms of fulfilled line items.
- taxLines? TaxLine[] - An array of tax line objects, each of which details a tax applicable to the order. When creating an order through the API, tax lines can be specified on the order or the line items but not both. Tax lines specified on the order are split across the taxable line items in the created order.
- contactEmail? string - The contact email address.
- orderStatusUrl? string - The URL pointing to the order status web page, if applicable.
- presentmentCurrency? string - The presentment currency that was used to display prices to the customer.
- totalLineItemsPriceSet? TotalLineItemsPriceSet - The total of all line item prices in shop and presentment currencies.
- totalDiscountsSet? TotalDiscountsSet - The total discounts applied to the price of the order in shop and presentment currencies.
- totalShippingPriceSet? TotalShippingPriceSet - The total shipping price of the order, excluding discounts and returns, in shop and presentment currencies. If taxes_included is set to true, then total_shipping_price_set includes taxes.
- subtotalPriceSet? SubtotalPriceSet - The subtotal of the order in shop and presentment currencies after discounts but before shipping, duties, taxes, and tips.
- totalPriceSet? TotalPriceSet - The total price of the order in shop and presentment currencies.
- totalTaxSet? TotalTaxSet - The total tax applied to the order in shop and presentment currencies.
- lineItems? OrderLineItem[] - A list of line item objects, each containing information about an item in the order.
- fulfillments? Fulfillment[] - An array of fulfillments associated with the order. For more information, see the Fulfillment API.
- refunds? Refund[] - A list of refunds applied to the order. For more information, see the Refund API.
- totalTipReceived? string - The sum of all the tips in the order in the shop currency.
- originalTotalDutiesSet? OriginalTotalDutiesSet - The original total duties charged on the order in shop and presentment currencies.
- currentTotalDutiesSet? CurrentTotalDutiesSet - The current total duties charged on the order in shop and presentment currencies. The amount values associated with this field reflect order edits, returns, and refunds.
- paymentTerms? PaymentTerms - The terms and conditions under which a payment should be processed.
- adminGraphqlApiId? string - Admin GraphQL API ID.
- shippingLines? ShippingLine[] - An array of objects, each of which details a shipping method used.
- billingAddress? CustomerAddress - The mailing address associated with the payment method. This address is an optional field that won't be available on orders that do not require a payment method.
- shippingAddress? CustomerAddress - The mailing address associated with the payment method. This address is an optional field that won't be available on orders that do not require a payment method.
- customer? Customer - The Customer resource stores information about a shop's customers, such as their contact details, their order history, and whether they've agreed to receive email marketing.
- json... - Rest field
shopify.trigger: OrderLineItem
A historical record of each line item.
Fields
- id? int - The ID of the line item within the fulfillment.
- variantId? int - The ID of the product variant being fulfilled.
- title? string - The title of the product.
- quantity? int - The number of items in the fulfillment.
- sku? string - The unique identifier of the item in the fulfillment.
- variantTitle? string - The title of the product variant being fulfilled.
- vendor? string - The name of the supplier of the item.
- fulfillmentService? string - The service provider who is doing the fulfillment.
- productId? int - The unique numeric identifier for the product in the fulfillment.
- requiresShipping? boolean - Whether a customer needs to provide a shipping address when placing an order for this product variant.
- taxable? boolean - Whether the line item is taxable.
- giftCard? boolean - Whether the line item is a gift card
- name? string - The name of the product variant.
- variantInventoryManagement? string - The name of the inventory management system.
- properties? Property[] - Any additional properties associated with the line item.
- productExists? boolean - Whether the product exists.
- fulfillableQuantity? int - The amount available to fulfill. This is the quantity - max (refunded_quantity, fulfilled_quantity) - pending_fulfilled_quantity - open_fulfilled_quantity.
- price? string - The price of the item.
- priceSet? PriceSet - The price of the line item in shop and presentment currencies.
- grams? int - The weight of the item in grams.
- totalDiscount? string - The total of any discounts applied to the line item.
- fulfillmentStatus? string - The status of an order in terms of the line items being fulfilled. Valid values are fulfilled, null, or partial
- fulfillmentLineItemId? int - A unique identifier for a quantity of items within a single fulfillment. An order can have multiple fulfillment line items.
- taxLines? TaxLine[] - A list of tax line objects, each of which details a tax applied to the item.
- tipPaymentGateway? string - The payment gateway used to tender the tip, such as shopify_payments. Present only on tips
- tipPaymentMethod? string - The payment method used to tender the tip, such as Visa. Present only on tips.
- totalDiscountSet? TotalDiscountSet - The total amount allocated to the line item in the presentment currency. Instead of using this field, Shopify recommends using discount_allocations, which provides the same information.
- discountAllocations? DiscountAllocations[] - An ordered list of amounts allocated by discount applications. Each discount allocation is associated with a particular discount application.
- originLocation? Address - Address
- adminGraphqlApiId? string - Admin GraphQL API ID
shopify.trigger: OriginalTotalDutiesSet
The original total duties charged on the order in shop and presentment currencies.
Fields
- originalTotalDutiesSet? OriginalTotalDutiesSetObject - The original total duties charged on the order in shop and presentment currencies.
shopify.trigger: OriginalTotalDutiesSetObject
The original total duties charged on the order in shop and presentment currencies.
Fields
- shopMoney? Price - The price object
- presentmentMoney? Price - The price object
shopify.trigger: PaymentSchedule
Schedule associated to the payment terms
Fields
- amount? string - The amount that is owed according to the payment terms.
- currency? string - The presentment currency for the payment.
- issuedAt? string - The date and time when the payment terms were initiated.
- dueAt? string - The date and time when the payment is due. Calculated based on issued_at and due_in_days or a customized fixed date if the type is fixed.
- completedAt? string - The date and time when the purchase is completed. Returns null initially and updates when the payment is captured.
- expectedPaymentMethod? string - The name of the payment method gateway.
shopify.trigger: PaymentTerms
The terms and conditions under which a payment should be processed.
Fields
- amount? string - The amount that is owed according to the payment terms.
- currency? string - The presentment currency for the payment.
- paymentTermsName? string - The name of the selected payment terms template for the order.
- paymentTermsType? string - The type of selected payment terms template for the order.
- dueInDays? int - The number of days between the invoice date and due date that is defined in the selected payment terms template.
- paymentSchedules? PaymentSchedule[] - An array of schedules associated to the payment terms.
shopify.trigger: PresentmentPrice
The variant's presentment prices and compare-at prices in each of the shop's enabled presentment currencies.
Fields
- price? Price - The price object
- compareAtPrice? Price - The price object
shopify.trigger: PresentmentPrices
The variant's presentment prices and compare-at prices in each of the shop's enabled presentment currencies.
Fields
- presentmentPrices? PresentmentPrice[] - A list of the variant's presentment prices and compare-at prices in each of the shop's enabled presentment currencies.
shopify.trigger: Price
The price object
Fields
- amount? string - The variant's price or compare-at price in the presentment currency.
- currencyCode? string - The three-letter code (ISO 4217 format) for one of the shop's enabled presentment currencies.
shopify.trigger: PriceSet
The price of the line item in shop and presentment currencies.
Fields
- shopMoney? Price - The price object
- presentmentMoney? Price - The price object
shopify.trigger: ProductEvent
Fields
- id? int - An unsigned 64-bit integer that's used as a unique identifier for the product. Each id is unique across the Shopify system. No two products will have the same id, even if they're from different shops.
- title? string - The name of the product.
- bodyHtml? string - A description of the product. Supports HTML formatting.
- vendor? string - The name of the product's vendor.
- productType? string - A categorization for the product used for filtering and searching products.
- createdAt? string - The date and time (ISO 8601 format) when the product was created.
- 'handle? string - A unique human-friendly string for the product. Automatically generated from the product's title. Used by the Liquid templating language to refer to objects.
- updatedAt? string - The date and time (ISO 8601 format) when the product was last modified. A product's updated_at value can change for different reasons. For example, if an order is placed for a product that has inventory tracking set up, then the inventory adjustment is counted as an update.
- publishedAt? string - The date and time (ISO 8601 format) when the product was published. Can be set to null to unpublish the product from the Online Store channel.
- templateSuffix? string - The suffix of the Liquid template used for the product page. If this property is specified, then the product page uses a template called "product.suffix.liquid", where "suffix" is the value of this property. If this property is "" or null, then the product page uses the default template "product.liquid". (default is null)
- status? string - The status of the product.
- publishedScope? string - Whether the product is published to the Point of Sale channel.
- adminGraphqlApiId? string - Admin GraphQL API ID
- variants? ProductVariant[] - An array of product variants, each representing a different version of the product. The position property is read-only. The position of variants is indicated by the order in which they are listed.
- options? ProductOption[] - The custom product properties. For example, Size, Color, and Material. Each product can have up to 3 options and each option value can be up to 255 characters. Product variants are made of up combinations of option values. Options cannot be created without values. To create new options, a variant with an associated option value also needs to be created.
- images? ProductImage[] - A list of product image objects, each one representing an image associated with the product.
- json... - Rest field
shopify.trigger: ProductImage
Products are easier to sell if customers can see pictures of them, which is why there are product images.
Fields
- createdAt? string - The date and time when the product image was created. The API returns this value in ISO 8601 formatting.
- id? int - A unique numeric identifier for the product image.
- position? int - The order of the product image in the list. The first product image is at position 1 and is the "main" image for the product.
- productId? int - The id of the product associated with the image.
- variantIds? int[] - An array of variant ids associated with the image.
- src? string - Specifies the location of the product image. This parameter supports URL filters that you can use to retrieve modified copies of the image. For example, add _small, to the filename to retrieve a scaled copy of the image at 100 x 100 px (for example, ipod-nano_small.png), or add _2048x2048 to retrieve a copy of the image constrained at 2048 x 2048 px resolution (for example, ipod-nano_2048x2048.png).
- width? int - Width dimension of the image which is determined on upload.
- height? int - Height dimension of the image which is determined on upload.
- updatedAt? string - The date and time when the product image was last modified. The API returns this value in ISO 8601 format.
- adminGraphqlApiId? string - Admin GraphQL API ID.
shopify.trigger: ProductOption
The custom product properties. For example, Size, Color, and Material. Each product can have up to 3 options and each option value can be up to 255 characters.
Fields
- id? int - Product option ID
- name? string - Product option name
- position? int - Product option position
- productId? int - Product option product ID
- values? string[] - Product option values
shopify.trigger: ProductVariant
A variant can be added to a Product resource to represent one version of a product with several options. The Product resource will have a variant for every possible combination of its options. Each product can have a maximum of three options and a maximum of 100 variants.
Fields
- barcode? string - The barcode, UPC, or ISBN number for the product.
- compareAtPrice? string - The original price of the item before an adjustment or a sale.
- createdAt? string - The date and time (ISO 8601 format) when the product variant was created.
- fulfillmentService? string - The fulfillment service associated with the product variant. Valid values are manual or the handle of a fulfillment service.
- grams? int - The weight of the product variant in grams.
- id? int - The unique numeric identifier for the product variant.
- imageId? int - The unique numeric identifier for a product's image. The image must be associated to the same product as the variant.
- inventoryItemId? int - The unique identifier for the inventory item, which is used in the Inventory API to query for inventory information.
- inventoryManagement? string - The fulfillment service that tracks the number of items in stock for the product variant.
- inventoryPolicy? string - Whether customers are allowed to place an order for the product variant when it's out of stock.
- inventoryQuantity? int - An aggregate of inventory across all locations. To adjust inventory at a specific location, use the InventoryLevel resource.
- oldInventoryQuantity? int - This property is deprecated. Use the InventoryLevel resource instead.
- inventoryQuantityAdjustment? int - This property is deprecated. Use the InventoryLevel resource instead.
- option? Option - The custom properties that a shop owner uses to define product variants. You can define three options for a product variant are option1, option2, option3. Default value is Default Title. The title field is a concatenation of the option1, option2, and option3 fields. Updating the option fields updates the title field.
- presentmentPrices? PresentmentPrices - The variant's presentment prices and compare-at prices in each of the shop's enabled presentment currencies.
- position? int - The order of the product variant in the list of product variants. The first position in the list is 1. The position of variants is indicated by the order in which they are listed.
- price? string - The price of the product variant.
- productId? int - The unique numeric identifier for the product.
- requiresShipping? boolean - This property is deprecated. Use the
requires_shippingproperty on the InventoryItem resource instead.
- sku? string - A unique identifier for the product variant in the shop. Required in order to connect to a FulfillmentService.
- taxable? boolean - Whether a tax is charged when the product variant is sold.
- taxCode? string - This parameter applies only to the stores that have the Avalara AvaTax app installed. Specifies the Avalara tax code for the product variant.
- title? string - The title of the product variant. The title field is a concatenation of the option1, option2, and option3 fields. You can only update title indirectly using the option fields.
- updatedAt? string - The date and time when the product variant was last modified. Gets returned in ISO 8601 formatting.
- weight? decimal - The weight of the product variant in the unit system specified with weight_unit.
- weightUnit? string - The unit of measurement that applies to the product variant's weight. If you don't specify a value for weight_unit, then the shop's default unit of measurement is applied. Valid values are g, kg, oz, and lb.
shopify.trigger: Property
Properties
Fields
- name? string - Property name
- value? string - Property value
shopify.trigger: Receipt
A text field that provides information about the receipt
Fields
- testcase? boolean - Whether the fulfillment was a testcase.
shopify.trigger: Refund
Schedule associated to the payment terms
Fields
- createdAt? string - The date and time (ISO 8601 format) when the refund was created.
- id? int - The unique identifier for the refund.
- note? string - An optional note attached to a refund.
- orderAdjustments? OrderAdjustment[] - A list of order adjustments attached to the refund. Order adjustments are generated to account for refunded shipping costs and differences between calculated and actual refund amounts.
- processedAt? string - The date and time (ISO 8601 format) when the refund was imported. This value can be set to a date in the past when importing from other systems. If no value is provided, then it will be auto-generated as the current time in Shopify. Public apps need to be granted permission by Shopify to import orders with the processed_at timestamp set to a value earlier the created_at timestamp. Private apps can't be granted permission by Shopify.
- refundLineItems? RefundLineItem[] - A list of refunded line items.
- userId? int - The unique identifier of the user who performed the refund.
shopify.trigger: RefundLineItem
Refunded line item
Fields
- id? int - The unique identifier of the line item in the refund.
- lineItemId? int - The ID of the related line item in the order.
- quantity? int - The quantity of the associated line item that was returned.
- restockType? string - How this refund line item affects inventory levels.
- locationId? int - The unique identifier of the location where the items will be restocked. Required when restock_type has the value return or cancel.
- subtotal? decimal - The subtotal of the refund line item.
- totalTax? decimal - The total tax on the refund line item.
shopify.trigger: ShippingLine
An object, which details a shipping method used.
Fields
- code? string - A reference to the shipping method.
- discountedPrice? string - The price of the shipping method after line-level discounts have been applied. Doesn't reflect cart-level or order-level discounts.
- discountedPriceSet? DiscountedPriceSet - The price of the shipping method in both shop and presentment currencies after line-level discounts have been applied.
- price? string - The price of this shipping method in the shop currency. Can't be negative.
- priceSet? PriceSet - The price of the line item in shop and presentment currencies.
- 'source? string - The source of the shipping method.
- title? string - The title of the shipping method.
- carrierIdentifier? string - A reference to the carrier service that provided the rate. Present when the rate was computed by a third-party carrier service.
- requestedFulfillmentServiceId? string - A reference to the fulfillment service that is being requested for the shipping method. Present if the shipping method requires processing by a third party fulfillment service; null otherwise.
shopify.trigger: SmsMarketingConsent
The marketing consent information when the customer consented to receiving marketing material by SMS. The phone property is required to create a customer with SMS consent information and to perform an SMS update on a customer that doesn't have a phone number recorded. The customer must have a unique phone number associated to the record.
Fields
- state? string - The current SMS marketing state for the customer.
- optInLevel? string - The marketing subscription opt-in level, as described by the M3AAWG best practices guidelines, that the customer gave when they consented to receive marketing material by SMS.
- consentUpdatedAt? string - The date and time at which the customer consented to receive marketing material by SMS. The customer's consent state reflects the consent record with the most recent last_consent_updated_at date. If no date is provided, then the date and time at which the consent information was sent is used.
- consentCollectedFrom? string - The source for whether the customer has consented to receive marketing material by SMS.
shopify.trigger: SubtotalPriceSet
The subtotal of the order in shop and presentment currencies after discounts but before shipping, duties, taxes, and tips.
Fields
- shopMoney? Price - The price object
- presentmentMoney? Price - The price object
shopify.trigger: TaxLine
Tax line object, which details a tax applicable to the order.
Fields
- price? string - The amount of tax to be charged in the shop currency.
- rate? decimal - The rate of tax to be applied.
- title? string - The name of the tax.
- channelLiable? boolean - Whether the channel that submitted the tax line is liable for remitting. A value of null indicates unknown liability for the tax line.
shopify.trigger: TotalDiscountSet
The total amount allocated to the line item in the presentment currency. Instead of using this field, Shopify recommends using discount_allocations, which provides the same information.
Fields
- shopMoney? Price - The price object
- presentmentMoney? Price - The price object
shopify.trigger: TotalDiscountsSet
The total discounts applied to the price of the order in shop and presentment currencies.
Fields
- shopMoney? Price - The price object
- presentmentMoney? Price - The price object
shopify.trigger: TotalLineItemsPriceSet
The total of all line item prices in shop and presentment currencies.
Fields
- shopMoney? Price - The price object
- presentmentMoney? Price - The price object
shopify.trigger: TotalPriceSet
The total price of the order in shop and presentment currencies.
Fields
- shopMoney? Price - The price object
- presentmentMoney? Price - The price object
shopify.trigger: TotalShippingPriceSet
The total shipping price of the order, excluding discounts and returns, in shop and presentment currencies. If taxes_included is set to true, then total_shipping_price_set includes taxes.
Fields
- shopMoney? Price - The price object
- presentmentMoney? Price - The price object
shopify.trigger: TotalTaxSet
The total tax applied to the order in shop and presentment currencies.
Fields
- shopMoney? Price - The price object
- presentmentMoney? Price - The price object
Union types
shopify.trigger: GenericServiceType
GenericServiceType
The union of every service type that can be attached to this listener.
Import
import ballerinax/shopify.trigger;Other versions
0.9.0