Module hubspot.marketing.transactional
ballerinax/hubspot.marketing.transactional Ballerina library
Overview
HubSpot is an AI-powered customer relationship management (CRM) platform.
The HubSpot Marketing Transactional Emails connector offers APIs to connect and interact with the Hubspot Marketing Transactional Emails API endpoints.
Key Features
- Connect and interact with HubSpot Marketing Transactional Emails API endpoints
- Support for HubSpot REST API
- Manage SMTP API tokens efficiently
- Send and track transactional emails
Setup guide
To use the HubSpot Marketing Transactional Emails connector, you must have access to the HubSpot API through a HubSpot developer account and a HubSpot App under it. Therefore you need to register for a developer account at HubSpot if you don't have one already.
Step 1: Create/Login to a HubSpot Developer Account
If you have an account already, go to the HubSpot developer portal
If you don't have a HubSpot Developer Account you can sign up to a free account here
Step 2 (Optional): Create a Developer Test Account
Within app developer accounts, you can create a developer test account under your account to test apps and integrations without affecting any real HubSpot data.
Note: These accounts are only for development and testing purposes. In production you should not use Developer Test Accounts.
-
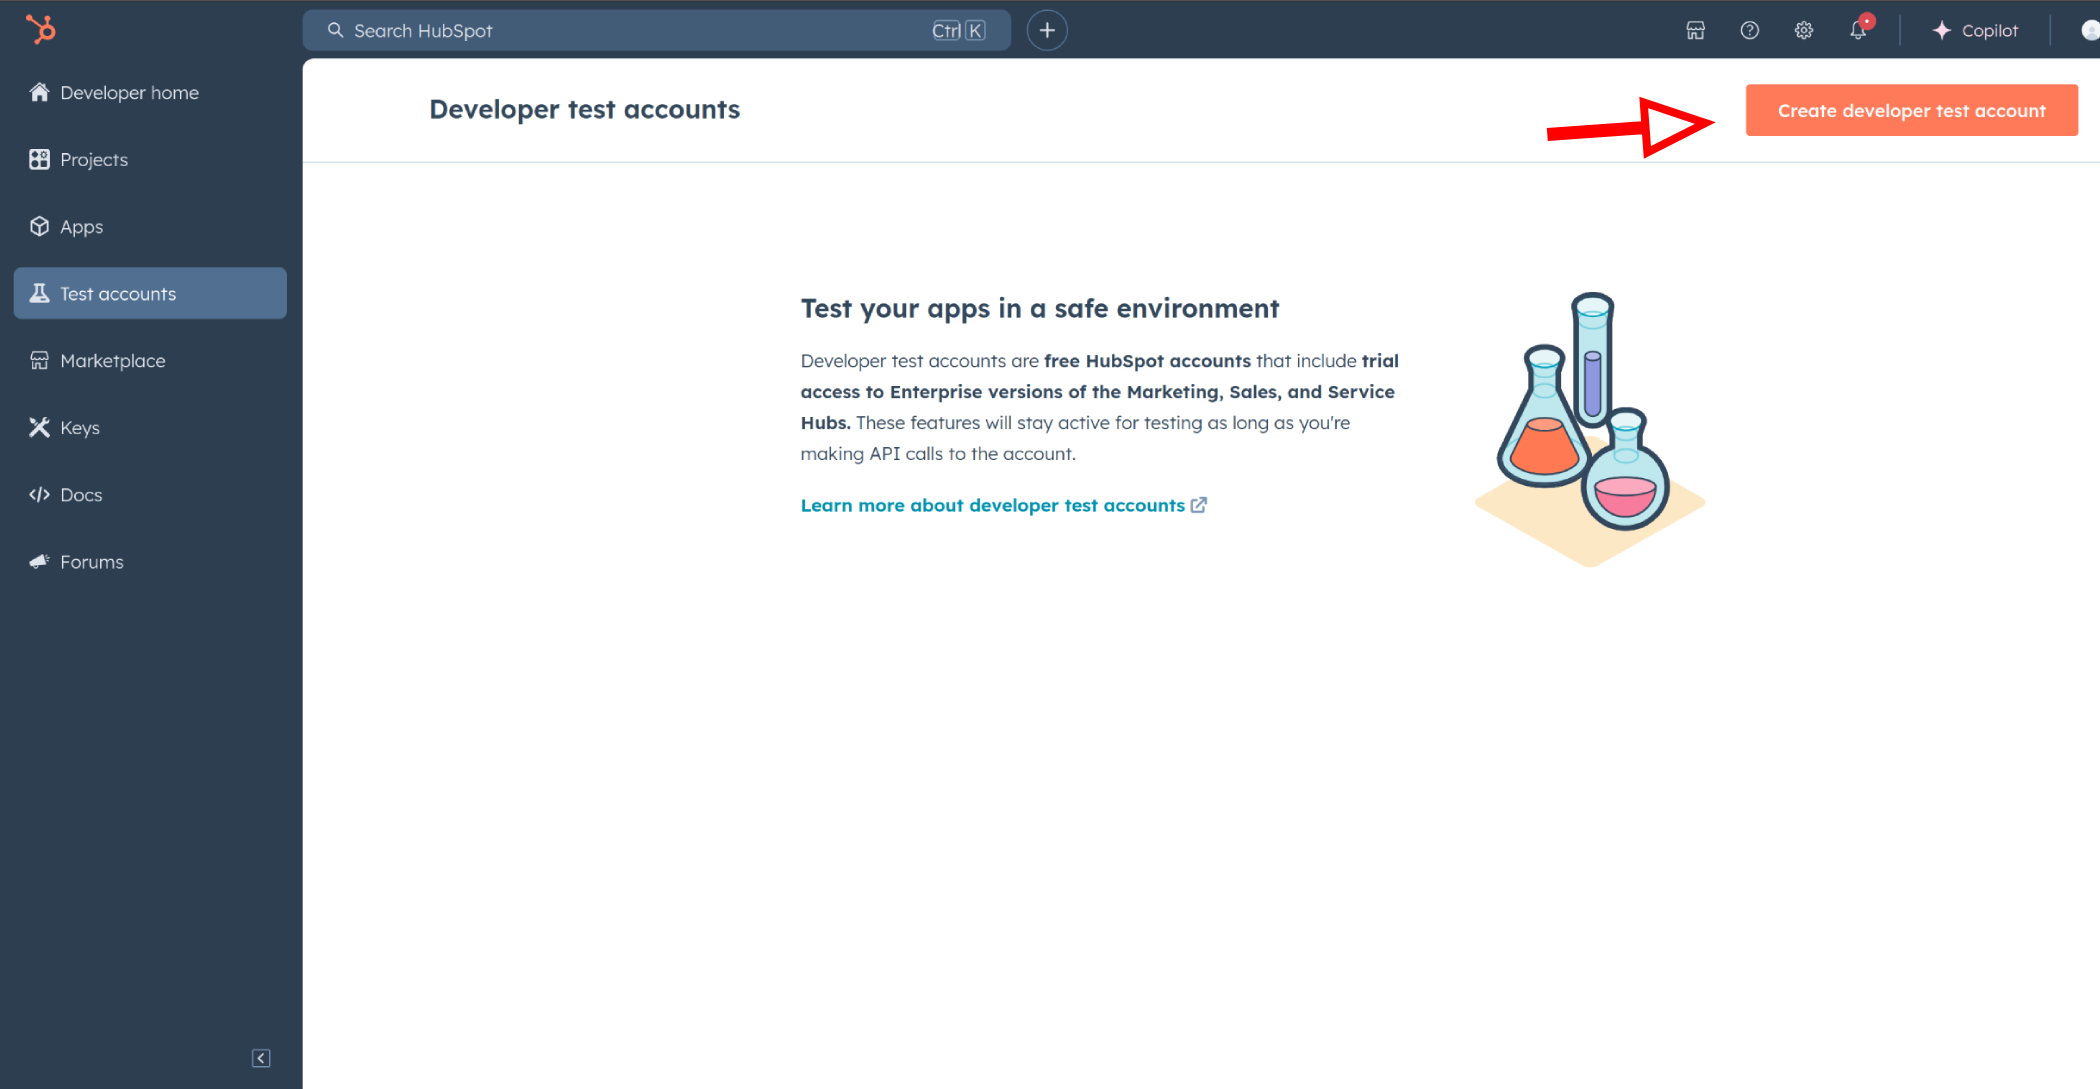
Go to Test Account section from the left sidebar.

-
Click Create developer test account.
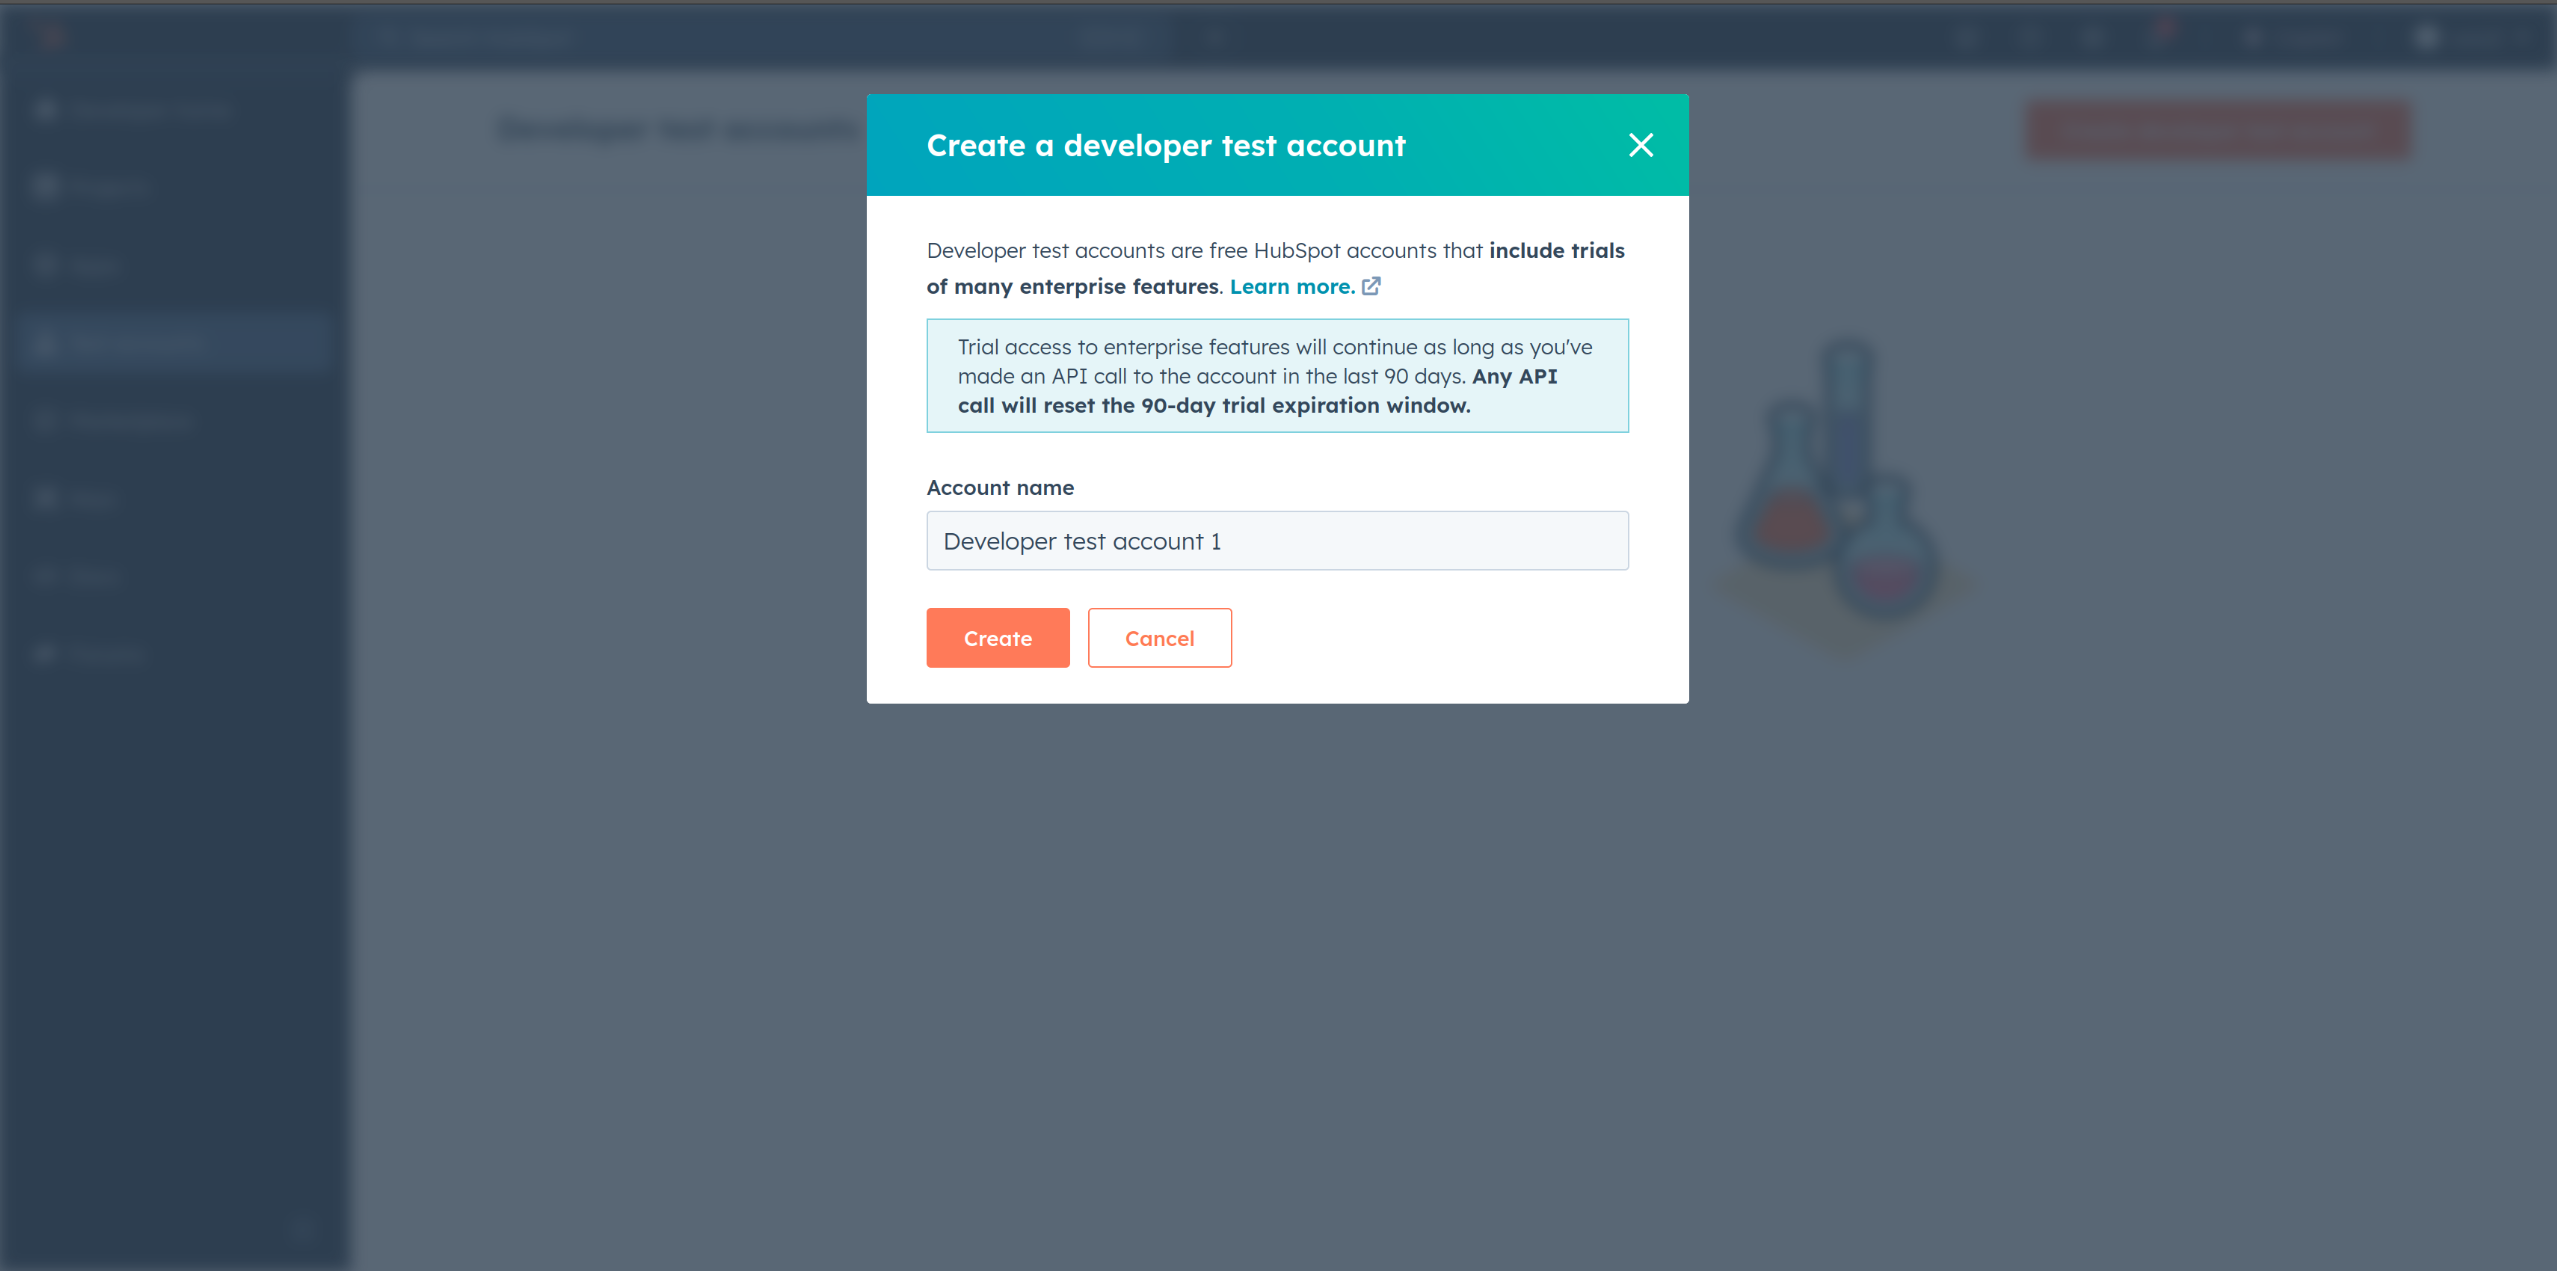
-
In the dialogue box, give a name to your test account and click create.
Step 3: Create a HubSpot App under your account
-
In your developer account, navigate to the "Apps" section. Click on "Create App"
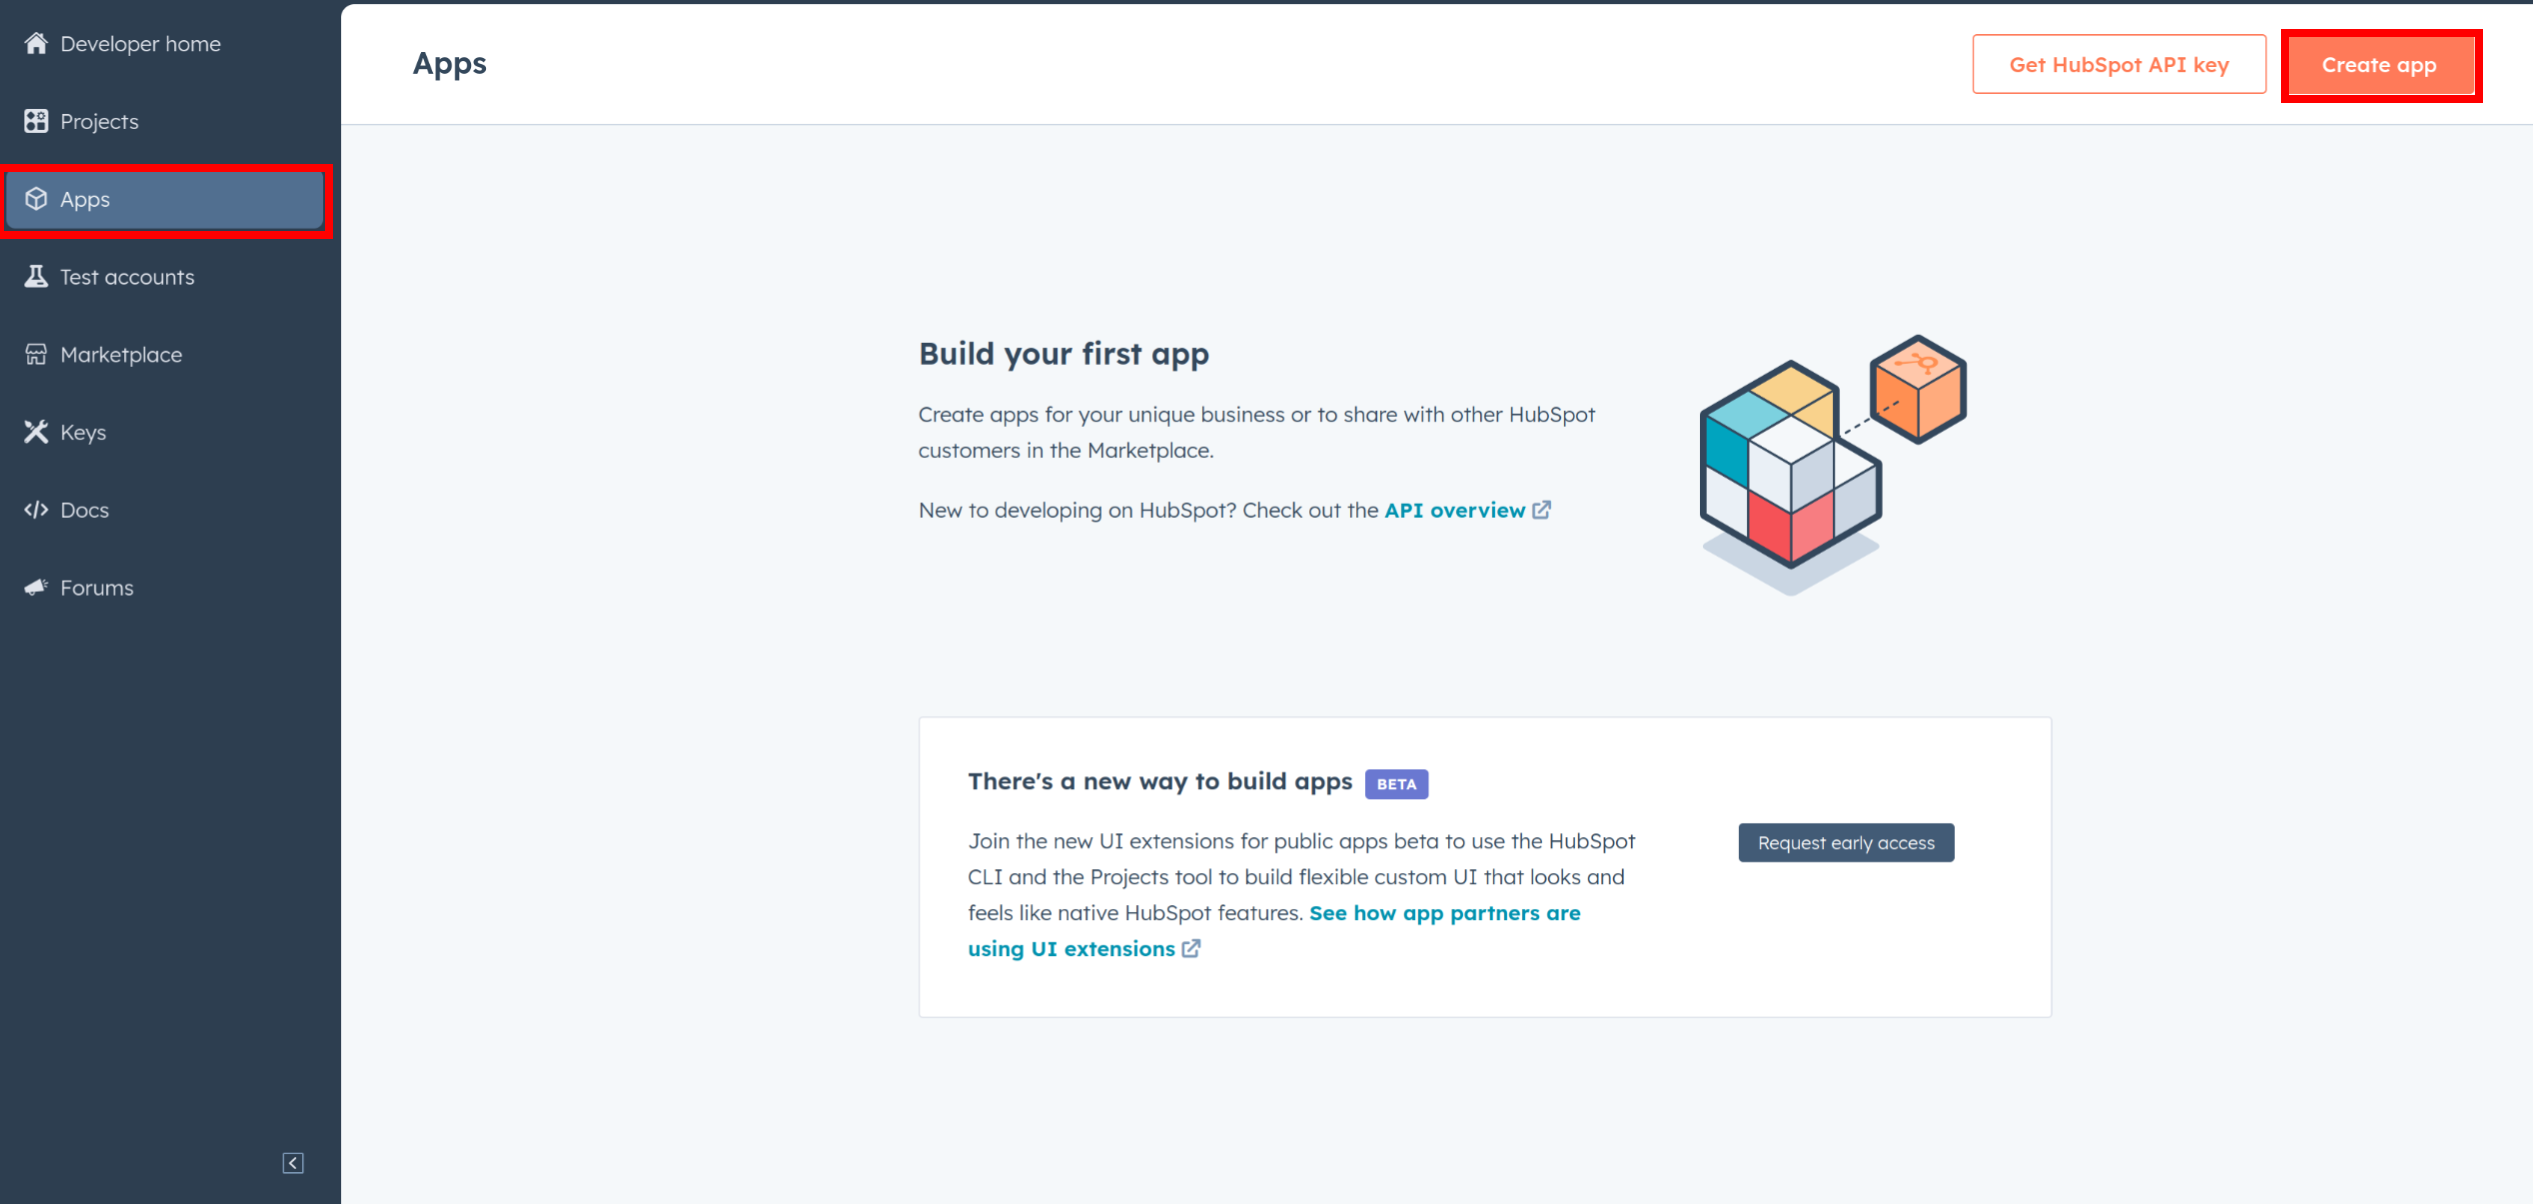
-
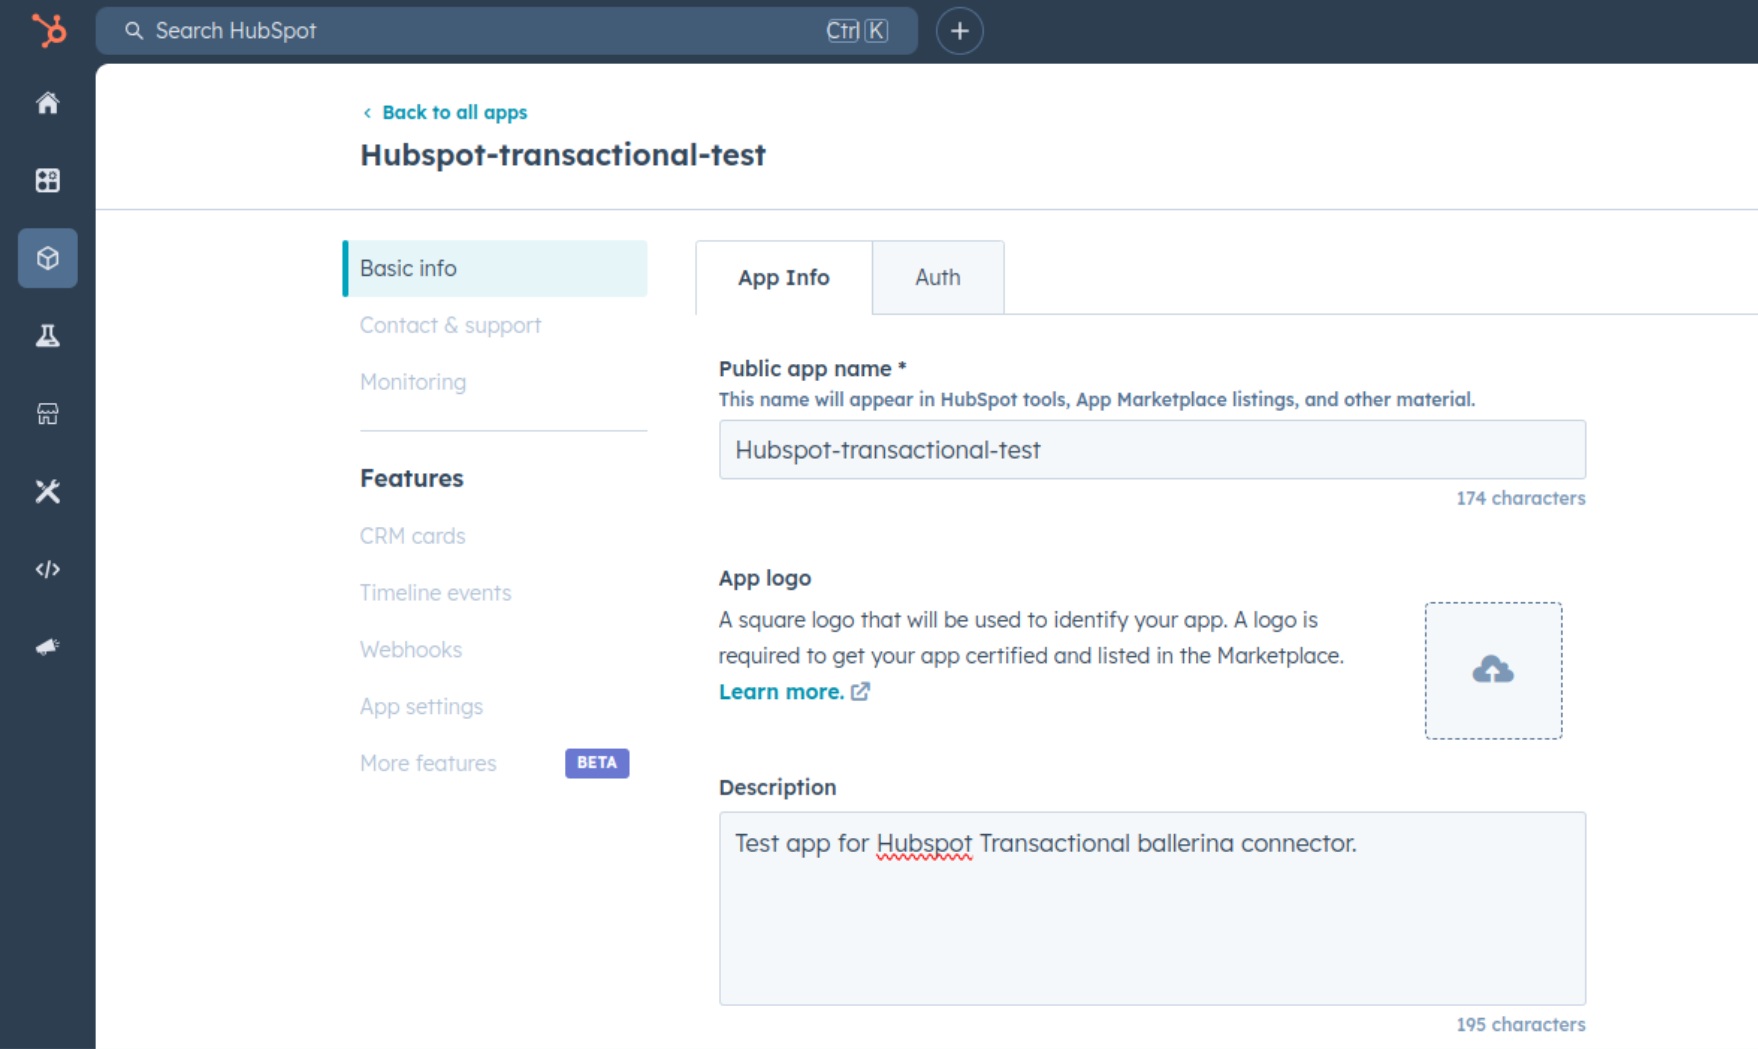
Provide the necessary details, including the app name and description.
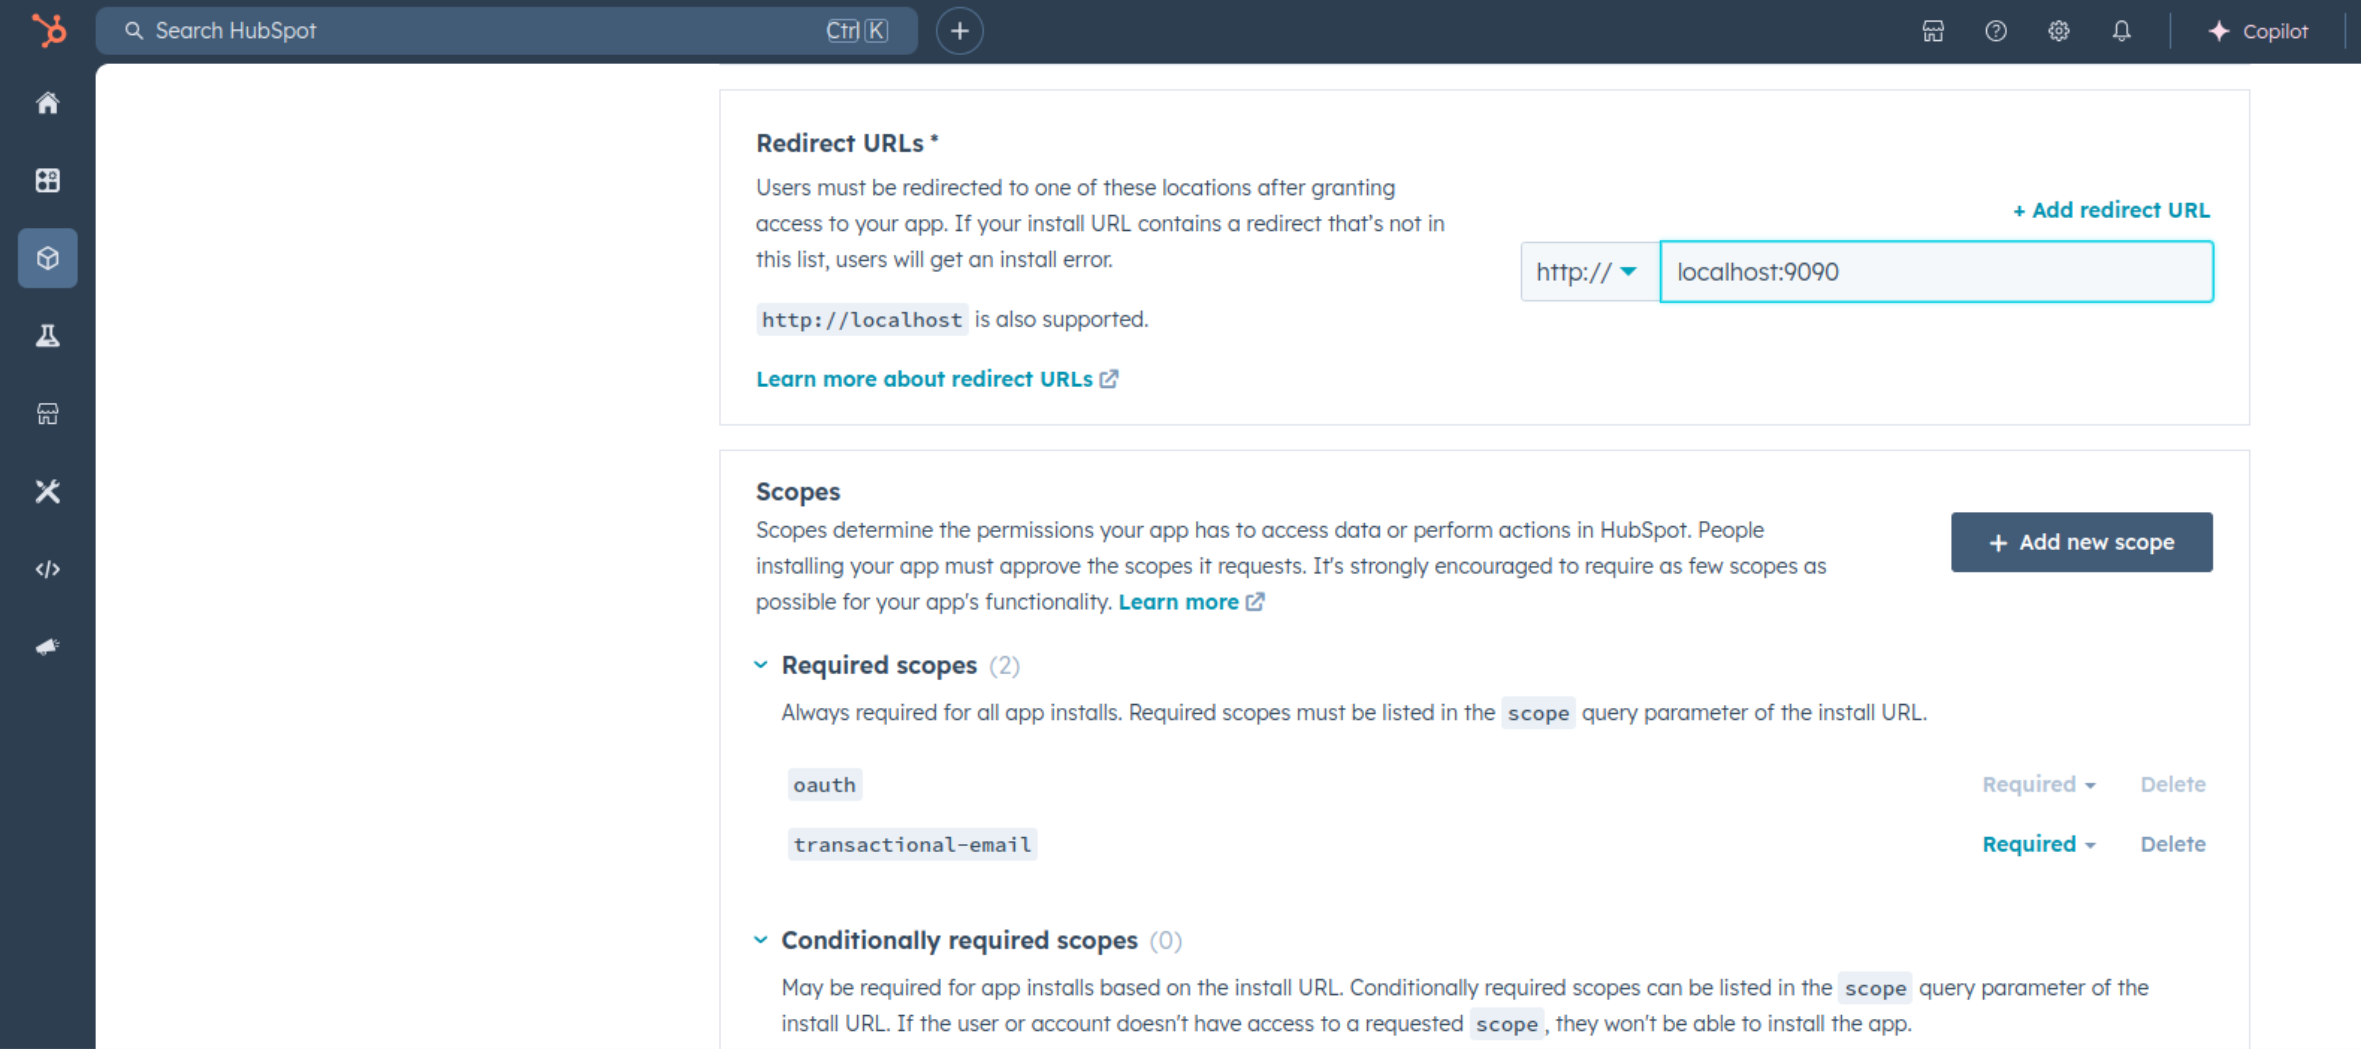
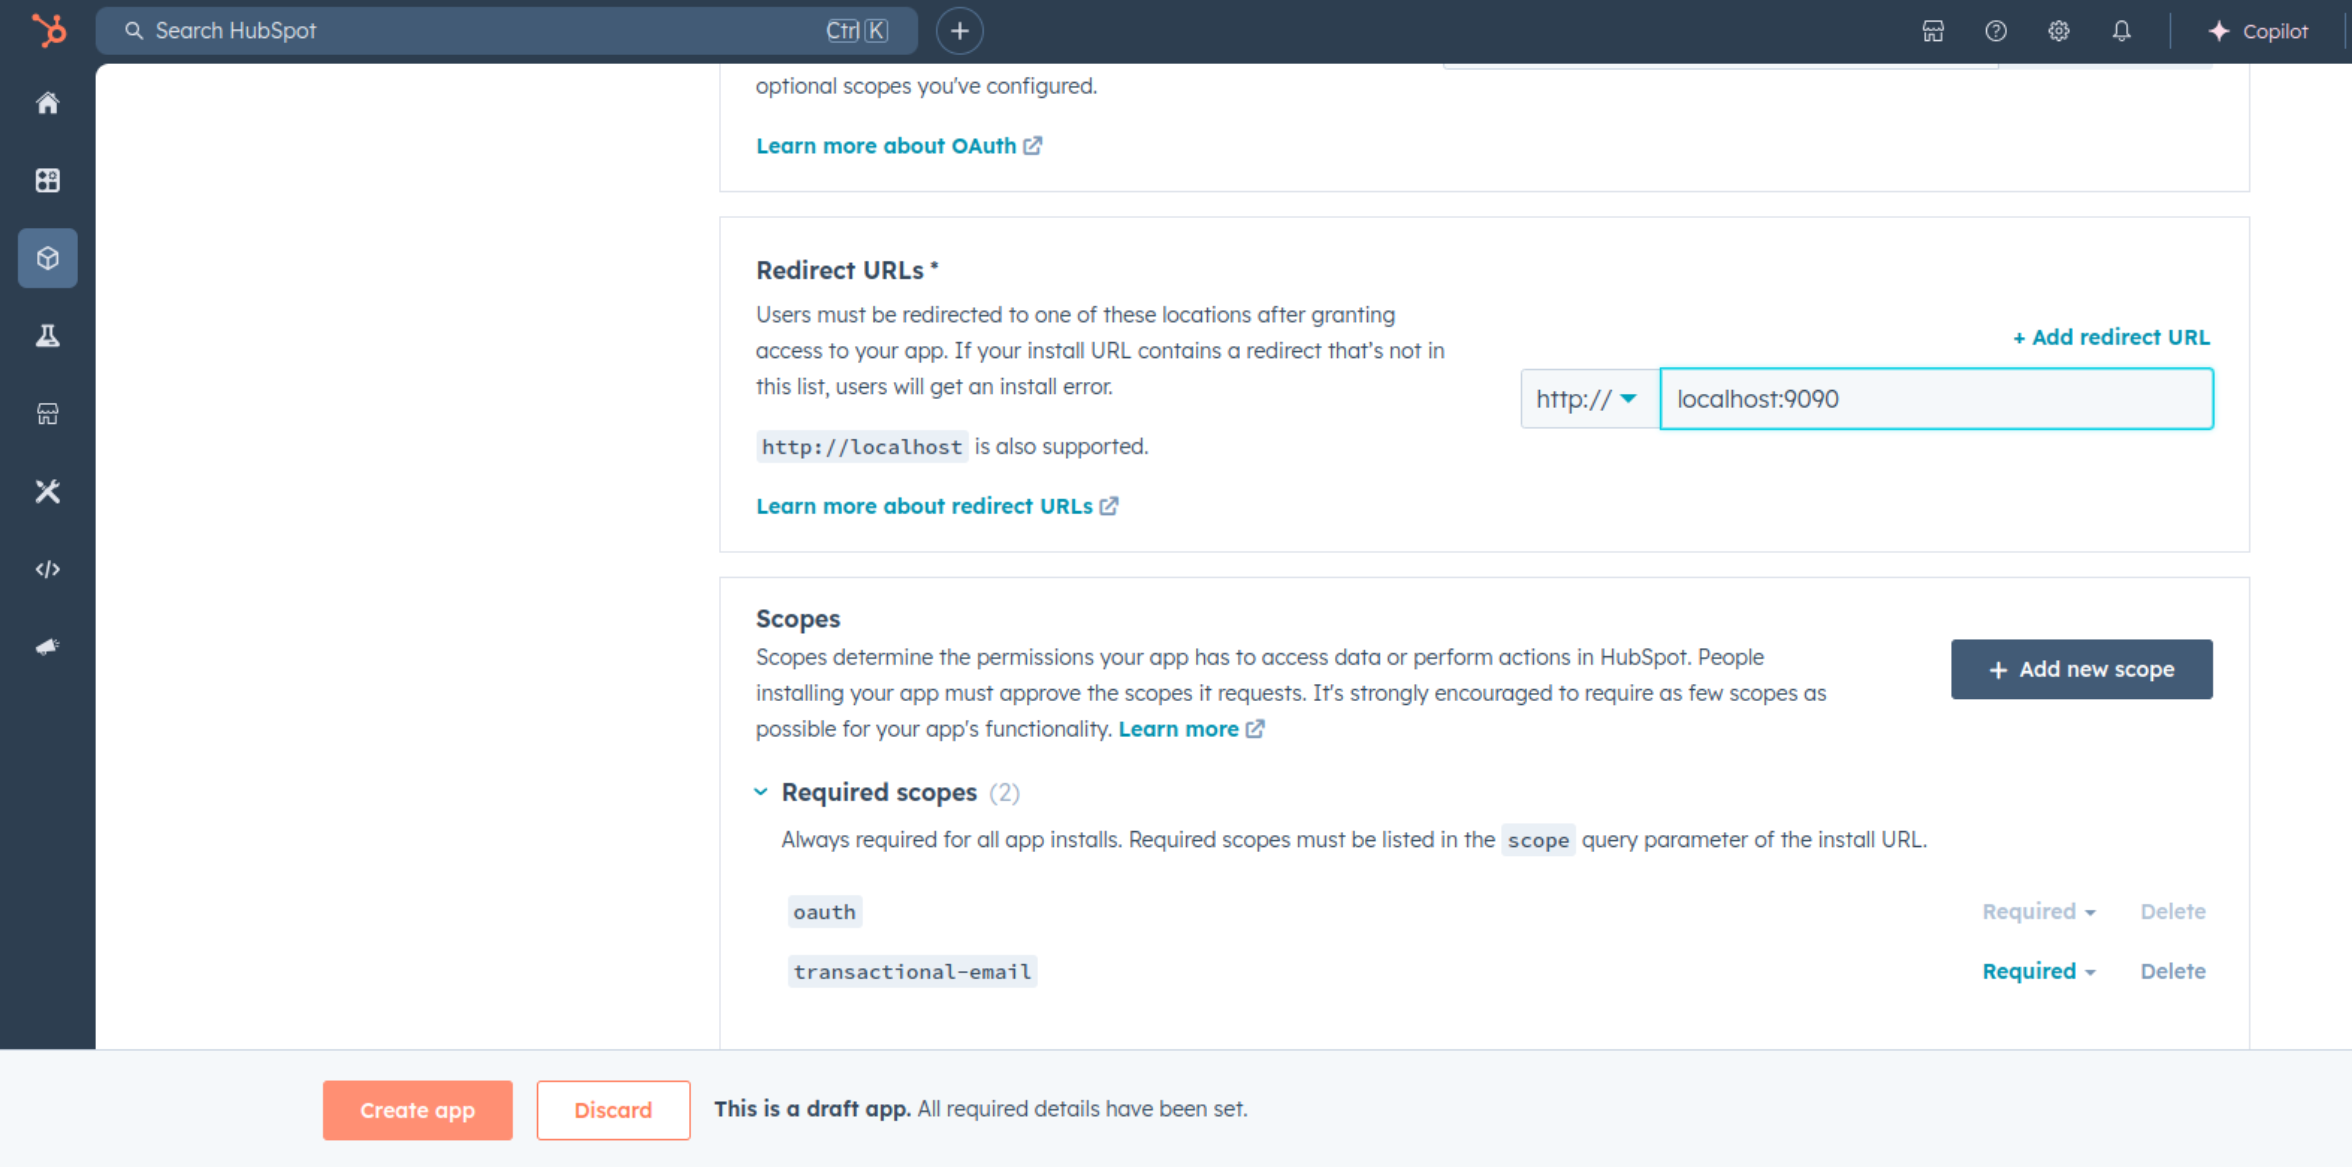
Step 4: Configure the Authentication Flow
-
Move to the Auth Tab.
-
In the Scopes section, add necessary scopes for your app using the "Add new scope" button.
-
Add your Redirect URI in the relevant section. You can also use localhost addresses for local development purposes. Click Create App.
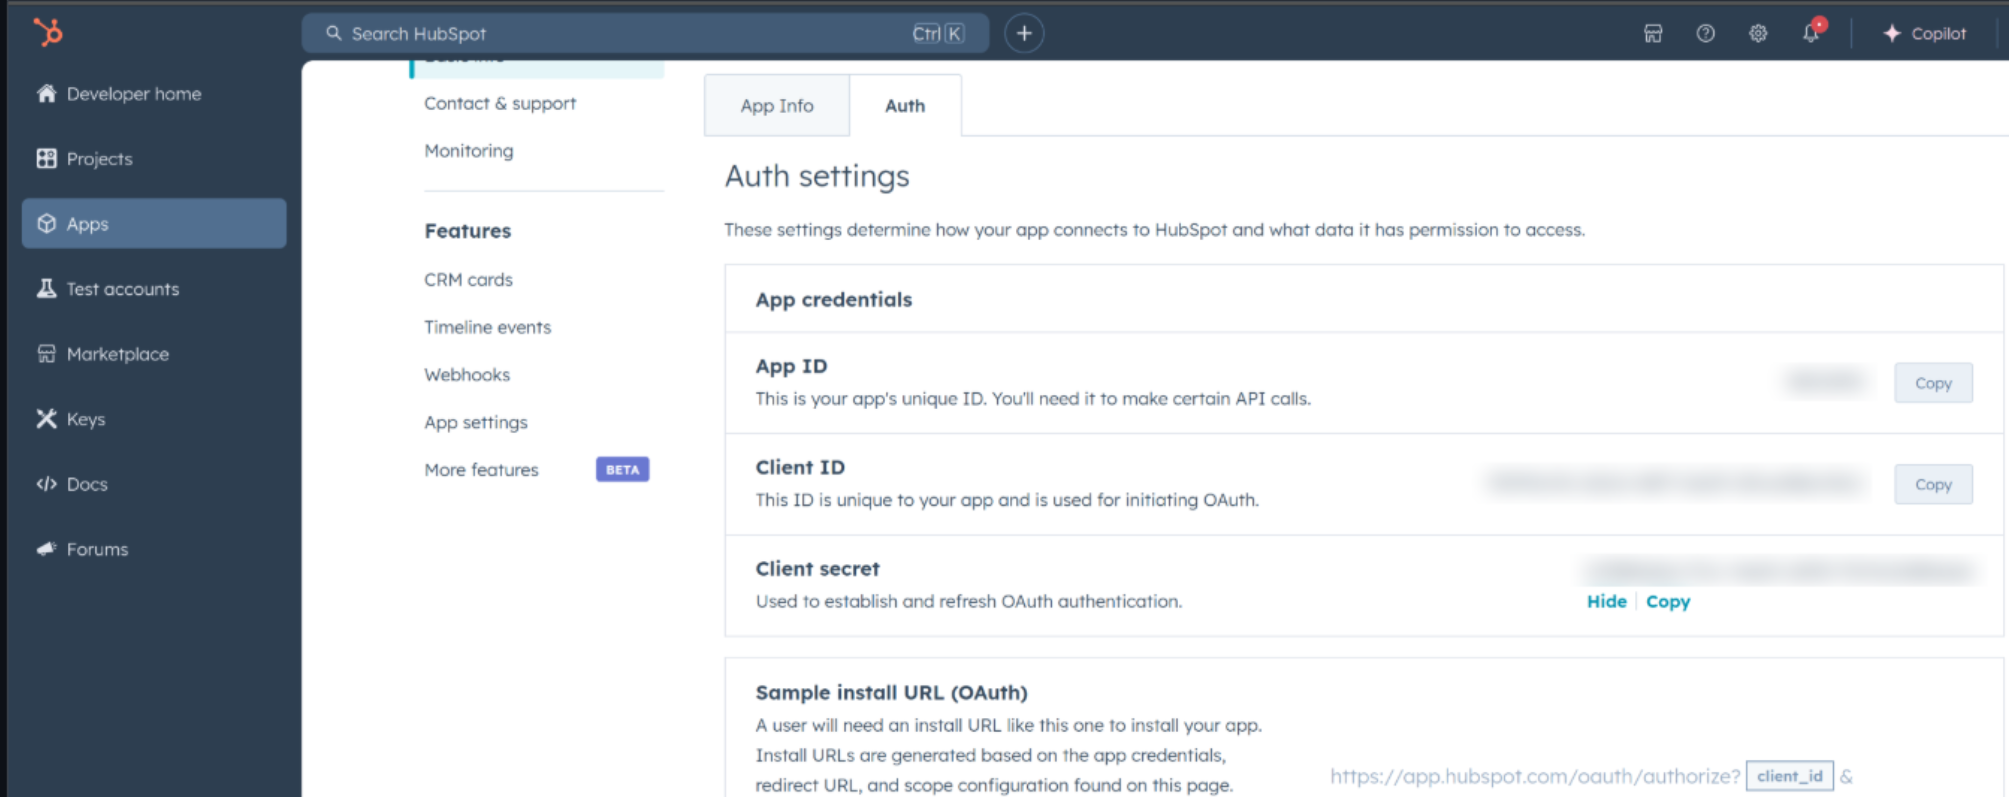
Step 5: Get your Client ID and Client Secret
- Navigate to the Auth section of your app. Make sure to save the provided Client ID and Client Secret.
Step 6: Setup Authentication Flow
Before proceeding with the Quickstart, ensure you have obtained the Access Token using the following steps:
-
Create an authorization URL using the following format:
https://app.hubspot.com/oauth/authorize?client_id=<YOUR_CLIENT_ID>&scope=<YOUR_SCOPES>&redirect_uri=<YOUR_REDIRECT_URI>Replace the
<YOUR_CLIENT_ID>,<YOUR_REDIRECT_URI>and<YOUR_SCOPES>with your specific value. -
Paste it in the browser and select your developer test account to intall the app when prompted.
-
A code will be displayed in the browser. Copy the code.
-
Run the following ballerina program or curl command.
- Linux/MacOS:
curl --request POST \ --url https://api.hubapi.com/oauth/v1/token \ --header 'content-type: application/x-www-form-urlencoded' \ --data 'grant_type=authorization_code&code=<your_authorization_code>&redirect_uri=<your_redirect_url>&client_id=<your_client_id>&client_secret=<your_client_secret>'- Windows:
curl --request POST \ --url https://api.hubapi.com/oauth/v1/token ^ --header 'content-type: application/x-www-form-urlencoded' ^ --data 'grant_type=authorization_code&code=<your_authorization_code>&redirect_uri=<your_redirect_url>&client_id=<your_client_id>&client_secret=<your_client_secret>'This command will return the access token and refresh token necessary for API calls.
{ "token_type": "bearer", "refresh_token": "<Refresh Token>", "access_token": "<Access Token>", "expires_in": 1800 } -
Store the access token securely for use in your application.
Quickstart
To use the HubSpot Transactional Emails connector in your Ballerina application, update the .bal file as follows:
Step 1: Import the module
Import the ballerinax/hubspot.marketing.'transactional module and ballerina/oauth2 module..
import ballerinax/hubspot.marketing.'transactional as hsmtransactional; import ballerina/oauth2;
Step 2: Instantiate a new connector
-
Create a
Config.tomlfile and, configure the obtained credentials obtained in the above steps as follows:clientId = <Client Id> clientSecret = <Client Secret> refreshToken = <Refresh Token> -
Instantiate a
hsmtransactional:OAuth2RefreshTokenGrantConfigwith the obtained credentials and initialize the connector with it.configurable string clientId = ?; configurable string clientSecret = ?; configurable string refreshToken = ?; hsmtransactional:OAuth2RefreshTokenGrantConfig auth = { clientId, clientSecret, refreshToken, credentialBearer: oauth2:POST_BODY_BEARER }; final hsmtransactional:Client hubSpotTransactional = check new ({ auth });
Step 3: Invoke the connector operation
Now, utilize the available connector operations. A sample usecase is shown below.
Create a SMTP API Token
public function main() returns error? { hsmtransactional:SmtpApiTokenRequestEgg payload = { createContact: true, campaignName: "Campaign1" }; hsmtransactional:SmtpApiTokenView response = check hubSpotTransactional->/smtp\-tokens.post(payload); }
Run the Ballerina application
bal run
Examples
The Ballerina HubSpot Marketing Transactional Connector connector provides practical examples illustrating usage in various scenarios. Explore these examples, covering the following use cases:
- Manage Tokens - see how the Hubspot API can be used to create SMTP API token and query it and resetting the password of an existing token.
Clients
hubspot.marketing.transactional: Client
Constructor
Gets invoked to initialize the connector.
init (ConnectionConfig config, string serviceUrl)- config ConnectionConfig - The configurations to be used when initializing the
connector
- serviceUrl string "https://api.hubapi.com/marketing/v3/transactional" - URL of the target service
post single-email/send
function post single\-email/send(PublicSingleSendRequestEgg payload, map<string|string[]> headers) returns EmailSendStatusView|errorSend a single transactional email asynchronously.
Parameters
- payload PublicSingleSendRequestEgg - A request object describing the email to send
Return Type
- EmailSendStatusView|error - successful operation
get smtp-tokens
function get smtp\-tokens(map<string|string[]> headers, *GetMarketingV3TransactionalSmtpTokensGetTokensPageQueries queries) returns CollectionResponseSmtpApiTokenViewForwardPaging|errorQuery SMTP API tokens by campaign name or an emailCampaignId.
Parameters
- queries *GetMarketingV3TransactionalSmtpTokensGetTokensPageQueries - Queries to be sent with the request
Return Type
- CollectionResponseSmtpApiTokenViewForwardPaging|error - successful operation
post smtp-tokens
function post smtp\-tokens(SmtpApiTokenRequestEgg payload, map<string|string[]> headers) returns SmtpApiTokenView|errorCreate a SMTP API token.
Parameters
- payload SmtpApiTokenRequestEgg - A request object that includes the campaign name tied to the token and whether contacts should be created for email recipients
Return Type
- SmtpApiTokenView|error - successful operation
post smtp-tokens/[string tokenId]/password-reset
function post smtp\-tokens/[string tokenId]/password\-reset(map<string|string[]> headers) returns SmtpApiTokenView|errorReset the password of an existing token.
Return Type
- SmtpApiTokenView|error - successful operation
get smtp-tokens/[string tokenId]
function get smtp\-tokens/[string tokenId](map<string|string[]> headers) returns SmtpApiTokenView|errorQuery a single token by ID.
Return Type
- SmtpApiTokenView|error - successful operation
delete smtp-tokens/[string tokenId]
Delete a single token by ID.
Return Type
- error? - No content
Records
hubspot.marketing.transactional: ApiKeysConfig
Provides API key configurations needed when communicating with a remote HTTP endpoint.
Fields
- privateAppLegacy string -
hubspot.marketing.transactional: CollectionResponseSmtpApiTokenViewForwardPaging
Fields
- paging? ForwardPaging -
- results SmtpApiTokenView[] -
hubspot.marketing.transactional: ConnectionConfig
Provides a set of configurations for controlling the behaviours when communicating with a remote HTTP endpoint.
Fields
- auth BearerTokenConfig|OAuth2RefreshTokenGrantConfig|ApiKeysConfig - Provides Auth configurations needed when communicating with a remote HTTP endpoint.
- httpVersion HttpVersion(default http:HTTP_2_0) - The HTTP version understood by the client
- http1Settings ClientHttp1Settings(default {}) - Configurations related to HTTP/1.x protocol
- http2Settings ClientHttp2Settings(default {}) - Configurations related to HTTP/2 protocol
- timeout decimal(default 30) - The maximum time to wait (in seconds) for a response before closing the connection
- forwarded string(default "disable") - The choice of setting
forwarded/x-forwardedheader
- followRedirects? FollowRedirects - Configurations associated with Redirection
- poolConfig? PoolConfiguration - Configurations associated with request pooling
- cache CacheConfig(default {}) - HTTP caching related configurations
- compression Compression(default http:COMPRESSION_AUTO) - Specifies the way of handling compression (
accept-encoding) header
- circuitBreaker? CircuitBreakerConfig - Configurations associated with the behaviour of the Circuit Breaker
- retryConfig? RetryConfig - Configurations associated with retrying
- responseLimits ResponseLimitConfigs(default {}) - Configurations associated with inbound response size limits
- secureSocket? ClientSecureSocket - SSL/TLS-related options
- proxy? ProxyConfig - Proxy server related options
- socketConfig ClientSocketConfig(default {}) - Provides settings related to client socket configuration
- validation boolean(default true) - Enables the inbound payload validation functionality which provided by the constraint package. Enabled by default
- laxDataBinding boolean(default true) - Enables relaxed data binding on the client side. When enabled,
nilvalues are treated as optional, and absent fields are handled asnilabletypes. Enabled by default.
hubspot.marketing.transactional: EmailSendStatusView
Describes the status of an email send request
Fields
- eventId? EventIdView - The ID of a send event
- completedAt? string - Time when the send was completed
- statusId string - Identifier used to query the status of the send
- sendResult? "SENT"|"IDEMPOTENT_IGNORE"|"QUEUED"|"IDEMPOTENT_FAIL"|"THROTTLED"|"EMAIL_DISABLED"|"PORTAL_SUSPENDED"|"INVALID_TO_ADDRESS"|"BLOCKED_DOMAIN"|"PREVIOUSLY_BOUNCED"|"EMAIL_UNCONFIRMED"|"PREVIOUS_SPAM"|"PREVIOUSLY_UNSUBSCRIBED_MESSAGE"|"PREVIOUSLY_UNSUBSCRIBED_PORTAL"|"INVALID_FROM_ADDRESS"|"CAMPAIGN_CANCELLED"|"VALIDATION_FAILED"|"MTA_IGNORE"|"BLOCKED_ADDRESS"|"PORTAL_OVER_LIMIT"|"PORTAL_EXPIRED"|"PORTAL_MISSING_MARKETING_SCOPE"|"MISSING_TEMPLATE_PROPERTIES"|"MISSING_REQUIRED_PARAMETER"|"PORTAL_AUTHENTICATION_FAILURE"|"MISSING_CONTENT"|"CORRUPT_INPUT"|"TEMPLATE_RENDER_EXCEPTION"|"GRAYMAIL_SUPPRESSED"|"UNCONFIGURED_SENDING_DOMAIN"|"UNDELIVERABLE"|"CANCELLED_ABUSE"|"QUARANTINED_ADDRESS"|"ADDRESS_ONLY_ACCEPTED_ON_PROD"|"PORTAL_NOT_AUTHORIZED_FOR_APPLICATION"|"ADDRESS_LIST_BOMBED"|"ADDRESS_OPTED_OUT"|"RECIPIENT_FATIGUE_SUPPRESSED"|"TOO_MANY_RECIPIENTS"|"PREVIOUSLY_UNSUBSCRIBED_BRAND"|"NON_MARKETABLE_CONTACT"|"PREVIOUSLY_UNSUBSCRIBED_BUSINESS_UNIT"|"GDPR_DOI_ENABLED" - Result of the send
- requestedAt? string - Time when the send was requested
- startedAt? string - Time when the send began processing
- status "PENDING"|"PROCESSING"|"CANCELED"|"COMPLETE" - Status of the send request
hubspot.marketing.transactional: EventIdView
The ID of a send event
Fields
- created string - Time of event creation
- id string - Identifier of event
hubspot.marketing.transactional: ForwardPaging
Fields
- next? NextPage -
hubspot.marketing.transactional: GetMarketingV3TransactionalSmtpTokensGetTokensPageQueries
Represents the Queries record for the operation: get-/marketing/v3/transactional/smtp-tokens_getTokensPage
Fields
- 'limit? Signed32 - Maximum number of tokens to return
- emailCampaignId? string - Identifier assigned to the campaign provided during the token creation
- after? string - Starting point to get the next set of results
- campaignName? string - A name for the campaign tied to the SMTP API token
hubspot.marketing.transactional: NextPage
Fields
- link? string -
- after string -
hubspot.marketing.transactional: OAuth2RefreshTokenGrantConfig
OAuth2 Refresh Token Grant Configs
Fields
- Fields Included from *OAuth2RefreshTokenGrantConfig
- refreshUrl string(default "https://api.hubapi.com/oauth/v1/token") - Refresh URL
hubspot.marketing.transactional: PublicSingleSendEmail
A JSON object containing anything you want to override
Fields
- cc? string[] - List of email addresses to send as Cc
- sendId? string - ID for a particular send. No more than one email will be sent per sendId
- bcc? string[] - List of email addresses to send as Bcc
- replyTo? string[] - List of Reply-To header values for the email
- 'from? string - The From header for the email
- to string - The recipient of the email
hubspot.marketing.transactional: PublicSingleSendRequestEgg
A request to send a single transactional email asynchronously
Fields
- customProperties? record { record {}... } - The customProperties field is a map of property values. Each property value contains a name and value property. Each property will be visible in the template under {{ custom.NAME }}. Note: Custom properties do not currently support arrays. To provide a listing in an email, one workaround is to build an HTML list (either with tables or ul) and specify it as a custom property
- emailId Signed32 - The content ID for the transactional email, which can be found in email tool UI
- message PublicSingleSendEmail - A JSON object containing anything you want to override
- contactProperties? record { string... } - The contactProperties field is a map of contact property values. Each contact property value contains a name and value property. Each property will get set on the contact record and will be visible in the template under {{ contact.NAME }}. Use these properties when you want to set a contact property while you’re sending the email. For example, when sending a reciept you may want to set a last_paid_date property, as the sending of the receipt will have information about the last payment
hubspot.marketing.transactional: SmtpApiTokenRequestEgg
A request object to create a SMTP API token
Fields
- createContact boolean - Indicates whether a contact should be created for email recipients
- campaignName string - A name for the campaign tied to the SMTP API token
hubspot.marketing.transactional: SmtpApiTokenView
A SMTP API token provides both an ID and password that can be used to send email through the HubSpot SMTP API
Fields
- createdAt string - Timestamp generated when a token is created
- password? string - Password used to log into the HubSpot SMTP server
- createdBy string - Email address of the user that sent the token creation request
- createContact boolean - Indicates whether a contact should be created for email recipients
- id string - User name to log into the HubSpot SMTP server
- emailCampaignId string - Identifier assigned to the campaign provided in the token creation request
- campaignName string - A name for the campaign tied to the token