Module hubspot.crm.obj.feedback

ballerinax/hubspot.crm.obj.feedback Ballerina library
Overview
HubSpot is an AI-powered customer relationship management (CRM) platform.
The ballerinax/hubspot.crm.obj.feedback offers APIs to connect and interact with the HubSpot Feedback Submission API endpoints, specifically based on the HubSpot REST API.
Note: This package may be changed in the future based on the HubSpot API changes, since it is currently under development and is subject to change based on testing and feedback. By using this package, you are agreeing to accept any future changes that might occur and understand the risk associated with testing an unstable API. Refer to the HubSpot Developer Terms & Developer Beta Terms for more information.
The feedback submissions endpoints are currently read only. Feedback submissions cannot be submitted or edited through the API.
Setup guide
To use the HubSpot Feedback connector, you must have access to the HubSpot API through a HubSpot developer account and a HubSpot App under it. Therefore you need to register for a developer account at HubSpot if you don't have one already.
Step 1: Create/Login to a HubSpot Developer Account
If you have an account already, go to the HubSpot developer portal
If you don't have a HubSpot Developer Account you can sign up to a free account here
Step 2 (Optional): Create a Developer Test Account
Within app developer accounts, you can create a developer test account under your account to test apps and integrations without affecting any real HubSpot data.
Note: These accounts are only for development and testing purposes. In production you should not use Developer Test Accounts.
-
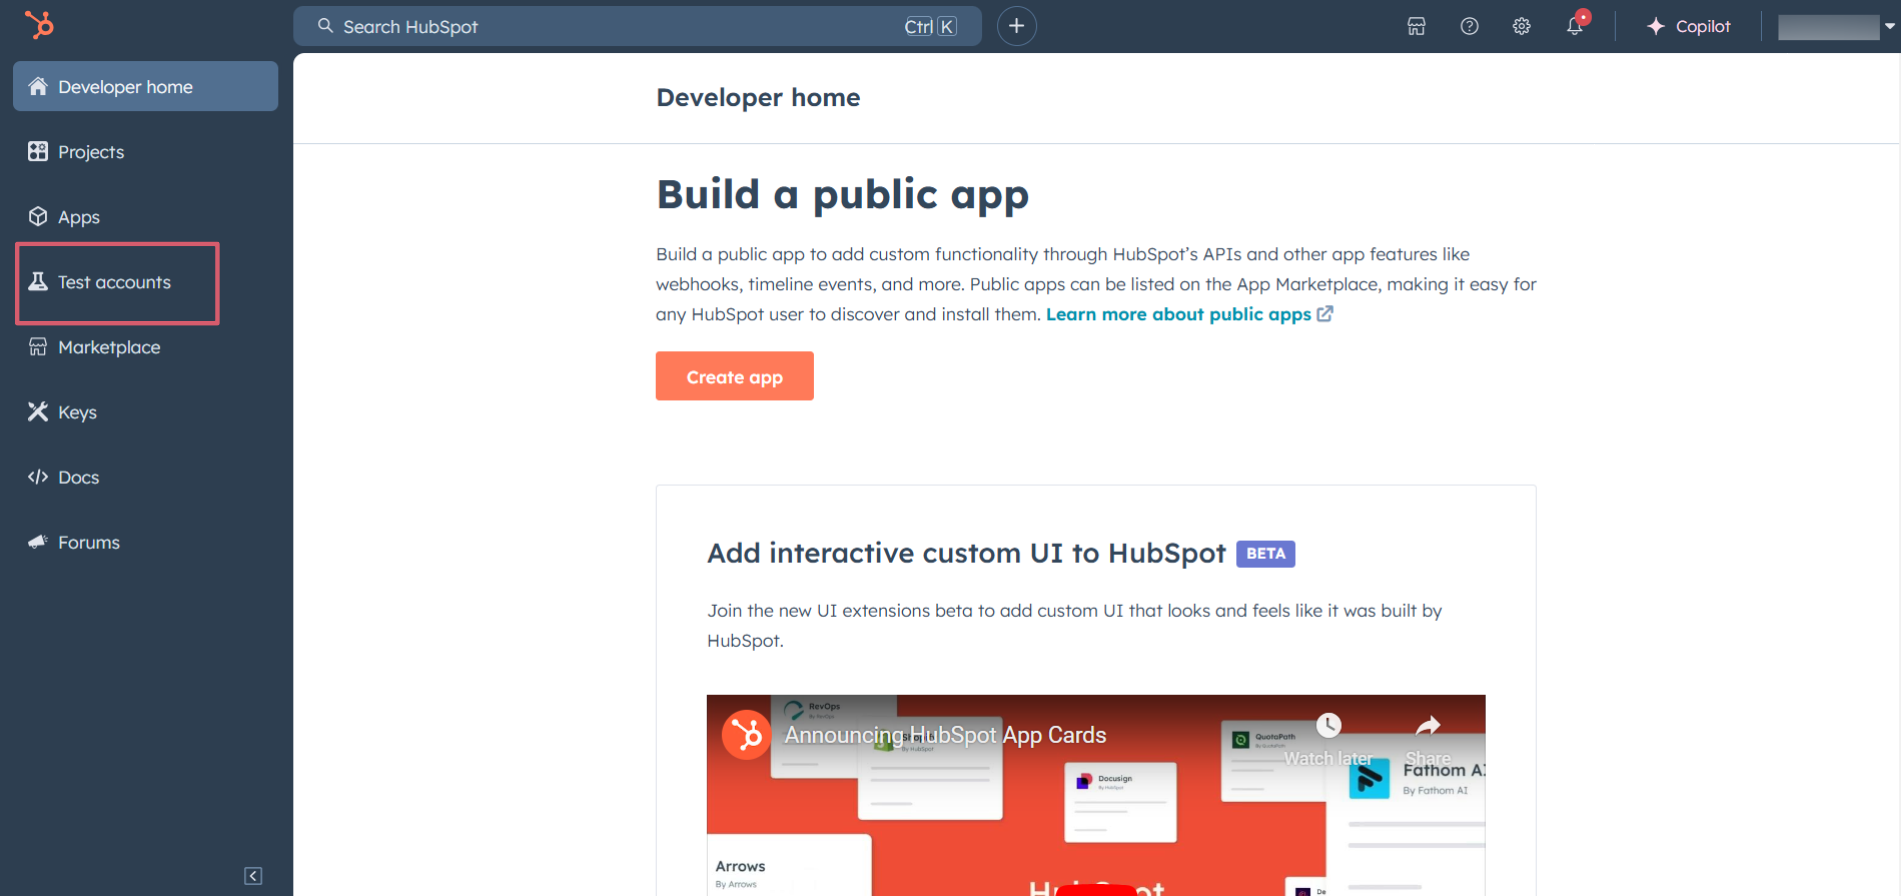
Go to the Test accounts section from the left sidebar.
-
Click on the
Create developer test accountbutton on the top right corner.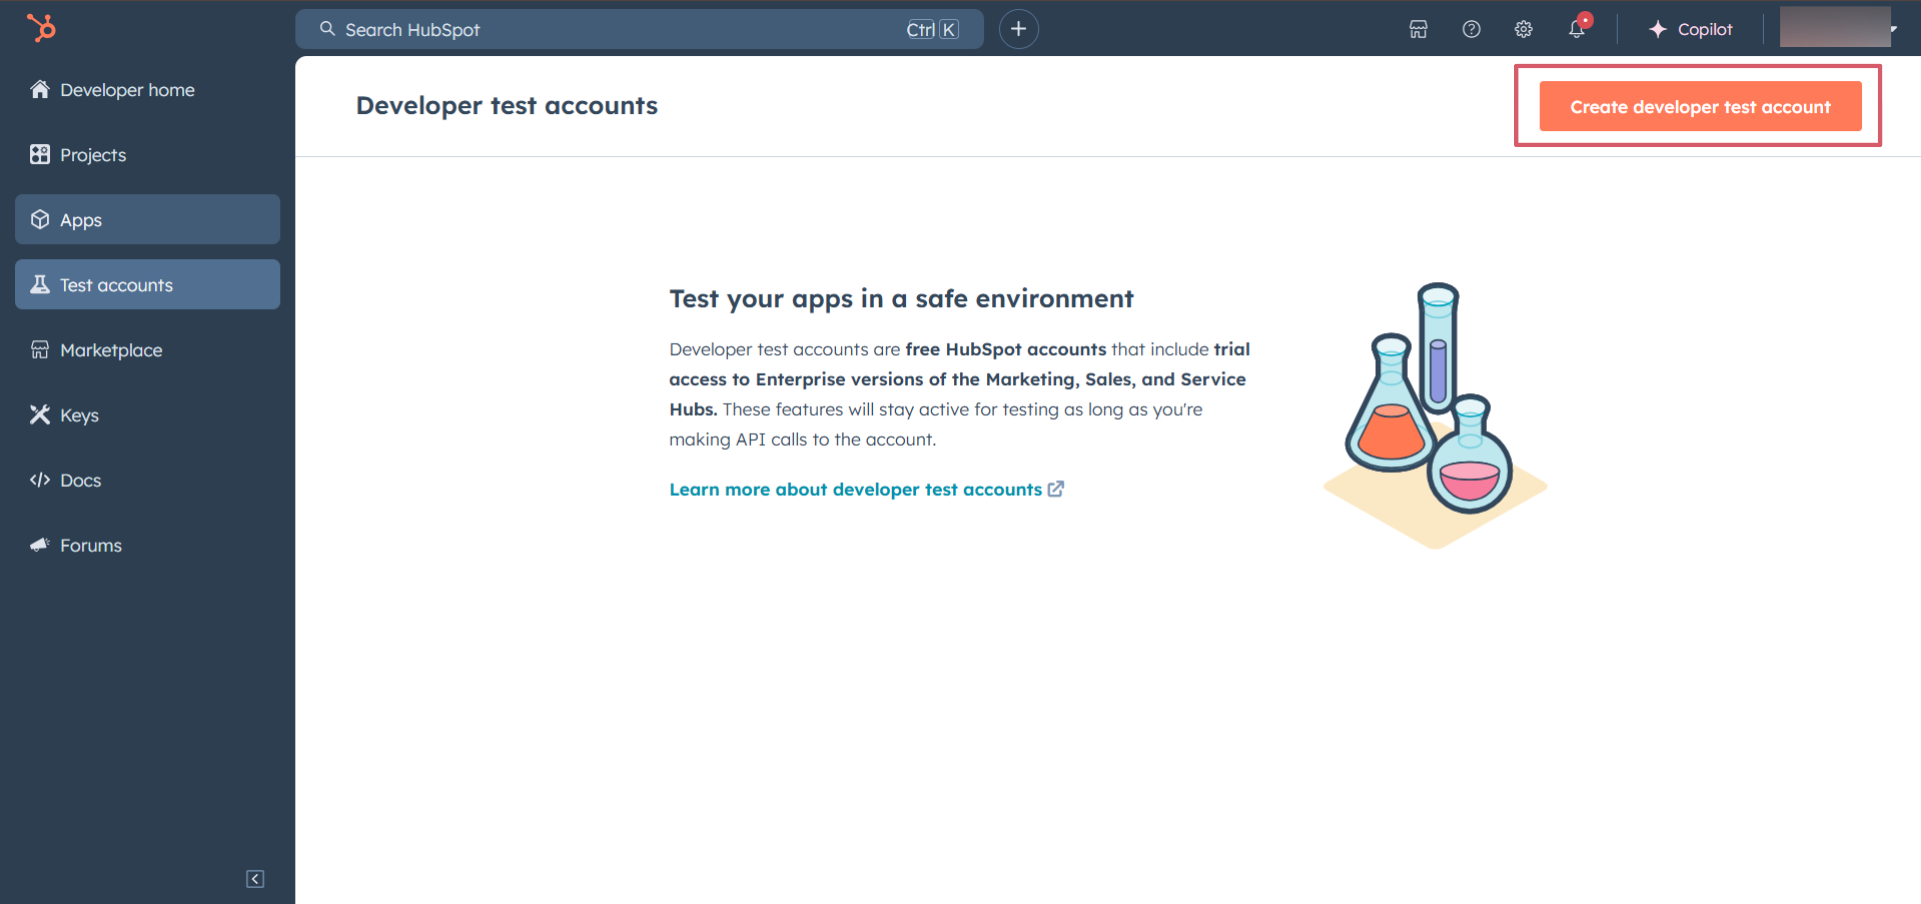
-
In the pop-up window, provide a name for the test account and click on the
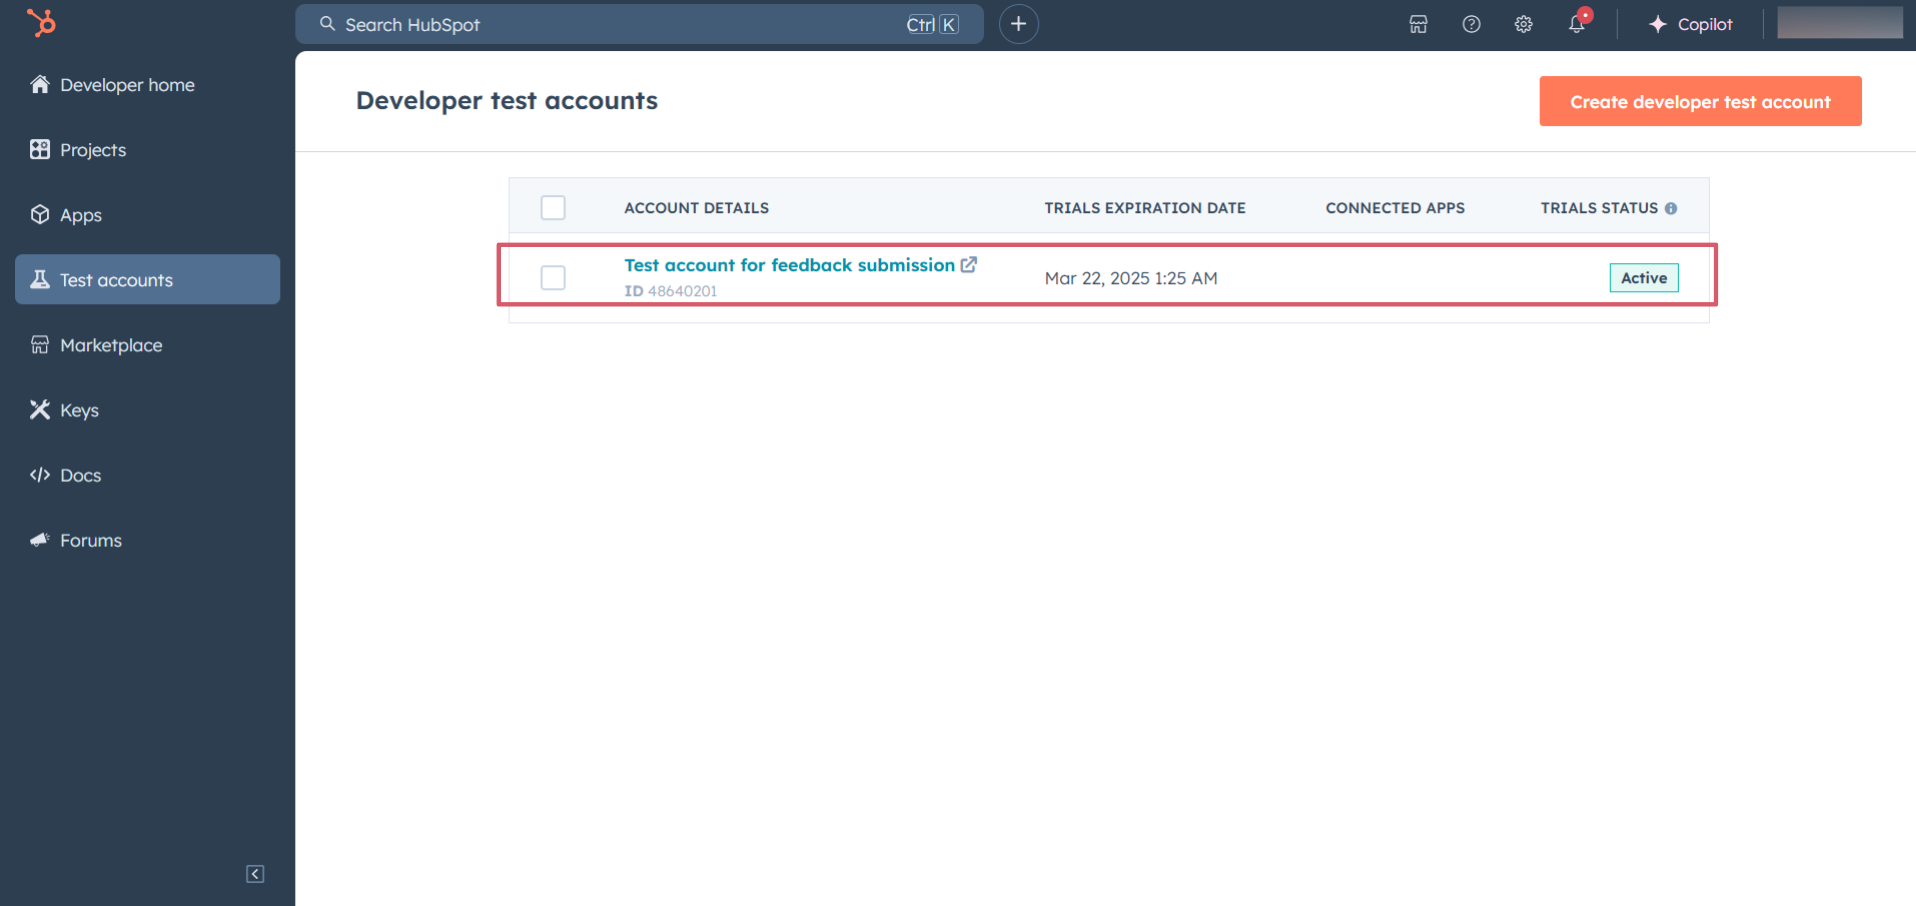
Createbutton. You will see the newly created test account in the list of test accounts.
Step 3: Create a HubSpot App
-
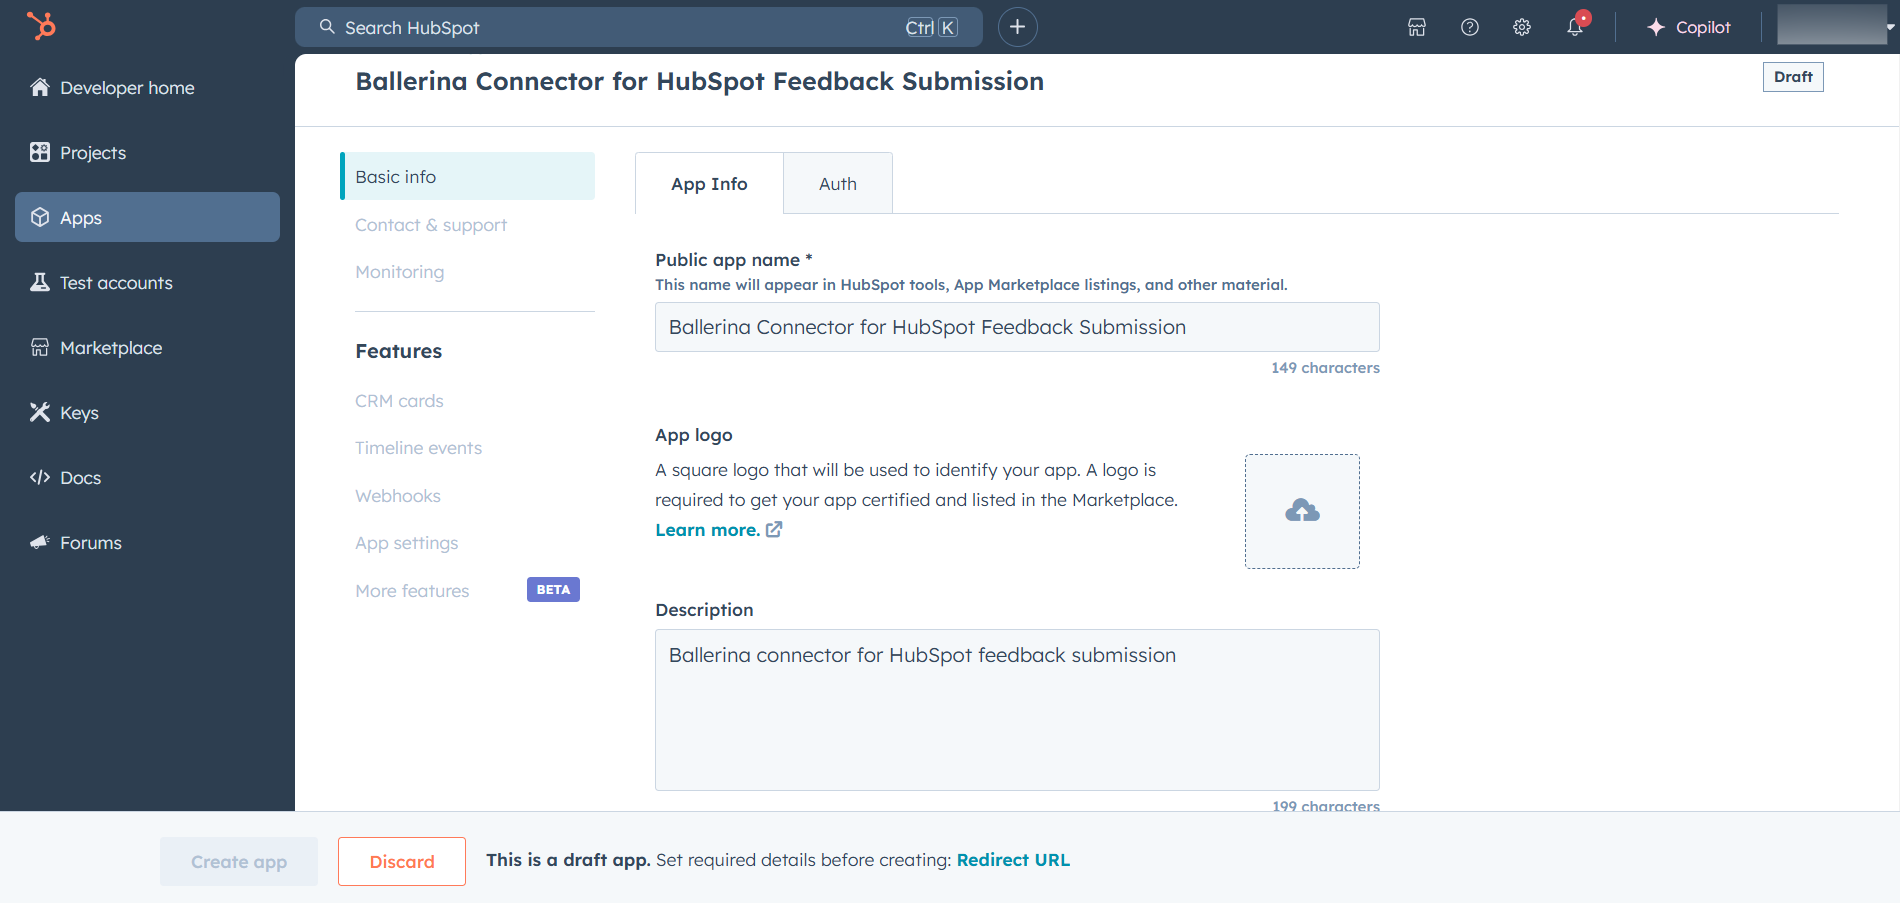
Now navigate to the
Appssection from the left sidebar and click on theCreate appbutton on the top right corner.
-
Provide a public app name and description for your app.
Step 4: Setup Authentication
-
Move to the
Authtab.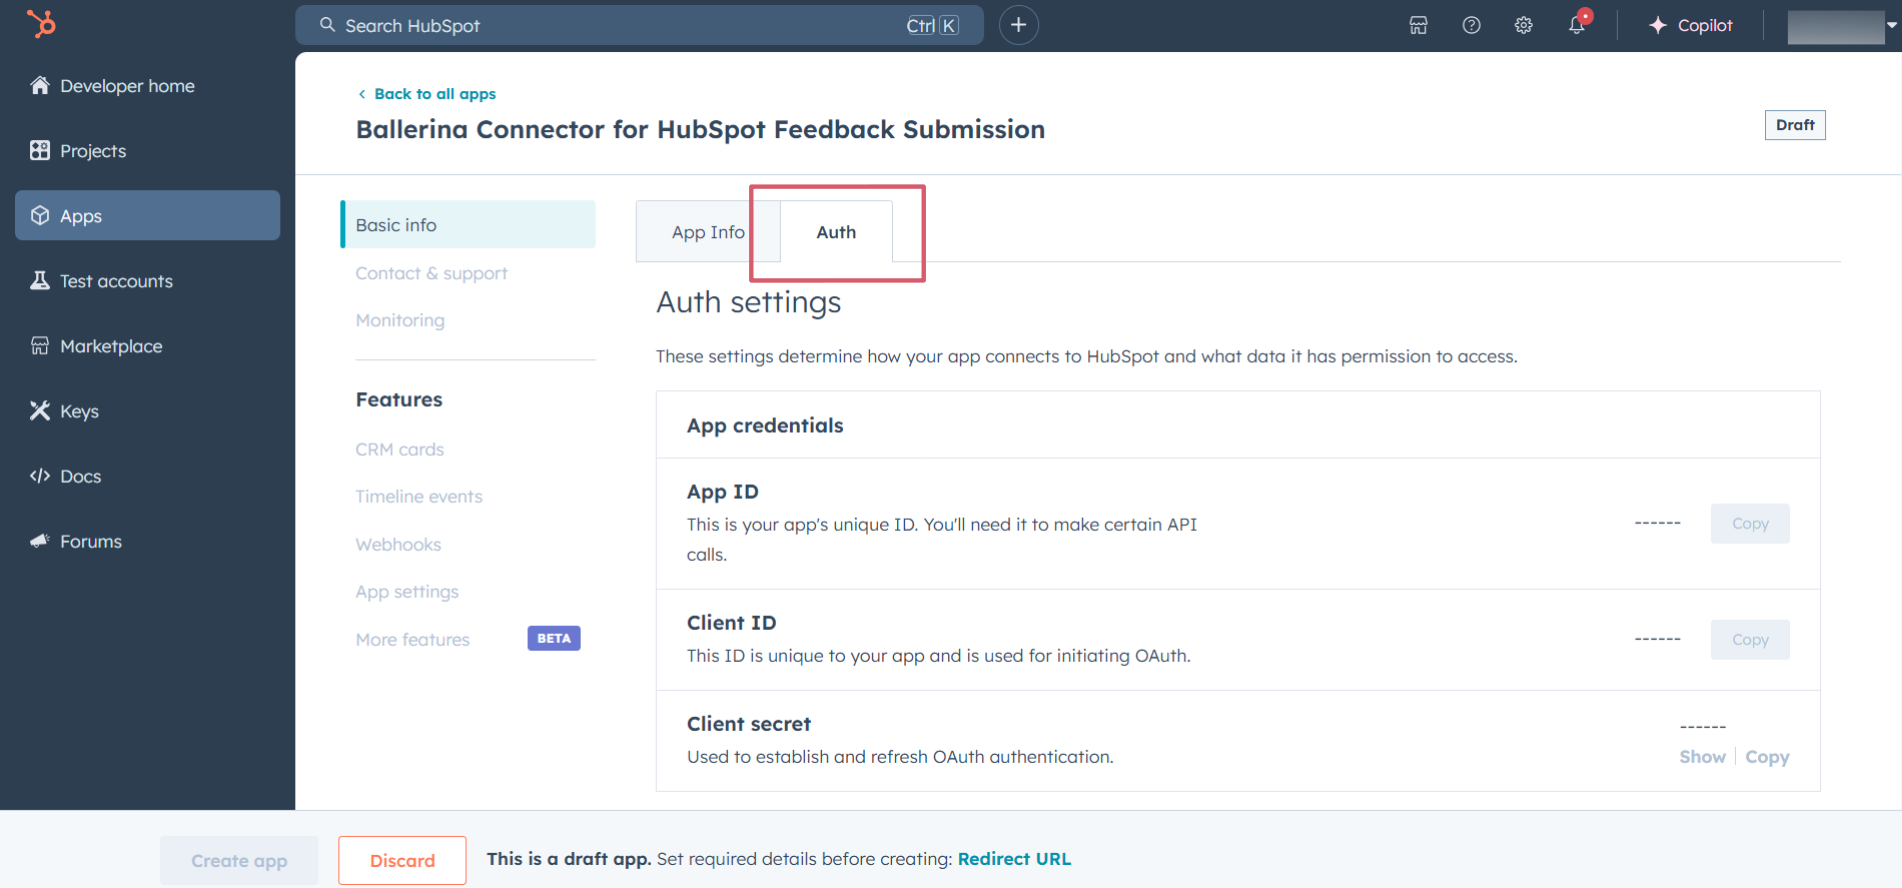
-
In the
Scopessection, add the following scopes for your app using theAdd new scopesbutton.e-commerceticketscrm.objects.goals.readmedia_bridge.readcrm.objects.custom.readcrm.objects.custom.writecrm.objects.feedback_submissions.read
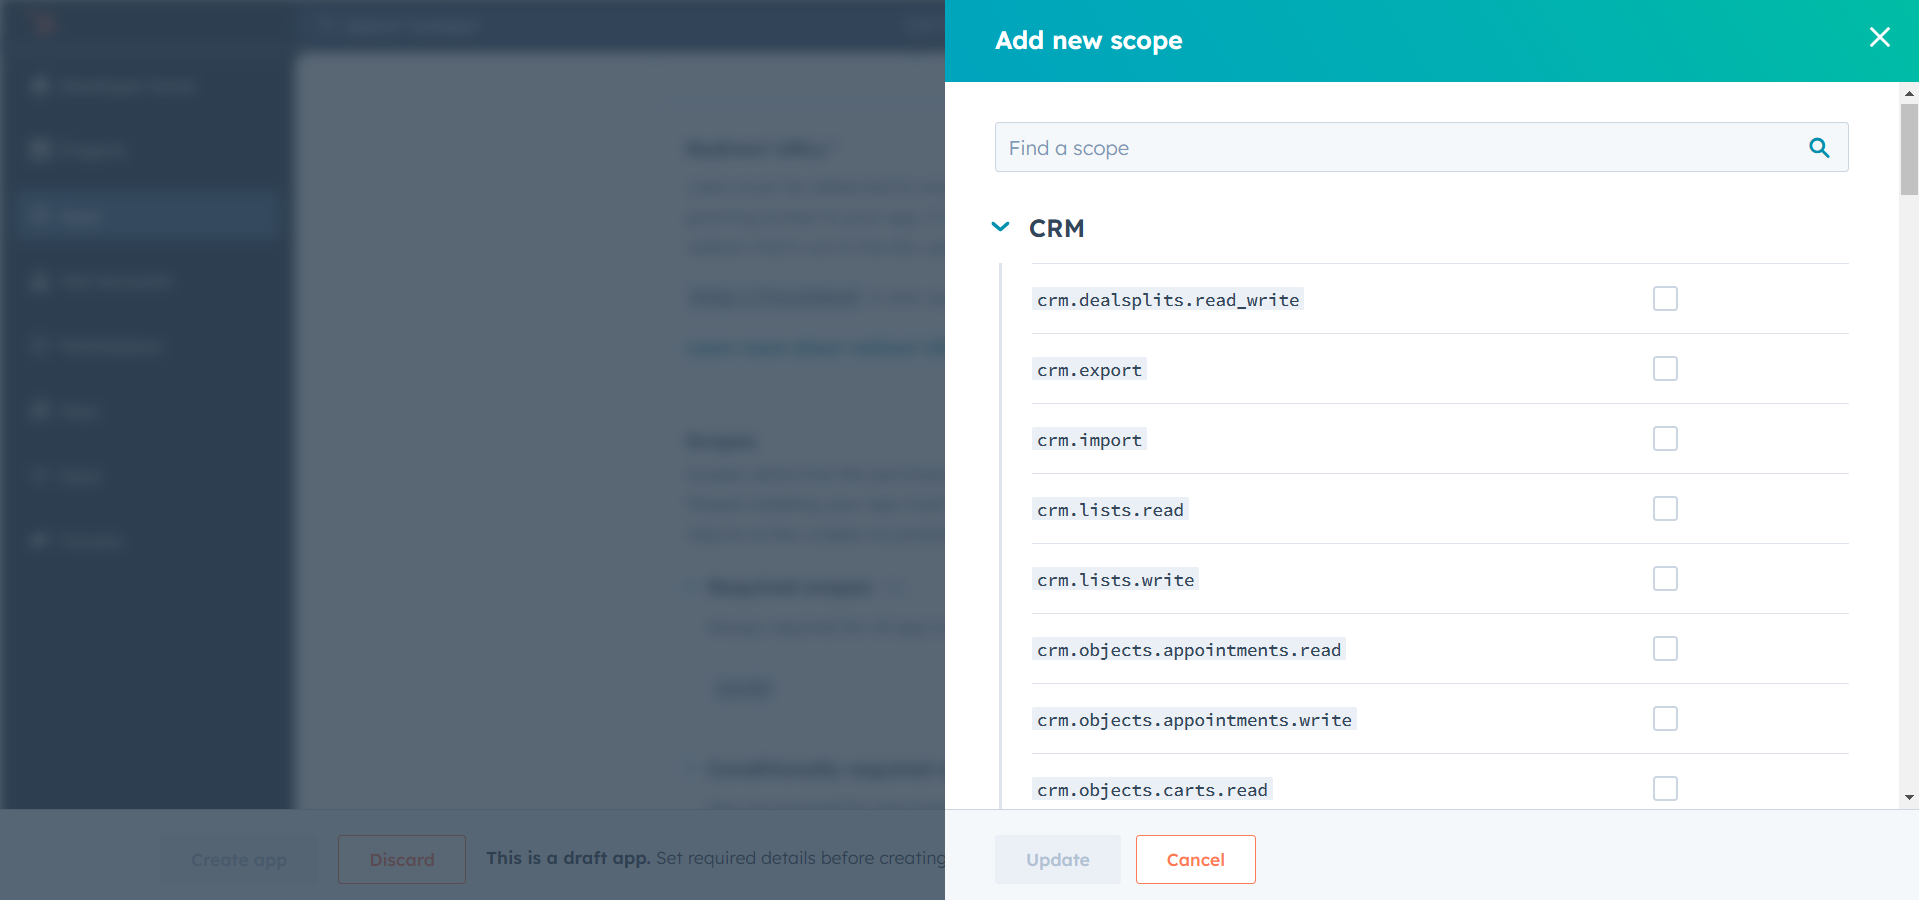
-
In the
Redirect URLsection, add the redirect URL for your app. This is the URL where the user will be redirected after the authentication process. You can uselocalhostfor testing purposes. Then click theCreate Appbutton.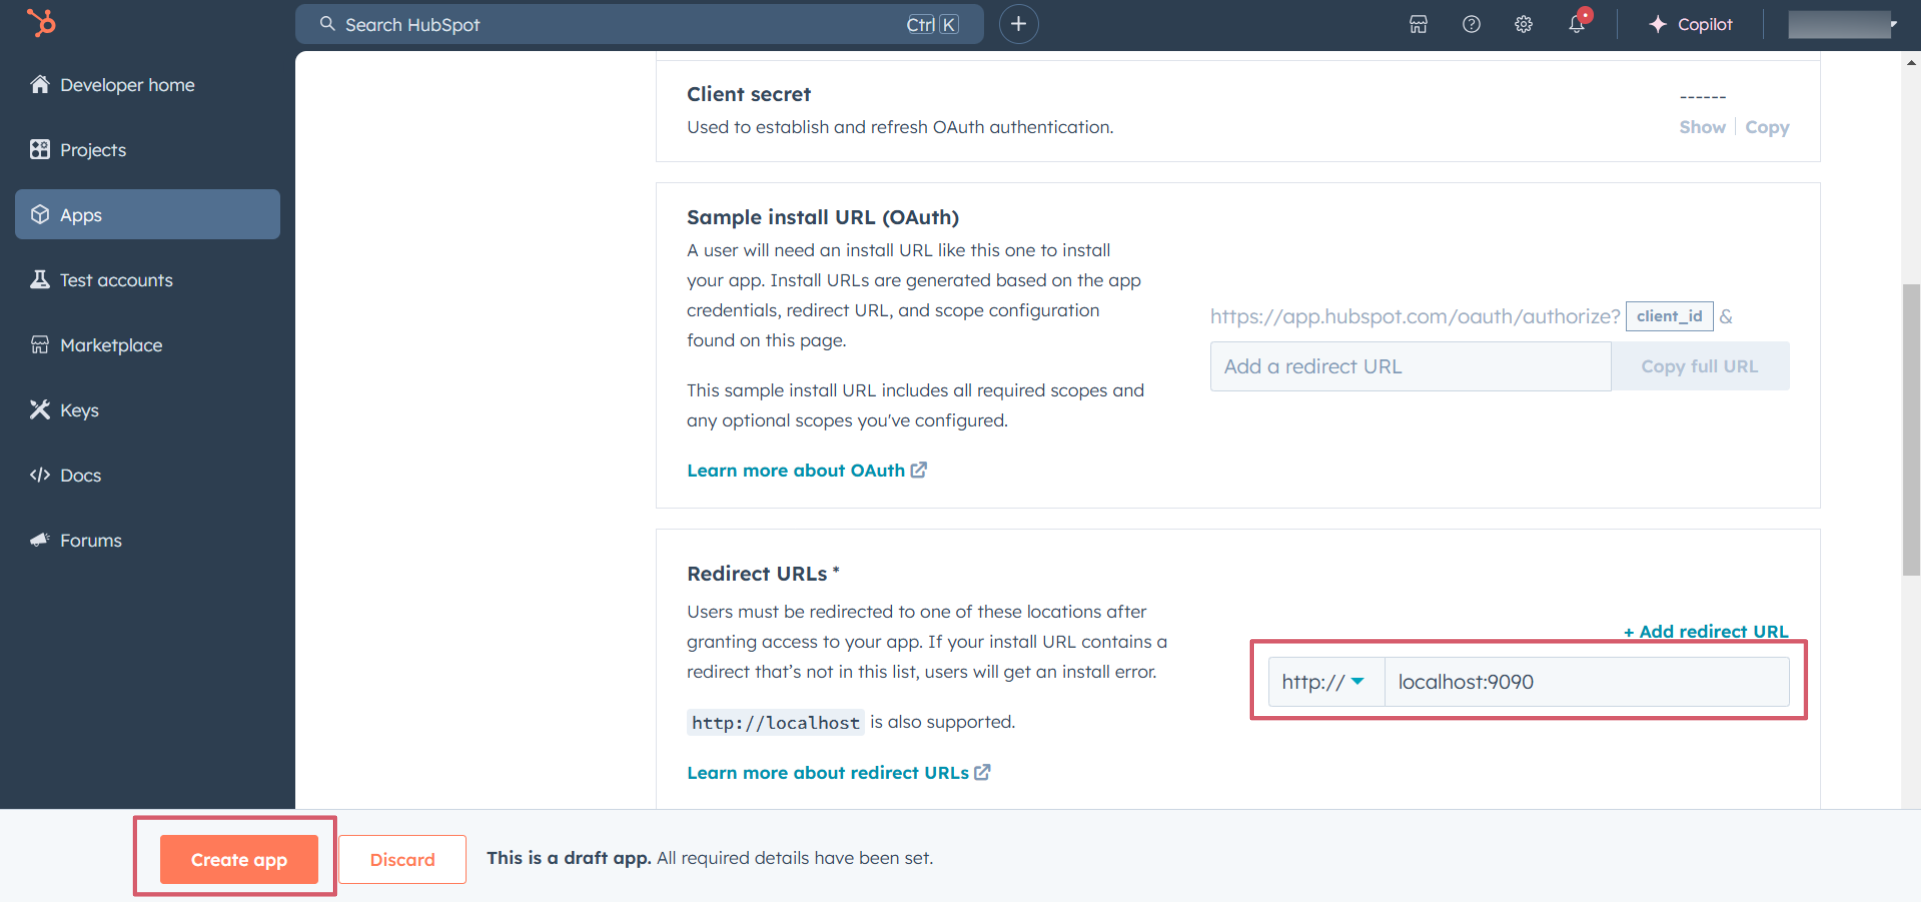
Step 5: Get the Client ID and Client Secret
Navigate to the Auth tab and you will see the Client ID and Client Secret for your app. Make sure to save these values.
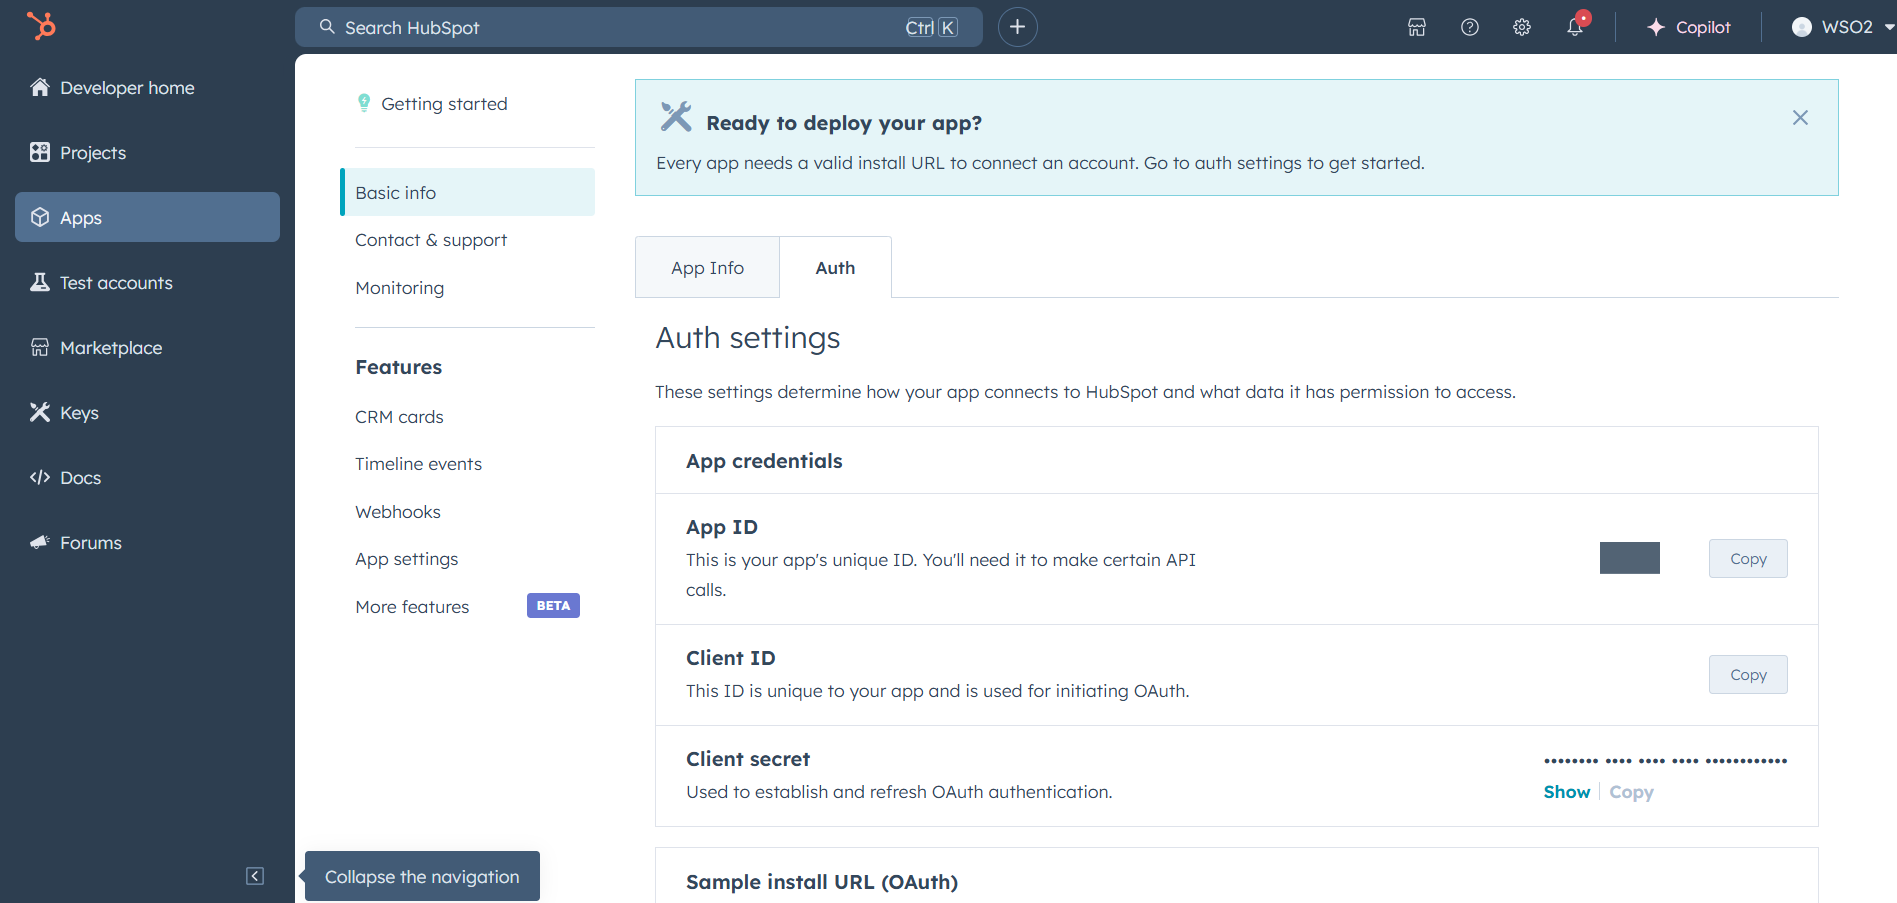
Step 6: Setup Authentication Flow
Before proceeding with the Quickstart, ensure you have obtained the Access Token or Refresh Token using the following steps:
-
Create an authorization URL using the following format:
https://app.hubspot.com/oauth/authorize?client_id=<YOUR_CLIENT_ID>&scope=<YOUR_SCOPES>&redirect_uri=<YOUR_REDIRECT_URI>Replace the
<YOUR_CLIENT_ID>,<YOUR_REDIRECT_URI>and<YOUR_SCOPES>with your specific value. -
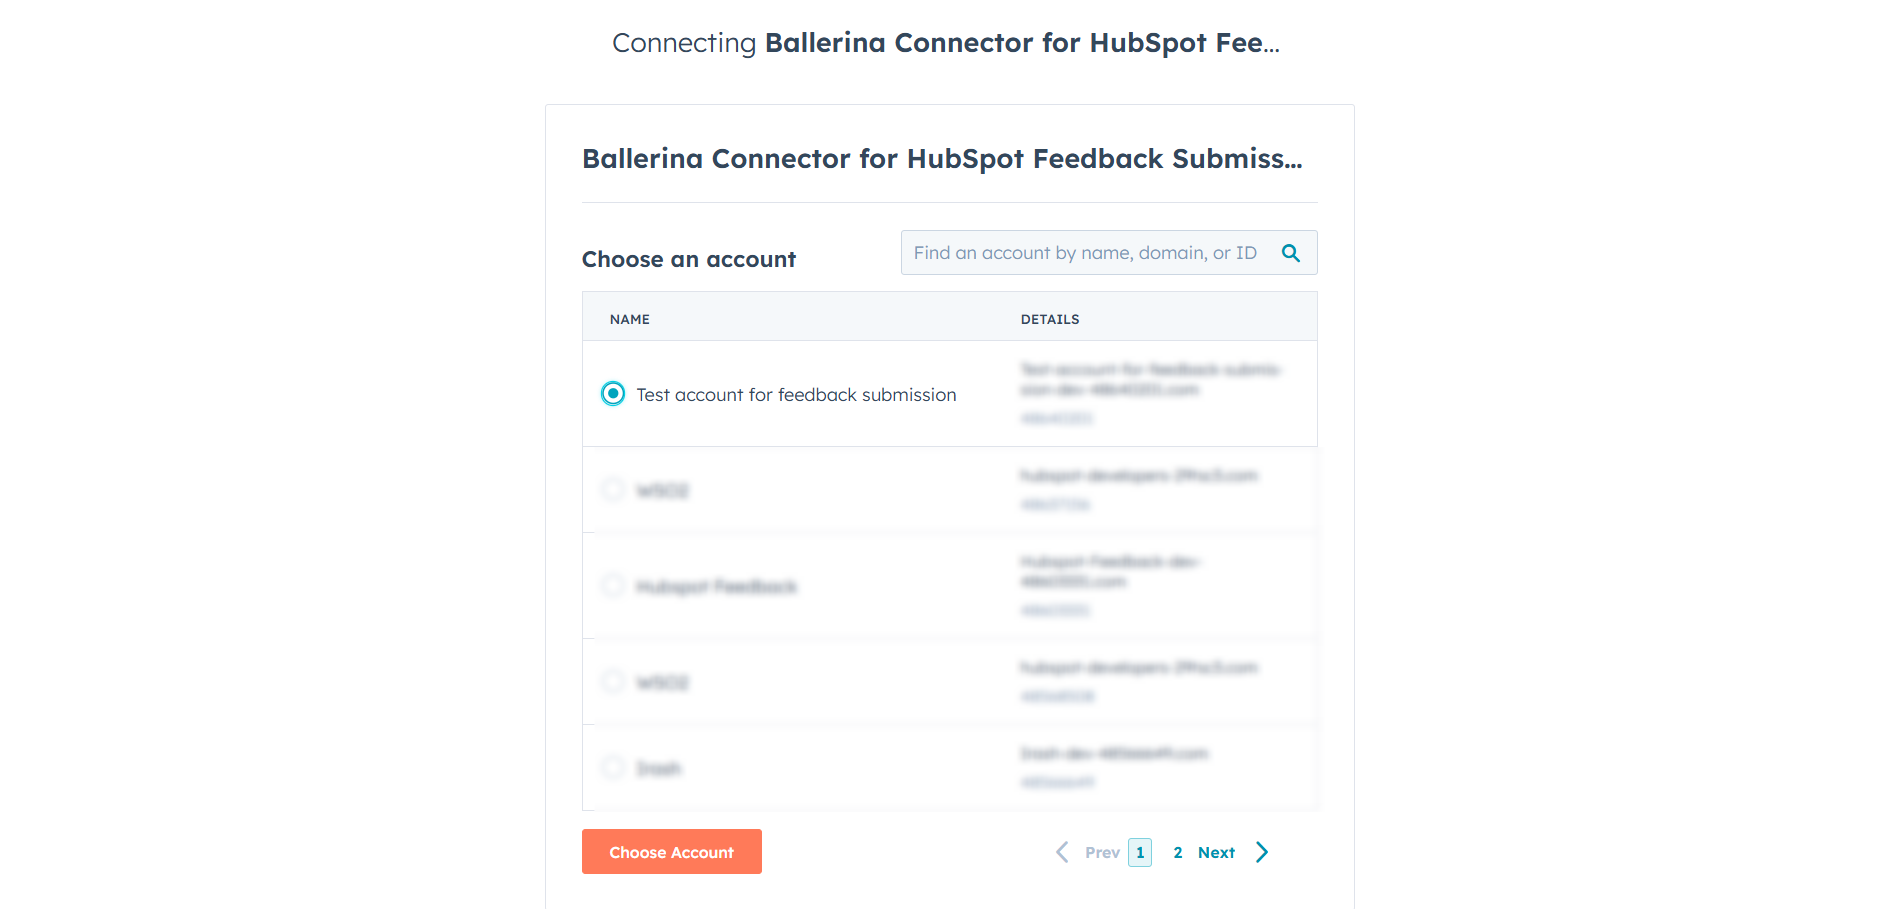
Paste it in the browser and select your developer test account to install the app when prompted.
-
A code will be displayed in the browser. Copy the code.
-
Run the following curl command. Replace the
<YOUR_CLIENT_ID>,<YOUR_REDIRECT_URI> and<YOUR_CLIENT_SECRET>with your specific value. Use the code you received in the above step 3 as the<CODE>.-
Linux/macOS
curl --request POST \ --url https://api.hubapi.com/oauth/v1/token \ --header 'content-type: application/x-www-form-urlencoded' \ --data 'grant_type=authorization_code&code=<CODE>&redirect_uri=<YOUR_REDIRECT_URI>&client_id=<YOUR_CLIENT_ID>&client_secret=<YOUR_CLIENT_SECRET>' -
Windows
curl --request POST ^ --url https://api.hubapi.com/oauth/v1/token ^ --header 'content-type: application/x-www-form-urlencoded' ^ --data 'grant_type=authorization_code&code=<CODE>&redirect_uri=<YOUR_REDIRECT_URI>&client_id=<YOUR_CLIENT_ID>&client_secret=<YOUR_CLIENT_SECRET>'
This command will return the access token and refresh token which are necessary for API calls.
{ "token_type": "bearer", "refresh_token": "<Refresh Token>", "access_token": "<Access Token>", "expires_in": 1800 } -
-
Store the refresh token securely for use in your application.
Quickstart
To use the Hubspot CRM Feedback Submission connector in your Ballerina application, update the .bal file as follows:
Step 1: Import the module
Import the hubspot.crm.obj.feedback module and oauth2 module.
import ballerinax/hubspot.crm.obj.feedback as hsfeedback; import ballerina/oauth2;
Step 2: Instantiate a new connector
-
Create a
Config.tomlfile and, configure the obtained credentials in the above steps as follows:clientId = <Client Id> clientSecret = <Client Secret> refreshToken = <Refresh Token> -
Instantiate a
hsfeedback:ConnectionConfigwith the obtained credentials and initialize the connector with it.configurable string clientId = ?; configurable string clientSecret = ?; configurable string refreshToken = ?; hsfeedback:ConnectionConfig config = { auth: { clientId, clientSecret, refreshToken, credentialBearer: oauth2:POST_BODY_BEARER } }; final hsfeedback:Client baseClient = check new (config);
Step 3: Invoke the connector operation
Now, utilize the available connector operations. A sample usecase is shown below.
View Submitted Feedbacks
public function main() returns error? { hsfeedback:CollectionResponseSimplePublicObjectWithAssociationsForwardPaging getPageOfFeedbackSubmissions = check baseClient->/feedback_submissions('limit = 10); io:println("Feedback submissions: ", getPageOfFeedbackSubmissions); }
Examples
The HubSpot CRM Feedback connector provides practical examples illustrating usage in various scenarios.
- Feedback Reviewing - This example demonstrates the usage of the HubSpot CRM Feedback connector to read a page of feedback submissions, read an object identified by
{feedbackSubmissionId}, read a batch of feedback submissions by internal ID, or unique property values, and search feedback submissions.
Note: The feedback submissions endpoints are currently read only. Feedback submissions cannot be submitted or edited through the API. You can only create properties in the feedback surveys tool within HubSpot, and the properties cannot be edited after creation.