Module hubspot.crm.extensions.timelines

ballerinax/hubspot.crm.extensions.timelines Ballerina library
Overview
HubSpot is an AI-powered customer relationship management (CRM) platform.
The HubSpot connector offers APIs to connect and interact with the HubSpot CRM Timelines API, specifically based on the HubSpot REST API.
Key Features
- Create and manage custom timeline events for CRM objects
- Define custom event templates with configurable properties
- Batch operations for timeline event creation
- Associate timeline events with contacts, deals, and other objects
Setup guide
To use the HubSpot CRM Timelines API, you must have access to the HubSpot API through a HubSpot developer account and a HubSpot app under it. Therefore, you need to register for a developer account at HubSpot if you don't have one already.
Step 1: Create/login to a HubSpot developer account
If you don't have a HubSpot developer account you can sign up to a free account here.
If you have an account already, go to the HubSpot developer portal
Step 2: Create a developer test account (Optional)
Within app developer accounts, you can create developer test accounts to test apps and integrations without affecting any real HubSpot data.
Note: These accounts are only for development and testing purposes. In production you should not use developer test accounts.
-
Go to test account section from the left sidebar.
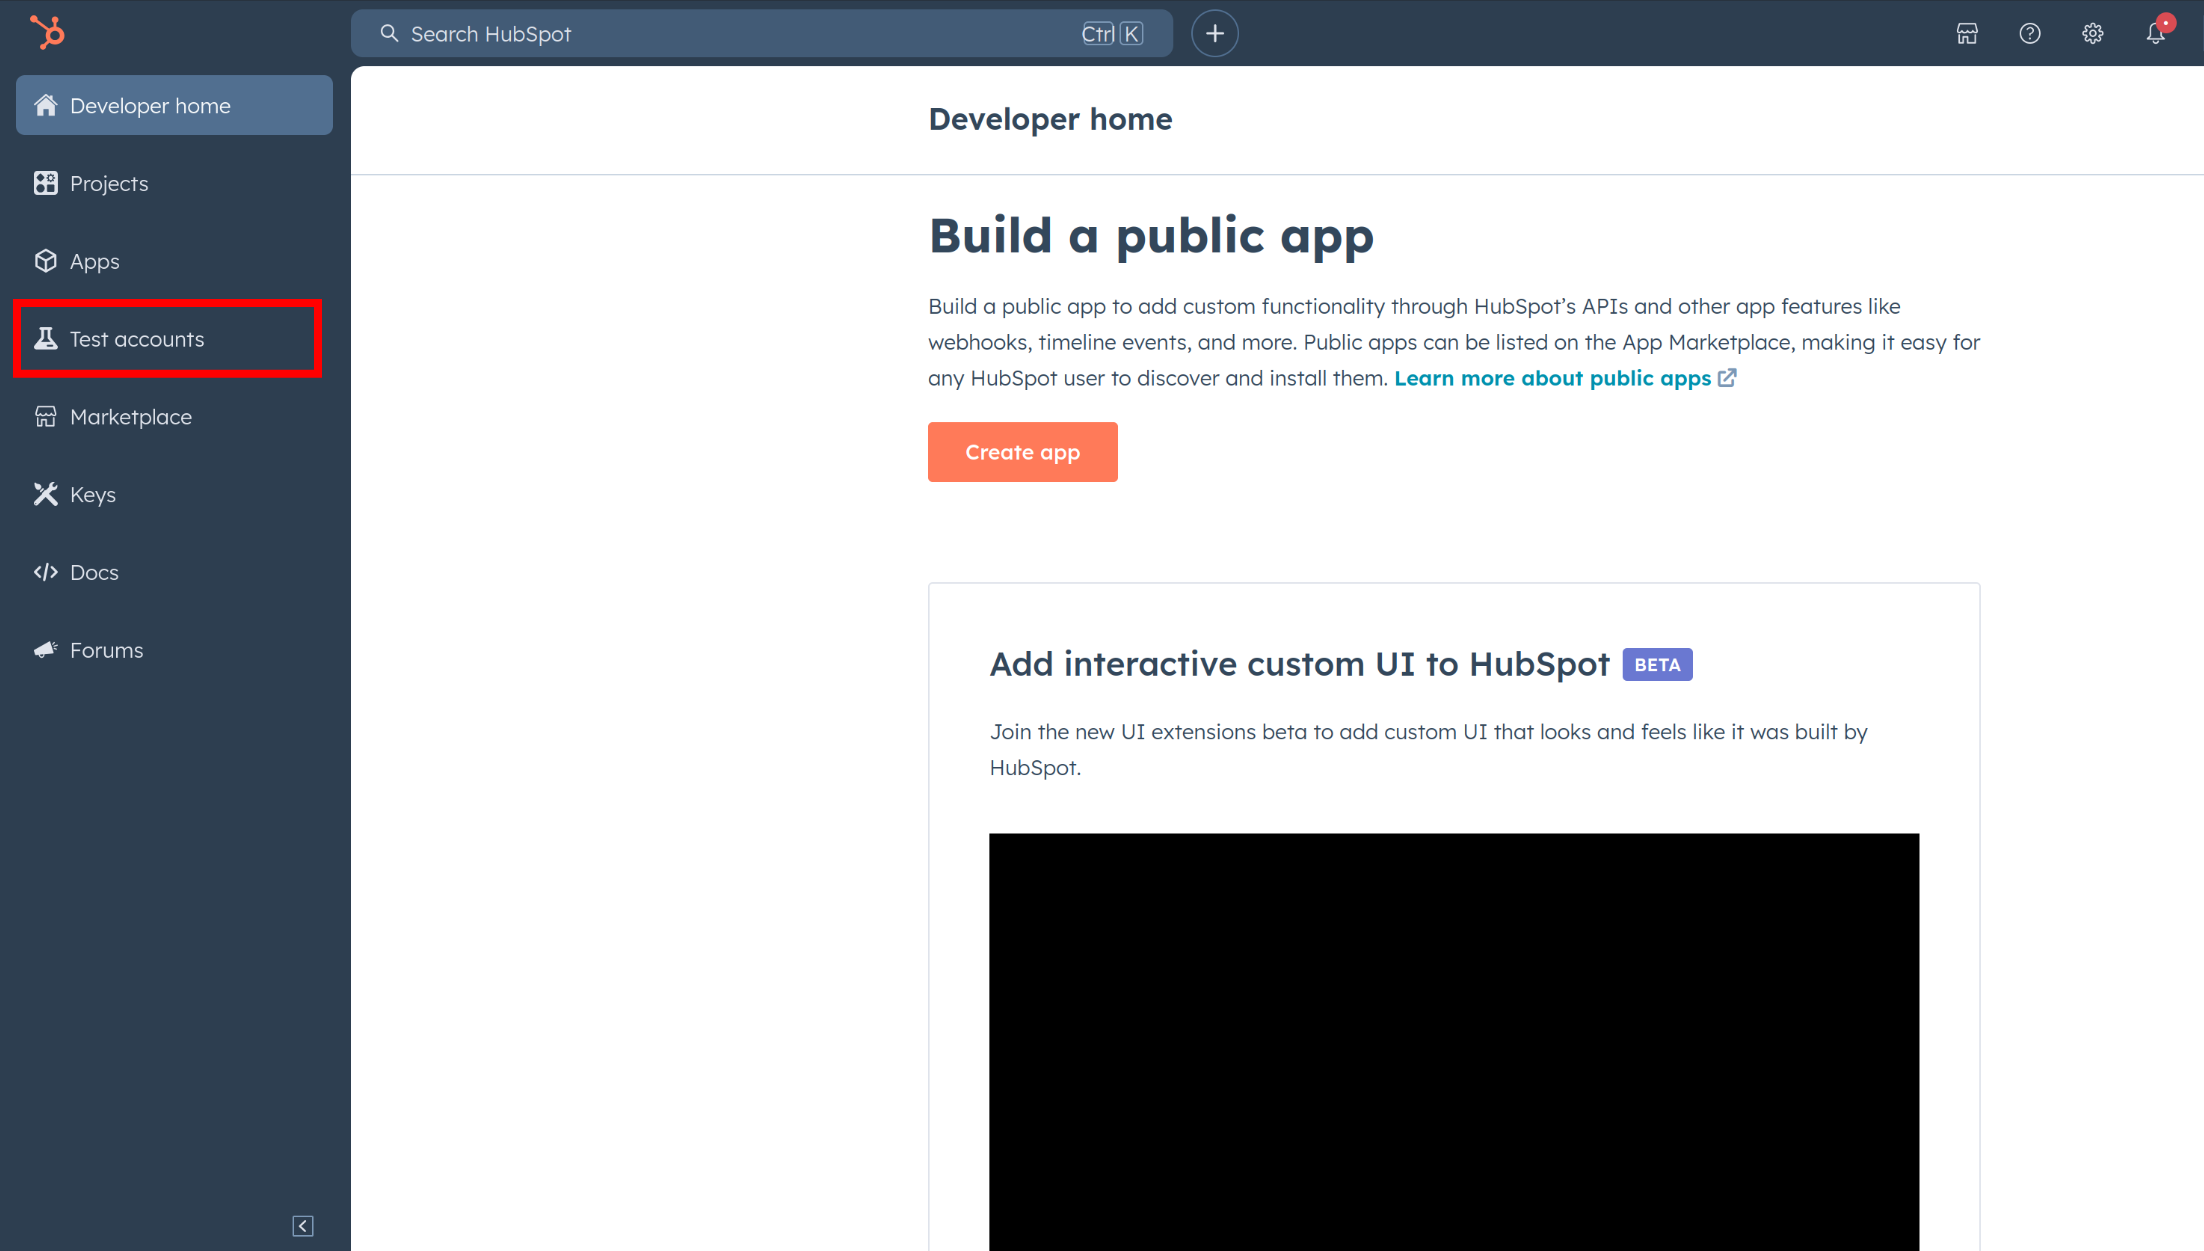
-
Click create developer test account.

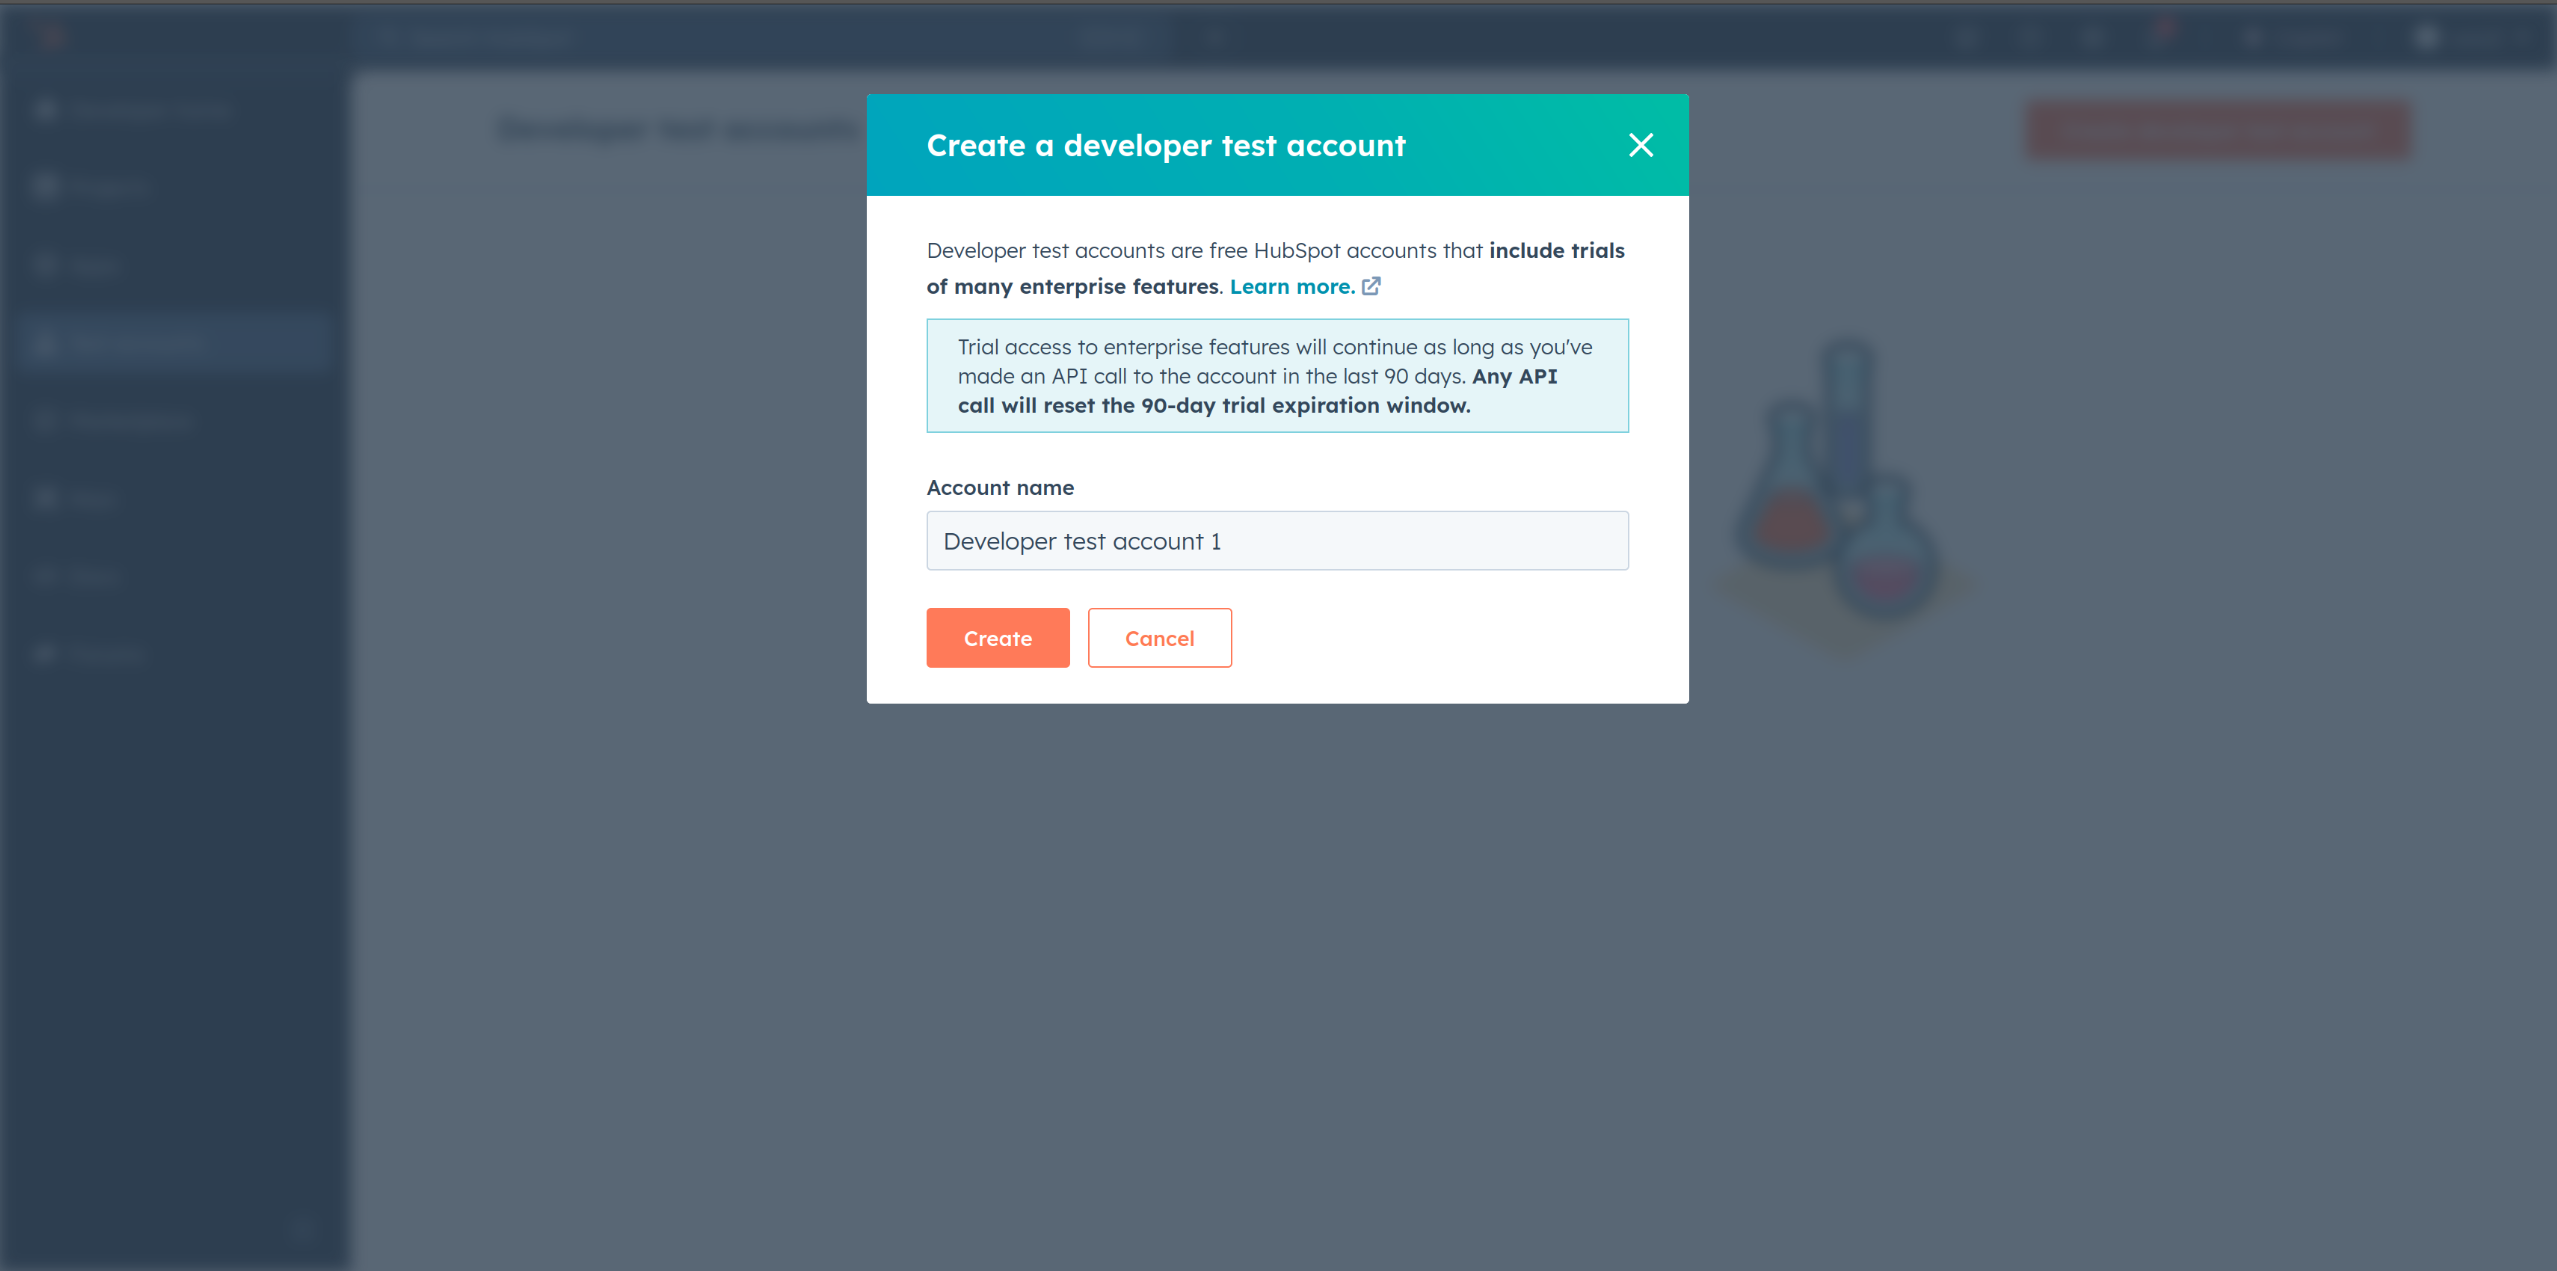
-
In the dialogue box, give a name to your test account and click create.
Step 3: Create a HubSpot app under your account
-
In your developer account, navigate to the "Apps" section. Click on "Create App"
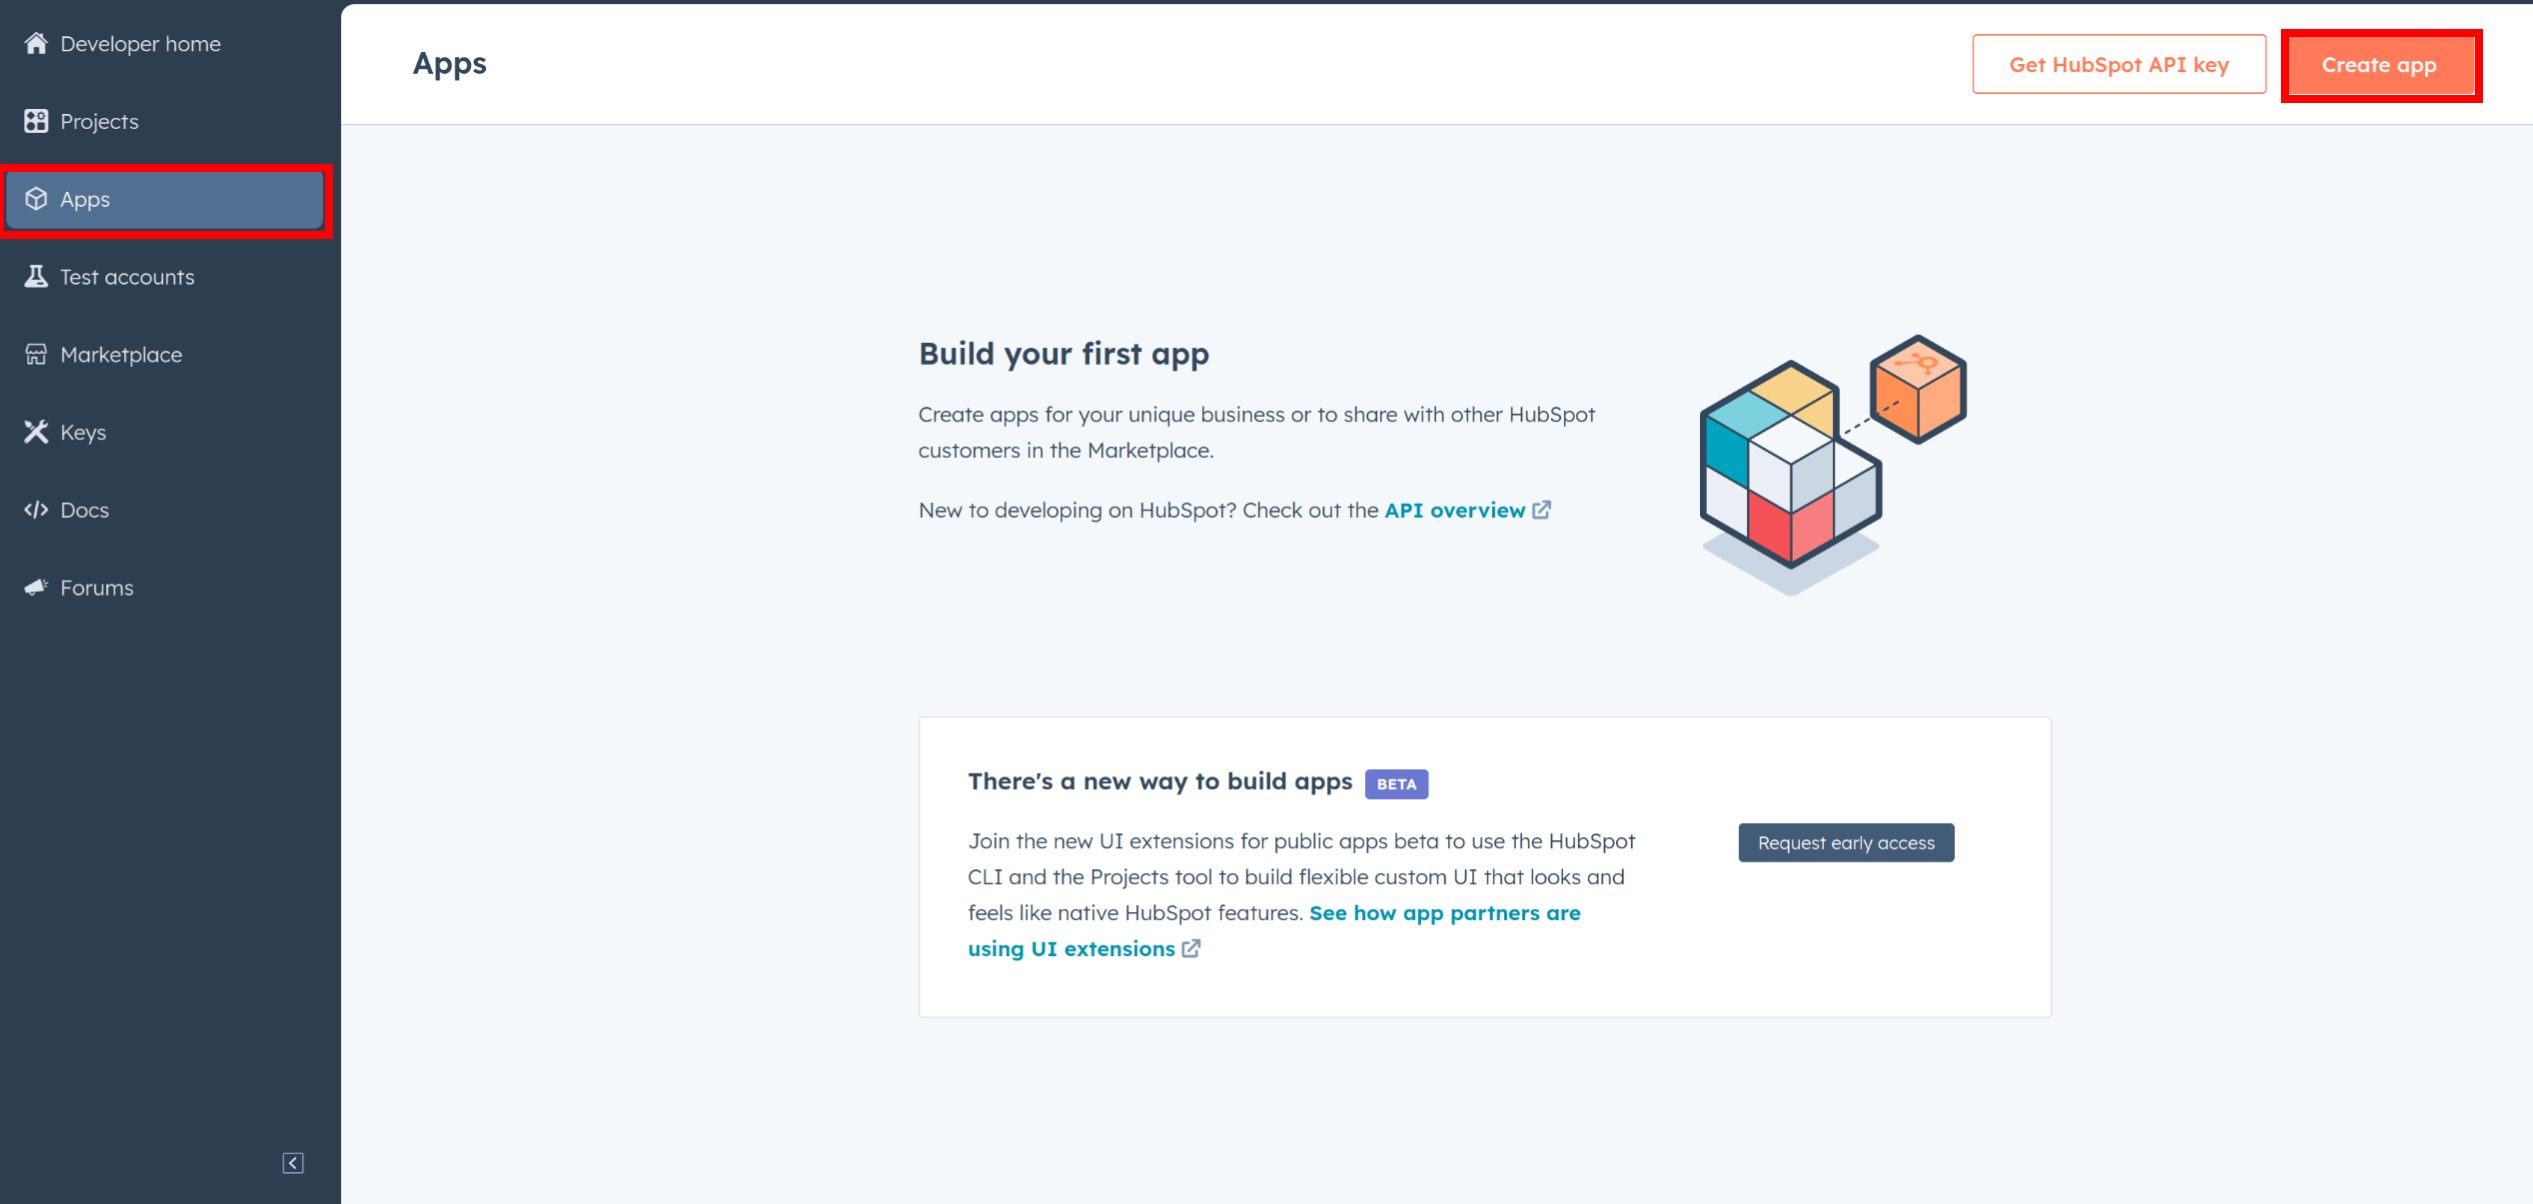
-
Provide the necessary details, including the app name and description.

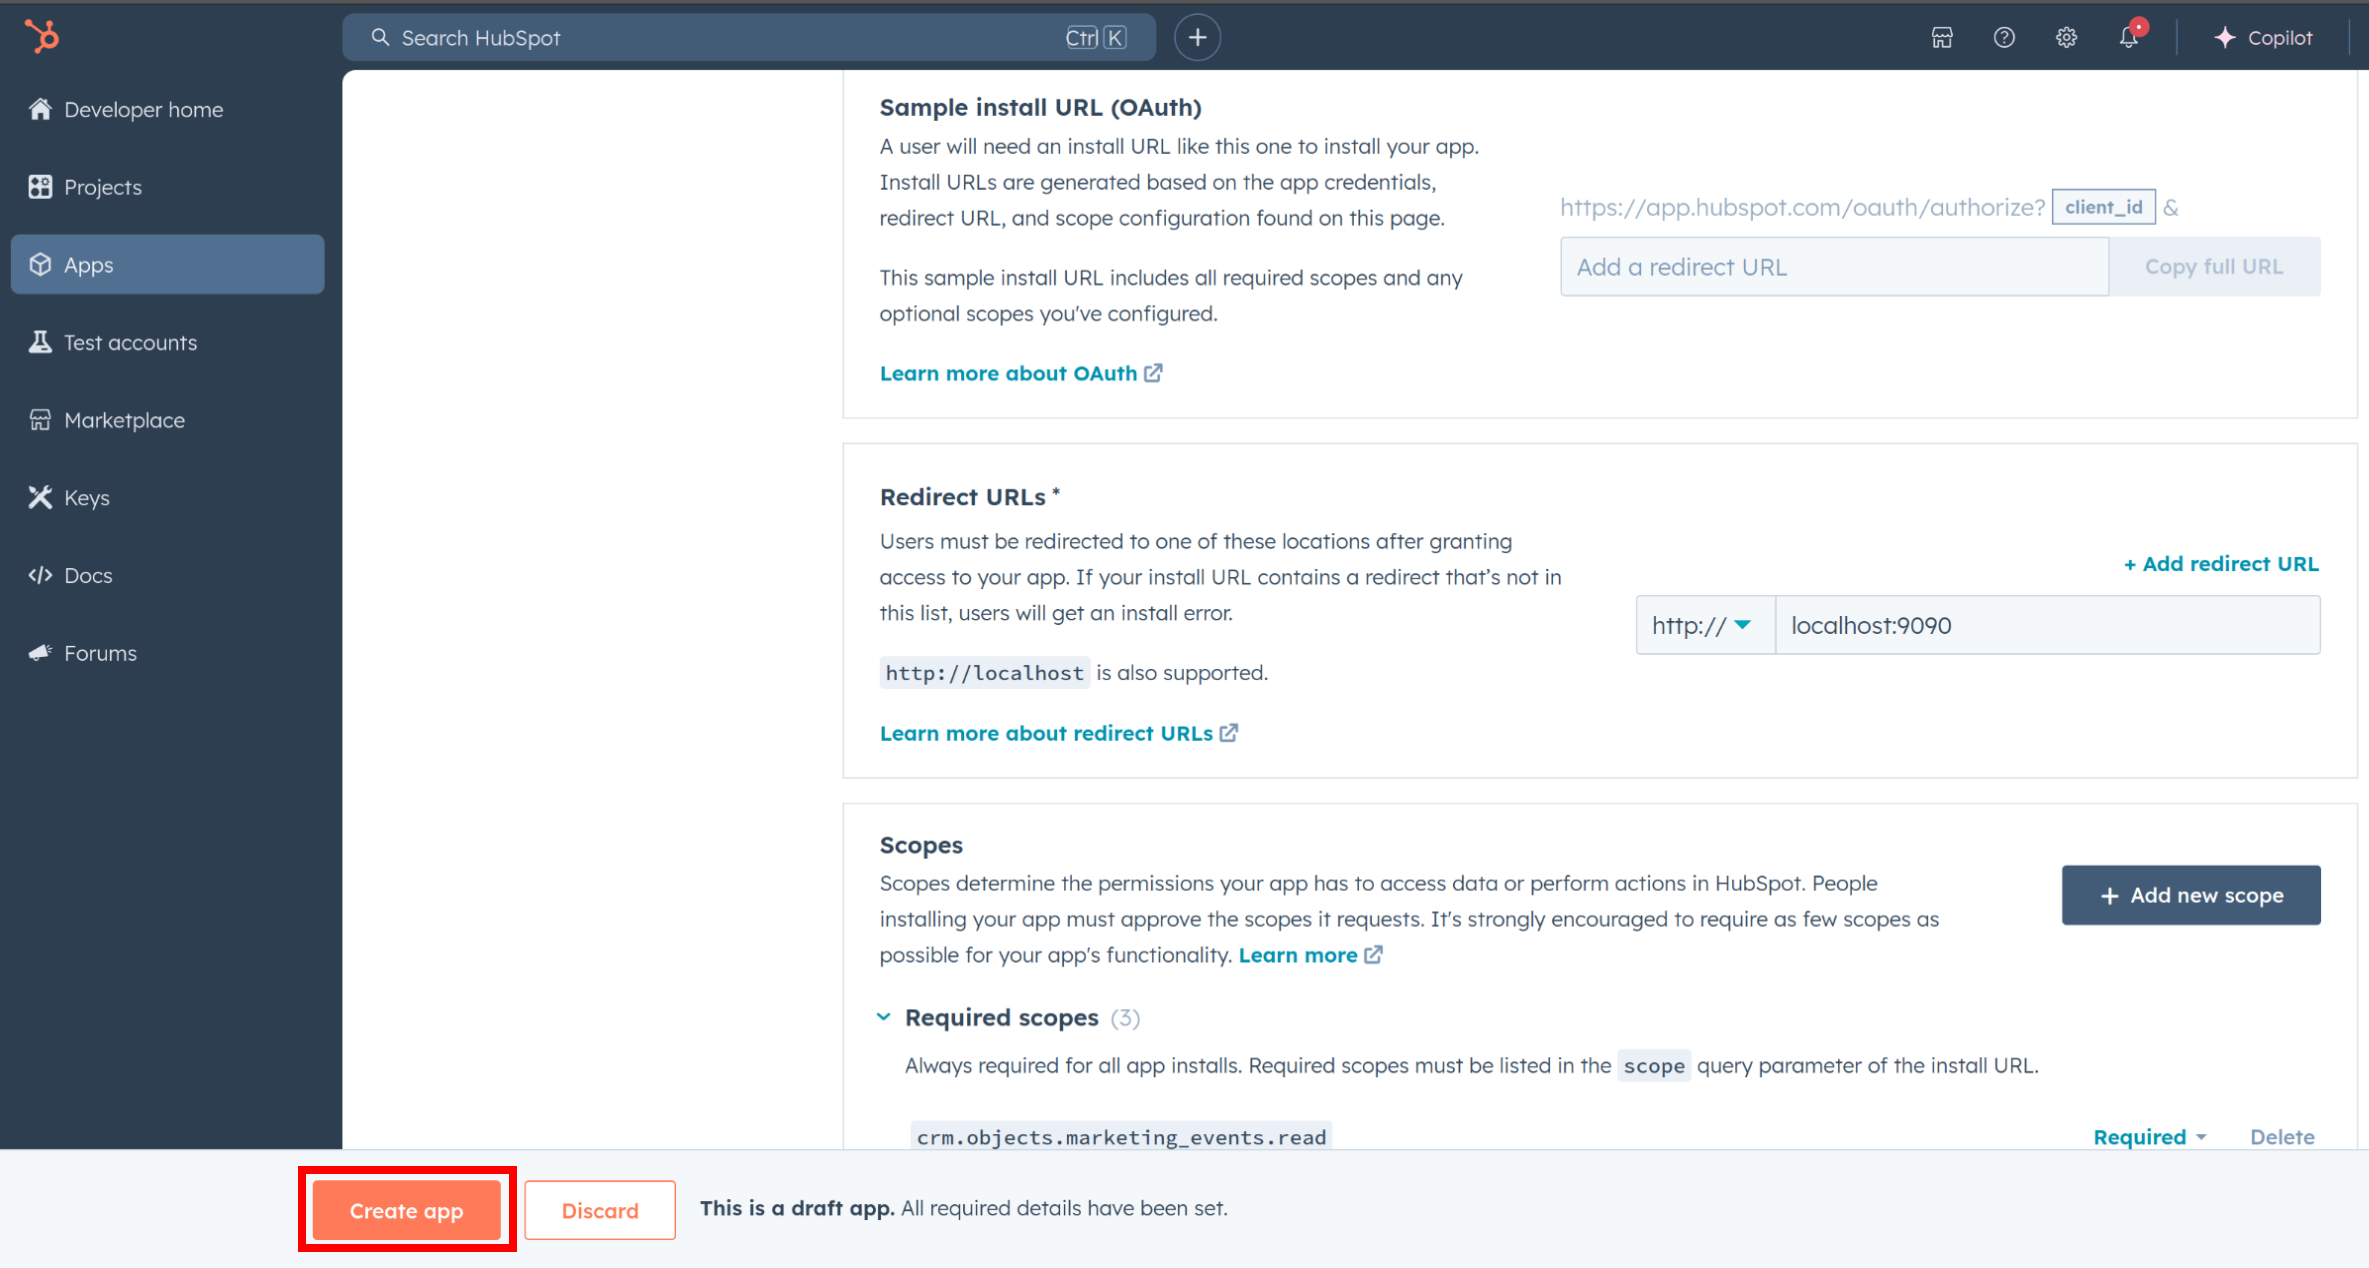
Step 4: Configure the authentication flow
-
Move to the "Auth" Tab.
-
In the "Scopes" section, add necessary scopes for your app using the "Add new scope" button.
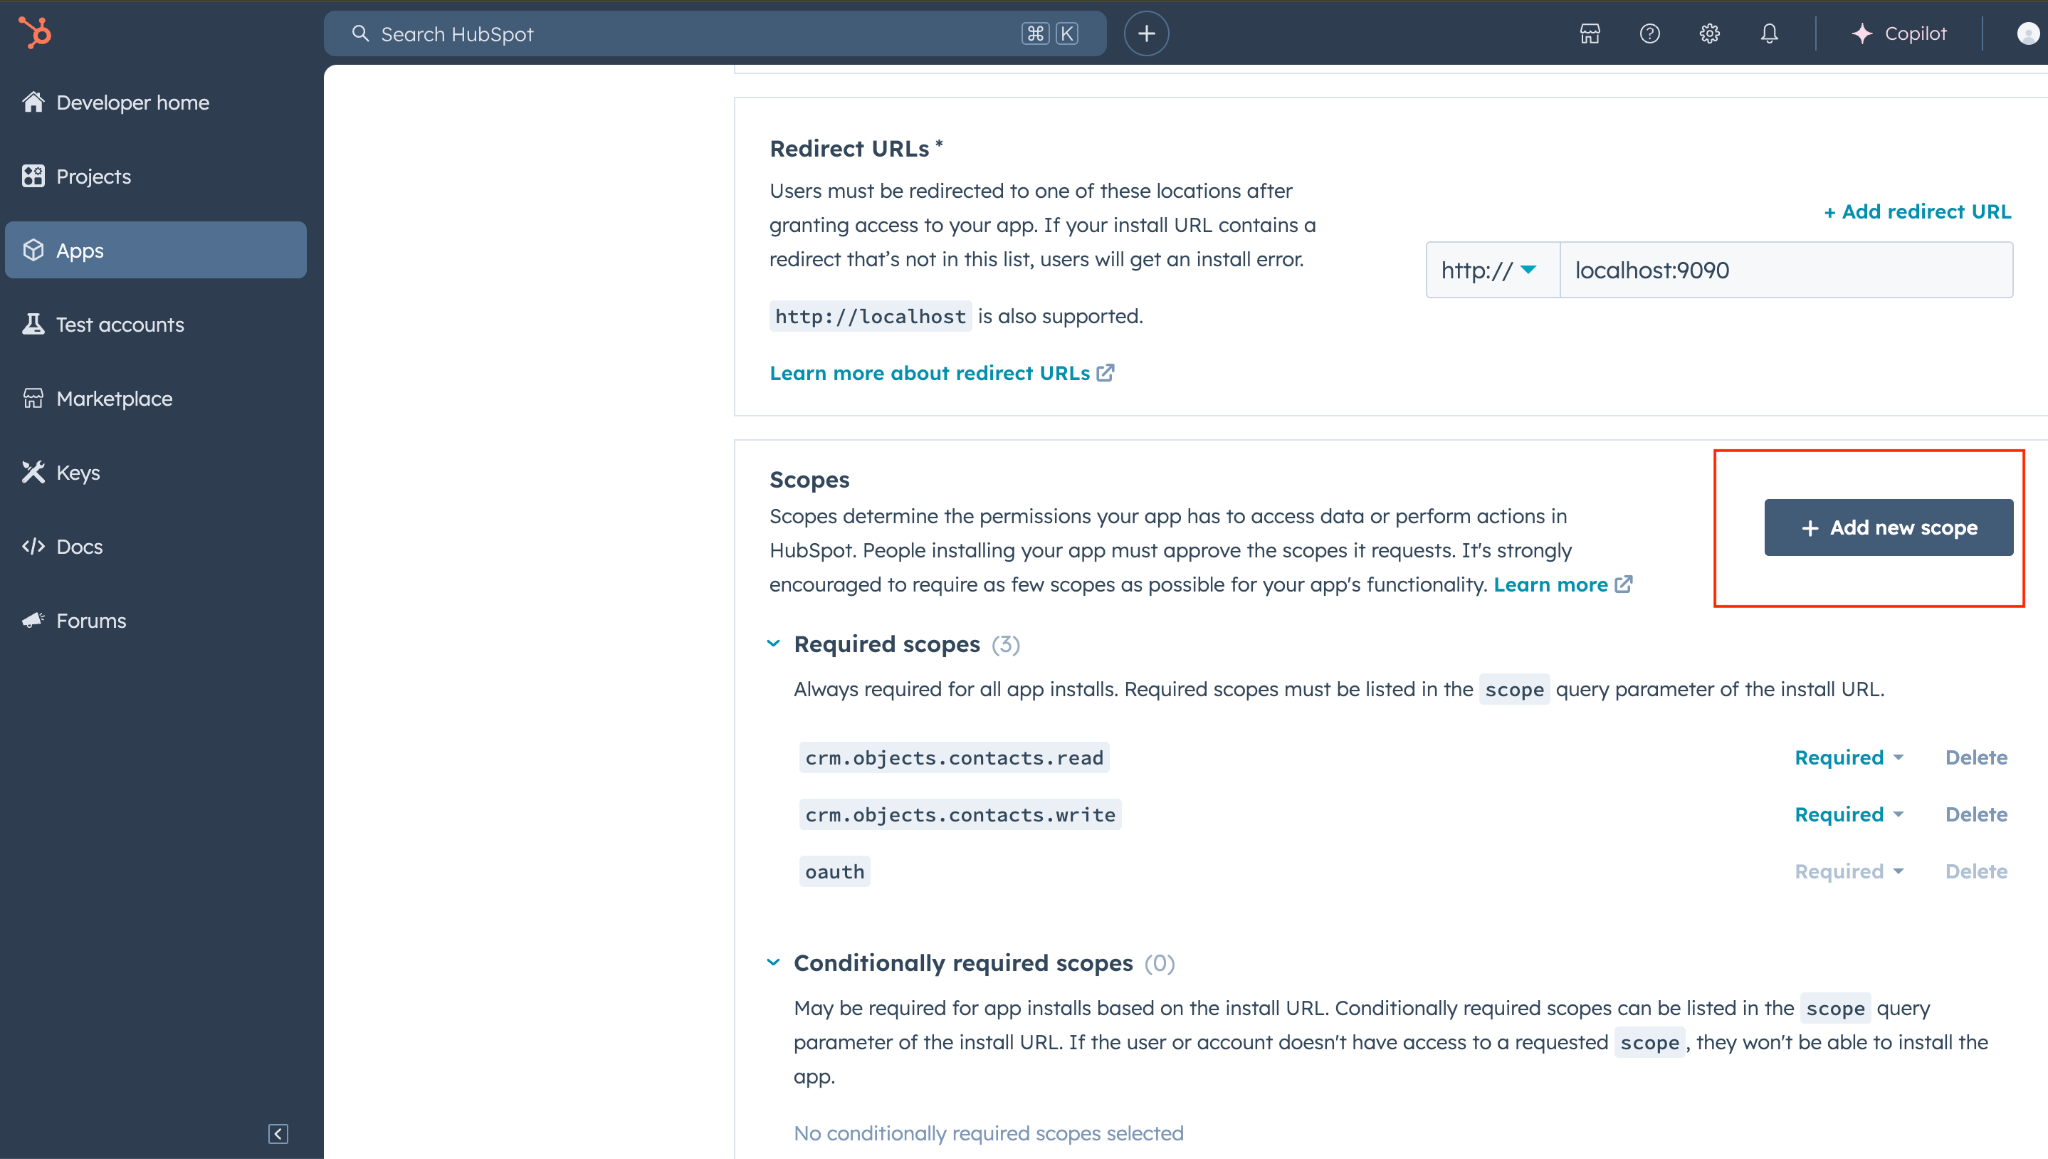
-
Add your redirect URI in the relevant section. You can also use localhost addresses for local development purposes. Click create app.
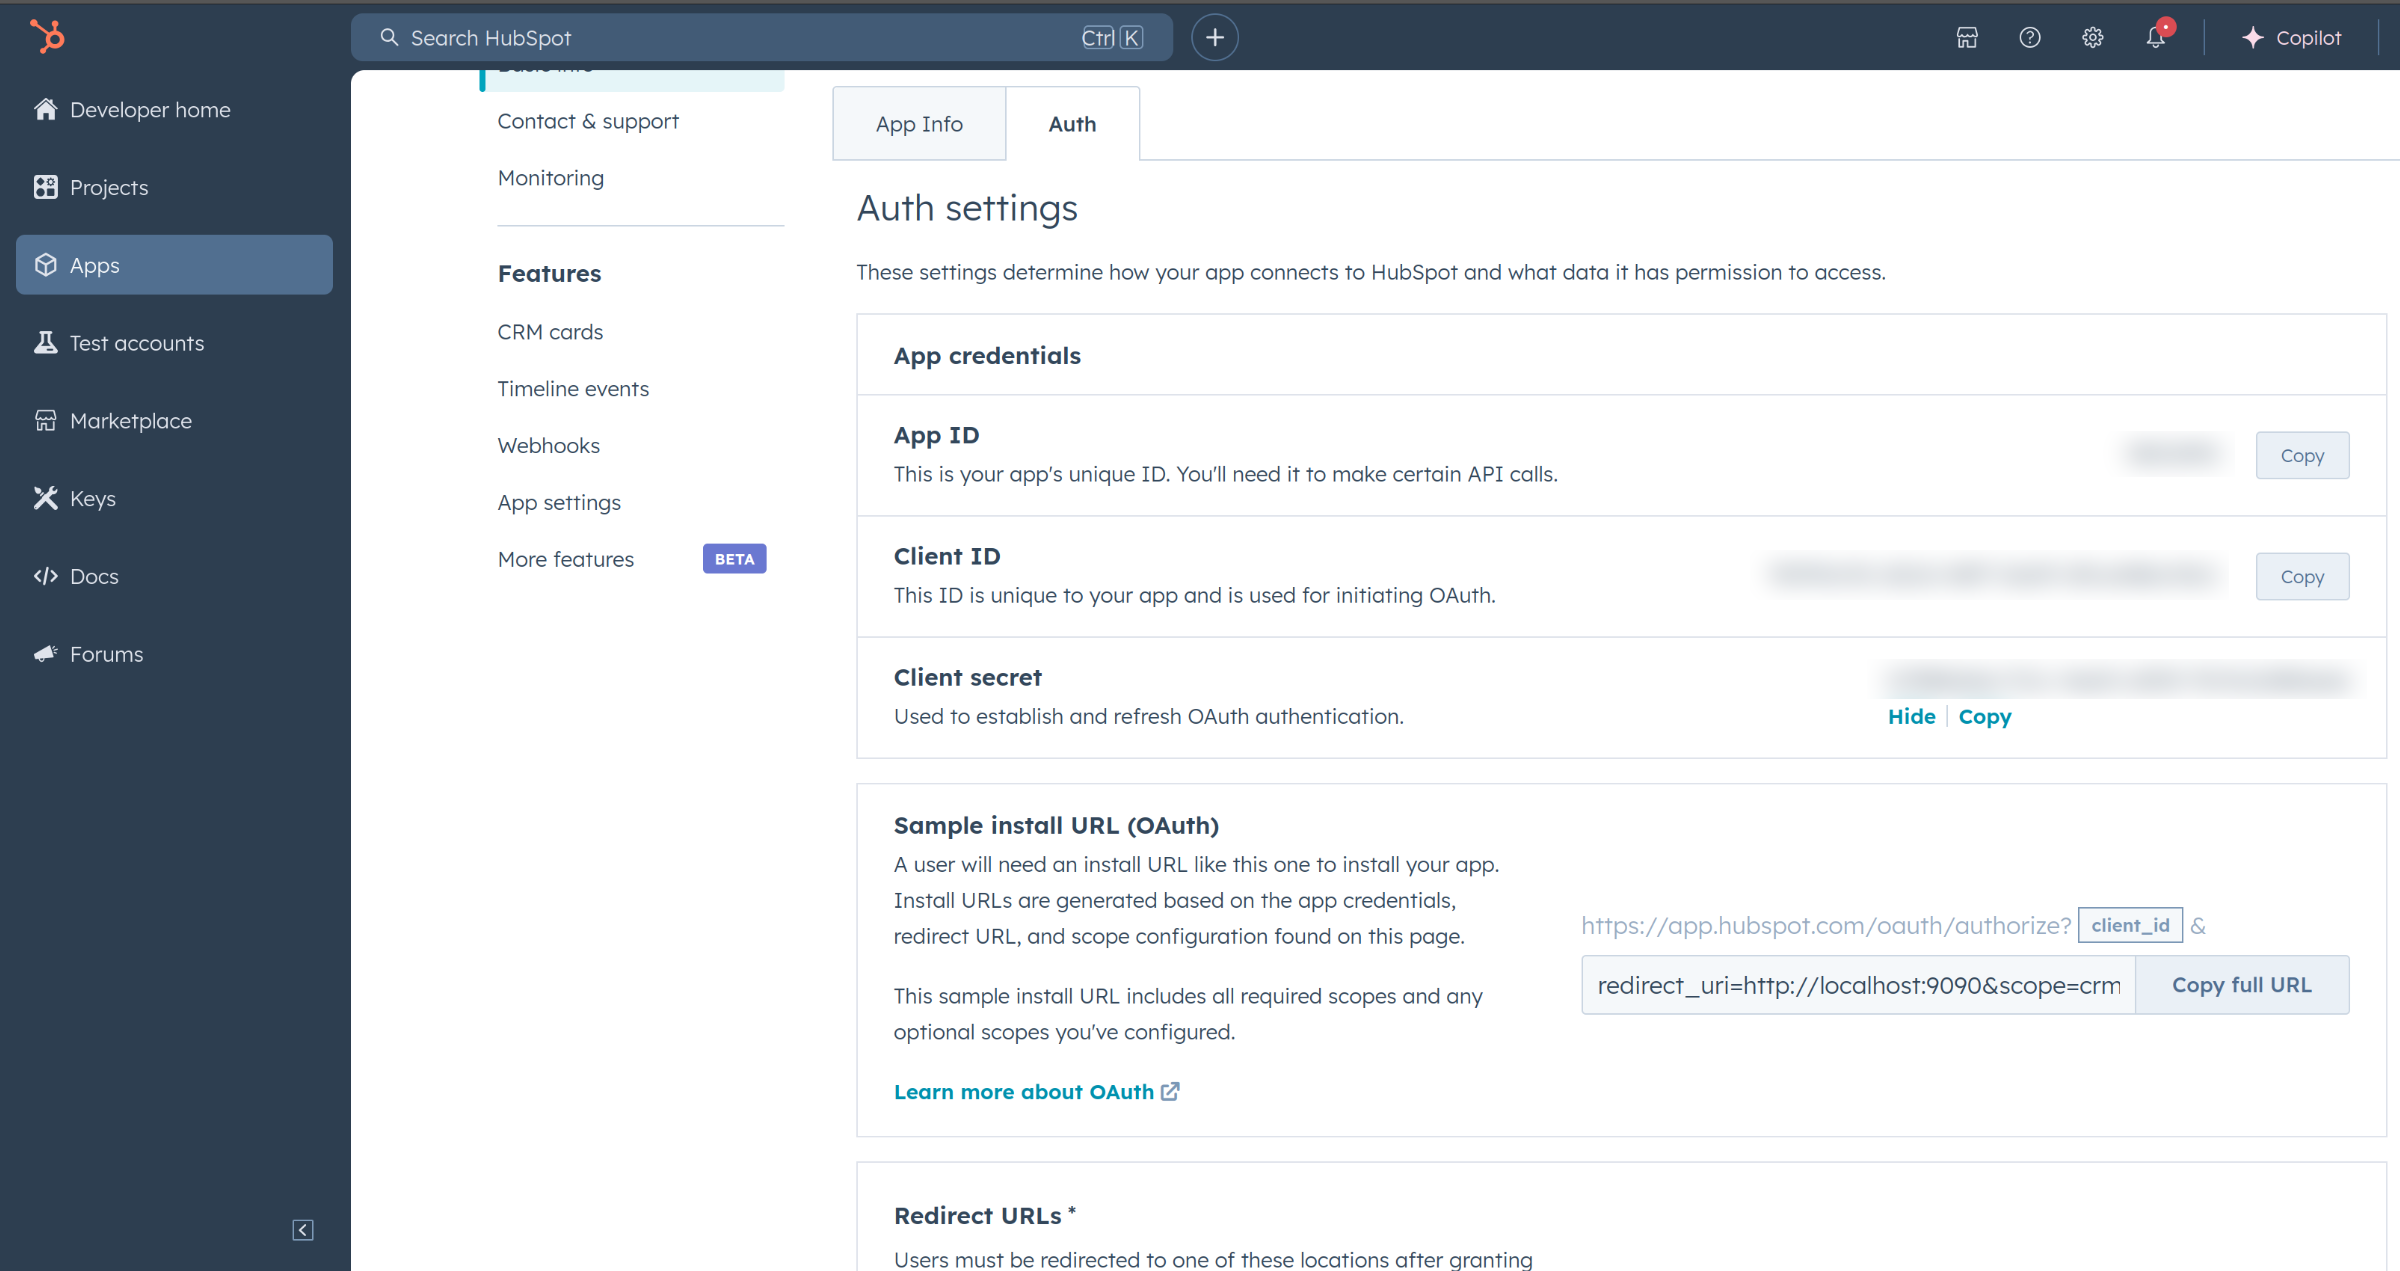
Step 5: Get your client ID and client Secret
Navigate to the auth section of your app. Make sure to save the provided client ID and client Secret.
Step 6: Setup authentication flow
Before proceeding with the quickstart, ensure you have obtained the necessary authentication credentials.
Method 1: OAuth 2.0 authentication (access token)
Some APIs require an access token for authentication. Follow these steps to obtain one:
-
Create an authorization URL using the following format:
https://app.hubspot.com/oauth/authorize?client_id=<YOUR_CLIENT_ID>&scope=<YOUR_SCOPES>&redirect_uri=<YOUR_REDIRECT_URI>Replace the
<YOUR_CLIENT_ID>,<YOUR_REDIRECT_URI>, and<YOUR_SCOPES>with your specific value. -
Paste it in the browser and select your developer test account to install the app when prompted.
-
A code will be displayed in the browser. Copy the code.
-
Run the following curl command. Replace the
<YOUR_CLIENT_ID>,<YOUR_REDIRECT_URI>, and<YOUR_CLIENT_SECRET>with your specific value. Use the code you received in the above step 3 as the<CODE>.-
Linux/macOS
curl --request POST \ --url https://api.hubapi.com/oauth/v1/token \ --header 'content-type: application/x-www-form-urlencoded' \ --data 'grant_type=authorization_code&code=<CODE>&redirect_uri=<YOUR_REDIRECT_URI>&client_id=<YOUR_CLIENT_ID>&client_secret=<YOUR_CLIENT_SECRET>' -
Windows
curl --request POST ^ --url https://api.hubapi.com/oauth/v1/token ^ --header 'content-type: application/x-www-form-urlencoded' ^ --data 'grant_type=authorization_code&code=<CODE>&redirect_uri=<YOUR_REDIRECT_URI>&client_id=<YOUR_CLIENT_ID>&client_secret=<YOUR_CLIENT_SECRET>'
This command will return the access token necessary for API calls.
{ "token_type": "bearer", "refresh_token": "<Refresh Token>", "access_token": "<Access Token>", "expires_in": 1800 } -
-
Store the access token securely for use in your application.
Method 2: Developer API key authentication
Some APIs use a developer API key as a query parameter for authentication.
- In your developer account, navigate to Keys -> Developer API key. It will list down the active API key that you can copy.
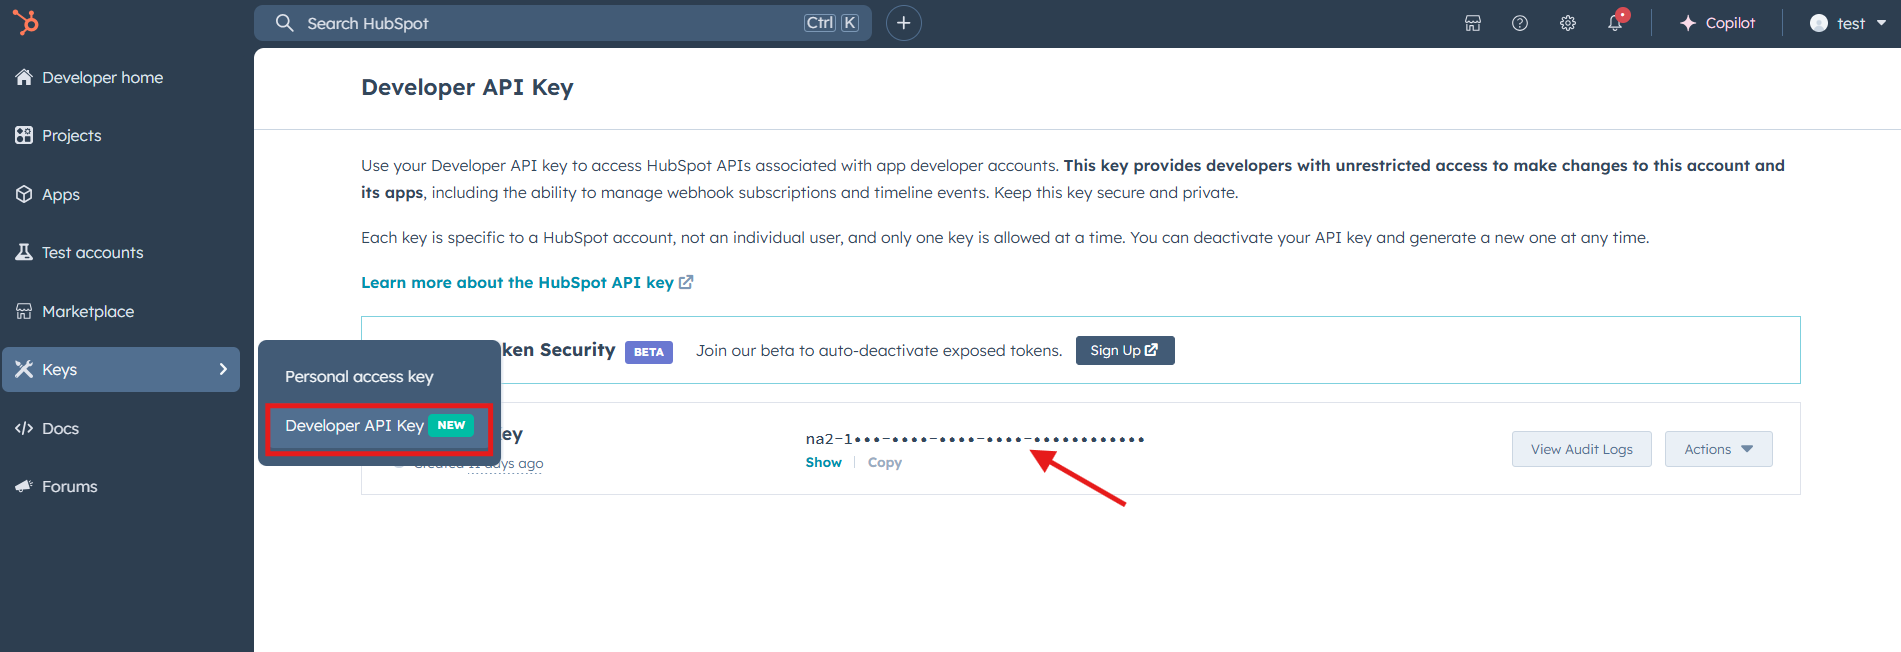
- Use the key by appending it to API requests as a query parameter:
https://api.hubapi.com/crm/v3/timeline/events?hapikey=<YOUR_DEVELOPER_API_KEY>
No OAuth flow is required for this authentication method.
Quickstart
To use the HubSpot CRM Timelines in your Ballerina application, update the .bal file as follows:
Step 1: Import the module
Import the hubspot.crm.extensions.timelines module and oauth2 module.
import ballerina/oauth2; import ballerinax/hubspot.crm.extensions.timelines as hstimeline;
Step 2: Instantiate a new connector
-
Instantiate a
hstimeline:OAuth2RefreshTokenGrantConfigorApiKeysConfigwith the obtained credentials and initialize the connector with it. Since different APIs use varying authentication mechanisms, initialize two separate clients to handle both OAuth 2.0 and developer API key authentication.configurable string clientId = ?; configurable string clientSecret = ?; configurable string refreshToken = ?; configurable string hapikey = ?; configurable int appId = ?; hstimeline:OAuth2RefreshTokenGrantConfig accessToken = { clientId, clientSecret, refreshToken, credentialBearer: oauth2:POST_BODY_BEARER }; hstimeline:ApiKeysConfig apikeys = { hapikey, private\-app: "", private\-app\-legacy: "" }; final hstimeline:Client hubSpotTimelineOAuth2 = check new({auth: accessToken}); final hstimeline:Client hubSpotTimelineApiKey = check new ({auth: apikeys}); -
Create a
Config.tomlfile and, configure the obtained credentials in the above steps as follows:clientId = <Client Id> clientSecret = <Client Secret> refreshToken = <Refresh Token> hapikey = <Developer API Key> appId = <App Id>
Step 3: Invoke the connector operation
Now, utilize the available connector operations. A sample use case is shown below.
Get all event templates
public function main() returns error? { hstimeline:CollectionResponseTimelineEventTemplateNoPaging response = check hubSpotTimelineApiKey->/[appIdSigned32]/event\-templates.get(); io:println("Event Templates: ", response); }
Run the Ballerina application
bal run
Examples
The HubSpot CRM Timelines connector provides practical examples illustrating usage in various scenarios. Explore these examples, covering the following use cases:
- Event Creation: This example demonstrates how to create a timeline event template, retrieving existing events, and creating an event using the template with their details in a structured format.
Clients
hubspot.crm.extensions.timelines: Client
This feature allows an app to create and configure custom events that can show up in the timelines of certain CRM objects like contacts, companies, tickets, or deals. You'll find multiple use cases for this API in the sections below
Constructor
Gets invoked to initialize the connector
init (ConnectionConfig config, string serviceUrl)- config ConnectionConfig - The configurations to be used when initializing the
connector
- serviceUrl string "https://api.hubapi.com/integrators/timeline/v3" - URL of the target service
get events/[string eventTemplateId]/[string eventId]/detail
function get events/[string eventTemplateId]/[string eventId]/detail(map<string|string[]> headers) returns EventDetail|errorGets the detailTemplate as rendered
Return Type
- EventDetail|error - successful operation
post events
function post events(TimelineEvent payload, map<string|string[]> headers) returns TimelineEventResponse|errorCreate a single event
Parameters
- payload TimelineEvent - The timeline event definition
Return Type
- TimelineEventResponse|error - successful operation
put [int:Signed32 appId]/event-templates/[string eventTemplateId]/tokens/[string tokenName]
function put [int:Signed32 appId]/event\-templates/[string eventTemplateId]/tokens/[string tokenName](TimelineEventTemplateTokenUpdateRequest payload, map<string|string[]> headers) returns TimelineEventTemplateToken|errorUpdate an event template token
Parameters
- payload TimelineEventTemplateTokenUpdateRequest - The updated token definition
Return Type
- TimelineEventTemplateToken|error - successful operation
delete [int:Signed32 appId]/event-templates/[string eventTemplateId]/tokens/[string tokenName]
function delete [int:Signed32 appId]/event\-templates/[string eventTemplateId]/tokens/[string tokenName](map<string|string[]> headers) returns error?Remove a token from a template
Return Type
- error? - No content
get events/[string eventTemplateId]/[string eventId]
function get events/[string eventTemplateId]/[string eventId](map<string|string[]> headers) returns TimelineEventResponse|errorGets the event
Return Type
- TimelineEventResponse|error - successful operation
post events/batch/create
function post events/batch/create(BatchInputTimelineEvent payload, map<string|string[]> headers) returns BatchResponseTimelineEventResponse|BatchResponseTimelineEventResponseWithErrors|json|errorCreates multiple events
Parameters
- payload BatchInputTimelineEvent - The timeline event definition
Return Type
- BatchResponseTimelineEventResponse|BatchResponseTimelineEventResponseWithErrors|json|error - successful operation
get events/[string eventTemplateId]/[string eventId]/render
function get events/[string eventTemplateId]/[string eventId]/render(map<string|string[]> headers, *GetEventsEventTemplateIdEventIdRenderGetRenderByIdQueries queries) returns string|errorRenders the header or detail as HTML
Parameters
- queries *GetEventsEventTemplateIdEventIdRenderGetRenderByIdQueries - Queries to be sent with the request
get [int:Signed32 appId]/event-templates
function get [int:Signed32 appId]/event\-templates(map<string|string[]> headers) returns CollectionResponseTimelineEventTemplateNoPaging|errorList all event templates for your app
Return Type
- CollectionResponseTimelineEventTemplateNoPaging|error - successful operation
post [int:Signed32 appId]/event-templates
function post [int:Signed32 appId]/event\-templates(TimelineEventTemplateCreateRequest payload, map<string|string[]> headers) returns TimelineEventTemplate|errorCreate an event template for the app
Parameters
- payload TimelineEventTemplateCreateRequest - The new event template definition
Return Type
- TimelineEventTemplate|error - successful operation
get [int:Signed32 appId]/event-templates/[string eventTemplateId]
function get [int:Signed32 appId]/event\-templates/[string eventTemplateId](map<string|string[]> headers) returns TimelineEventTemplate|errorGet an app event template
Return Type
- TimelineEventTemplate|error - successful operation
put [int:Signed32 appId]/event-templates/[string eventTemplateId]
function put [int:Signed32 appId]/event\-templates/[string eventTemplateId](TimelineEventTemplateUpdateRequest payload, map<string|string[]> headers) returns TimelineEventTemplate|errorUpdate an existing event template
Parameters
- payload TimelineEventTemplateUpdateRequest - The updated event template definition
Return Type
- TimelineEventTemplate|error - successful operation
delete [int:Signed32 appId]/event-templates/[string eventTemplateId]
function delete [int:Signed32 appId]/event\-templates/[string eventTemplateId](map<string|string[]> headers) returns error?Deletes an event template for the app
Return Type
- error? - No content
post [int:Signed32 appId]/event-templates/[string eventTemplateId]/tokens
function post [int:Signed32 appId]/event\-templates/[string eventTemplateId]/tokens(TimelineEventTemplateToken payload, map<string|string[]> headers) returns TimelineEventTemplateToken|errorAdd a token to an event template
Parameters
- payload TimelineEventTemplateToken - The new token definition
Return Type
- TimelineEventTemplateToken|error - successful operation
Records
hubspot.crm.extensions.timelines: ApiKeysConfig
Provides API key configurations needed when communicating with a remote HTTP endpoint
Fields
- hapikey string -
- privateAppLegacy string -
- privateApp string -
hubspot.crm.extensions.timelines: BatchInputTimelineEvent
Used to create timeline events in batches
Fields
- inputs TimelineEvent[] - A collection of timeline events we want to create
hubspot.crm.extensions.timelines: BatchResponseTimelineEventResponse
The state of the batch event request
Fields
- completedAt string - The time the request was completed
- requestedAt? string - The time the request occurred
- startedAt string - The time the request began processing
- links? record { string... } - Map of link names to associated URIs for the batch response
- results TimelineEventResponse[] - Successfully created events
- status "PENDING"|"PROCESSING"|"CANCELED"|"COMPLETE" - The status of the batch response. Should always be COMPLETED if processed
hubspot.crm.extensions.timelines: BatchResponseTimelineEventResponseWithErrors
Batch response containing timeline event results, processing status, timestamps, and any errors encountered during the operation
Fields
- completedAt string - Timestamp indicating when the batch operation completed
- numErrors? Signed32 - Total number of errors encountered during the batch operation
- requestedAt? string - Timestamp indicating when the batch operation was requested
- startedAt string - Timestamp indicating when the batch operation started processing
- links? record { string... } - Map of relevant links associated with the batch response
- results TimelineEventResponse[] - Array of successfully processed timeline event responses
- errors? StandardError[] - Array of standard errors encountered during the batch operation
- status "PENDING"|"PROCESSING"|"CANCELED"|"COMPLETE" - Current processing status of the batch operation
hubspot.crm.extensions.timelines: CollectionResponseTimelineEventTemplateNoPaging
A collection of timeline event templates returned without pagination metadata
Fields
- results TimelineEventTemplate[] - Array of timeline event templates returned in the response
hubspot.crm.extensions.timelines: ConnectionConfig
Provides a set of configurations for controlling the behaviours when communicating with a remote HTTP endpoint
Fields
- auth BearerTokenConfig|OAuth2RefreshTokenGrantConfig|ApiKeysConfig - Provides Auth configurations needed when communicating with a remote HTTP endpoint
- httpVersion HttpVersion(default http:HTTP_2_0) - The HTTP version understood by the client
- http1Settings ClientHttp1Settings(default {}) - Configurations related to HTTP/1.x protocol
- http2Settings ClientHttp2Settings(default {}) - Configurations related to HTTP/2 protocol
- timeout decimal(default 30) - The maximum time to wait (in seconds) for a response before closing the connection
- forwarded string(default "disable") - The choice of setting
forwarded/x-forwardedheader
- followRedirects? FollowRedirects - Configurations associated with Redirection
- poolConfig? PoolConfiguration - Configurations associated with request pooling
- cache CacheConfig(default {}) - HTTP caching related configurations
- compression Compression(default http:COMPRESSION_AUTO) - Specifies the way of handling compression (
accept-encoding) header
- circuitBreaker? CircuitBreakerConfig - Configurations associated with the behaviour of the Circuit Breaker
- retryConfig? RetryConfig - Configurations associated with retrying
- responseLimits ResponseLimitConfigs(default {}) - Configurations associated with inbound response size limits
- secureSocket? ClientSecureSocket - SSL/TLS-related options
- proxy? ProxyConfig - Proxy server related options
- socketConfig ClientSocketConfig(default {}) - Provides settings related to client socket configuration
- validation boolean(default true) - Enables the inbound payload validation functionality which provided by the constraint package. Enabled by default
- laxDataBinding boolean(default true) - Enables relaxed data binding on the client side. When enabled,
nilvalues are treated as optional, and absent fields are handled asnilabletypes. Enabled by default
hubspot.crm.extensions.timelines: ErrorDetail
Granular error detail describing a specific issue within a failed API request
Fields
- subCategory? string - A specific category that contains more specific detail about the error
- code? string - The status code associated with the error detail
- 'in? string - The name of the field or parameter in which the error was found
- context? record { string[]... } - Context about the error condition
- message string - A human readable message describing the error along with remediation steps where appropriate
hubspot.crm.extensions.timelines: EventDetail
The details Markdown rendered as HTML
Fields
- details string - The details Markdown rendered as HTML
hubspot.crm.extensions.timelines: GetEventsEventTemplateIdEventIdRenderGetRenderByIdQueries
Represents the Queries record for the operation: get-/events/{eventTemplateId}/{eventId}/render_getRenderById
Fields
- detail? boolean - Set to 'true', we want to render the
detailTemplateinstead of theheaderTemplate
hubspot.crm.extensions.timelines: OAuth2RefreshTokenGrantConfig
OAuth2 Refresh Token Grant Configs
Fields
- Fields Included from *OAuth2RefreshTokenGrantConfig
- refreshUrl string(default "https://api.hubapi.com/oauth/v1/token") - Refresh URL
hubspot.crm.extensions.timelines: StandardError
Standard error response structure returned when an API request fails
Fields
- subCategory? record {} - Additional subcategory detail for the error
- context record { string[]... } - Key-value map providing contextual details about the error condition
- links record { string... } - Map of related link names to their associated URIs
- id? string - Unique identifier associated with the error
- category string - The high-level category classifying the error type
- message string - Human-readable message describing the error
- errors ErrorDetail[] - List of detailed error information for the failed request
- status string - The HTTP status associated with the error response
hubspot.crm.extensions.timelines: TimelineEvent
The state of the timeline event
Fields
- eventTemplateId string - The event template ID
- extraData? record {} - Additional event-specific data that can be interpreted by the template's markdown
- timelineIFrame? TimelineEventIFrame - Defines an iframe modal embedded in a timeline event, including its URL, dimensions, and display labels
- domain? string - The event domain (often paired with utk)
- tokens record { string... } - A collection of token keys and values associated with the template tokens
- id? string - Identifier for the event. This is optional, and we recommend you do not pass this in. We will create one for you if you omit this. You can also use
{{uuid}}anywhere in the ID to generate a unique string, guaranteeing uniqueness
- utk? string - Use the
utkparameter to associate an event with a contact byusertoken. This is recommended if you don't know a user's email, but have an identifying user token in your cookie
- email? string - The email address used for contact-specific events. This can be used to identify existing contacts, create new ones, or change the email for an existing contact (if paired with the
objectId)
- objectId? string - The CRM object identifier. This is required for every event other than contacts (where utk or email can be used)
- timestamp? string - The time the event occurred. If not passed in, the curren time will be assumed. This is used to determine where an event is shown on a CRM object's timeline
hubspot.crm.extensions.timelines: TimelineEventIFrame
Defines an iframe modal embedded in a timeline event, including its URL, dimensions, and display labels
Fields
- linkLabel string - The text displaying the link that will display the iframe
- headerLabel string - The label of the modal window that displays the iframe contents
- width Signed32 - The width of the modal window in pixels
- url string - The URI of the iframe contents
- height Signed32 - The height of the modal window in pixels
hubspot.crm.extensions.timelines: TimelineEventResponse
The current state of the timeline event
Fields
- eventTemplateId string - The event template ID
- createdAt? string? - Timestamp indicating when the timeline event was created
- extraData? record {} - Additional event-specific data that can be interpreted by the template's markdown
- timelineIFrame? TimelineEventIFrame - Defines an iframe modal embedded in a timeline event, including its URL, dimensions, and display labels
- domain? string - The event domain (often paired with utk)
- tokens record { string... } - A collection of token keys and values associated with the template tokens
- id string - Identifier for the event. This should be unique to the app and event template. If you use the same ID for different CRM objects, the last to be processed will win and the first will not have a record. You can also use
{{uuid}}anywhere in the ID to generate a unique string, guaranteeing uniqueness
- utk? string - Use the
utkparameter to associate an event with a contact byusertoken. This is recommended if you don't know a user's email, but have an identifying user token in your cookie
- email? string - The email address used for contact-specific events. This can be used to identify existing contacts, create new ones, or change the email for an existing contact (if paired with the
objectId)
- objectId? string - The CRM object identifier. This is required for every event other than contacts (where utk or email can be used)
- timestamp? string - The time the event occurred. If not passed in, the curren time will be assumed. This is used to determine where an event is shown on a CRM object's timeline
- objectType string - The ObjectType associated with the EventTemplate
hubspot.crm.extensions.timelines: TimelineEventTemplate
The current state of the template definition
Fields
- createdAt? string? - The date and time that the Event Template was created, as an ISO 8601 timestamp. Will be null if the template was created before Feb 18th, 2020
- detailTemplate? string - This uses Markdown syntax with Handlebars and event-specific data to render HTML on a timeline when you expand the details
- name string - The template name
- tokens TimelineEventTemplateToken[] - A collection of tokens that can be used as custom properties on the event and to create fully fledged CRM objects
- id string - The template ID
- headerTemplate? string - This uses Markdown syntax with Handlebars and event-specific data to render HTML on a timeline as a header
- objectType string - The type of CRM object this template is for. [Contacts, companies, tickets, and deals] are supported
- updatedAt? string - The date and time that the Event Template was last updated, as an ISO 8601 timestamp. Will be null if the template was created before Feb 18th, 2020
hubspot.crm.extensions.timelines: TimelineEventTemplateCreateRequest
State of the template definition being created
Fields
- detailTemplate? string - This uses Markdown syntax with Handlebars and event-specific data to render HTML on a timeline when you expand the details
- name string - The template name
- tokens TimelineEventTemplateToken[] - A collection of tokens that can be used as custom properties on the event and to create fully fledged CRM objects
- headerTemplate? string - This uses Markdown syntax with Handlebars and event-specific data to render HTML on a timeline as a header
- objectType string - The type of CRM object this template is for. [Contacts, companies, tickets, and deals] are supported
hubspot.crm.extensions.timelines: TimelineEventTemplateToken
State of the token definition
Fields
- createdAt? string - The date and time that the Event Template Token was created, as an ISO 8601 timestamp. Will be null if the template was created before Feb 18th, 2020
- options? TimelineEventTemplateTokenOption[] - If type is
enumeration, we should have a list of options to choose from
- name string - The name of the token referenced in the templates. This must be unique for the specific template. It may only contain alphanumeric characters, periods, dashes, or underscores (. - _)
- label string - Used for list segmentation and reporting
- objectPropertyName? string? - The name of the CRM object property. This will populate the CRM object property associated with the event. With enough of these, you can fully build CRM objects via the Timeline API
- 'type "date"|"enumeration"|"number"|"string" - The data type of the token. You can currently choose from [string, number, date, enumeration]
- updatedAt? string - The date and time that the Event Template Token was last updated, as an ISO 8601 timestamp. Will be null if the template was created before Feb 18th, 2020
hubspot.crm.extensions.timelines: TimelineEventTemplateTokenOption
Defines a selectable option for an enumeration token in a timeline event template
Fields
- label string -
- value string -
hubspot.crm.extensions.timelines: TimelineEventTemplateTokenUpdateRequest
State of the token definition for update requests
Fields
- options? TimelineEventTemplateTokenOption[] - If type is
enumeration, we should have a list of options to choose from
- label string - Used for list segmentation and reporting
- objectPropertyName? string - The name of the CRM object property. This will populate the CRM object property associated with the event. With enough of these, you can fully build CRM objects via the Timeline API
hubspot.crm.extensions.timelines: TimelineEventTemplateUpdateRequest
State of the template definition being updated
Fields
- detailTemplate? string - This uses Markdown syntax with Handlebars and event-specific data to render HTML on a timeline when you expand the details
- name string - The template name
- tokens TimelineEventTemplateToken[] - A collection of tokens that can be used as custom properties on the event and to create fully fledged CRM objects
- id string - The template ID
- headerTemplate? string - This uses Markdown syntax with Handlebars and event-specific data to render HTML on a timeline as a header